
We're an affiliate
We hope you love the products we recommend! Just so you know, we may collect a share of sales or other compensation from the links on this page. Thank you if you use our links, we really appreciate it!
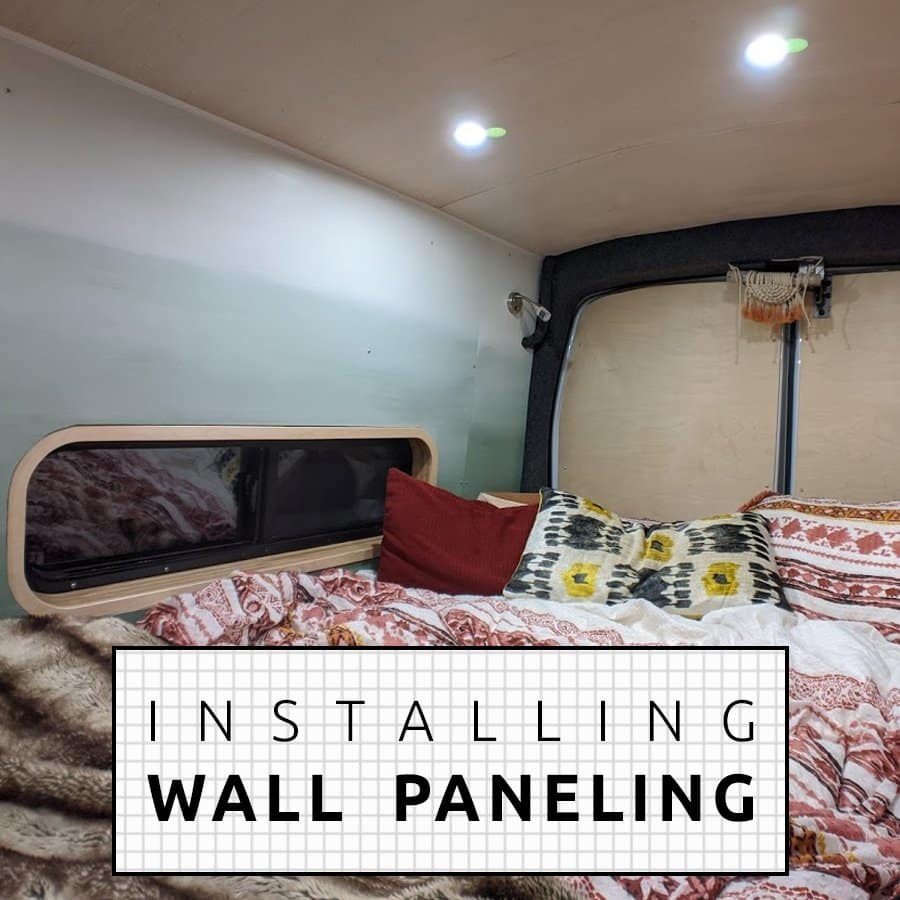
Finishing the sliding door of a van is often one of the last projects a DIY van builder tackles. We have to admit, it was definitely an afterthought for us. We had accepted that we were simply going to leave it unfinished, but once we realized how easy it was to install automotive carpet (relatively speaking), we decided to add that extra level of love to the van doors. We decided to inset some frameless marker board as well so that we can write up recipes, shopping lists, or notes to one another. Additionally, marker board is much more wipeable than carpet, should anything from the stovetop make a splash! This update was a great decision – the carpet and marker board have made a huge difference in how the van feels from inside.
Carpet lining was a game changer for us. It gives a finished professional look to all the weird curved surfaces in a van, and it’s really easy to do. We carpet lined exposed metal in the back, plus the sliding door and wall and floor edges. If we were to do this again, we would use closed celled foam on the van metal first. This creates a smooth surface for the carpet lining, and adds an additional thermal break.
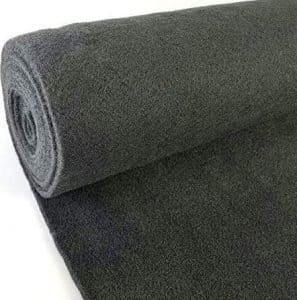
We selected a grey automotive carpet for our wall covering. It was easy to cut and fold, looks clean and professional, and adhered as intended with spray adhesive. We’re happy to recommend it!
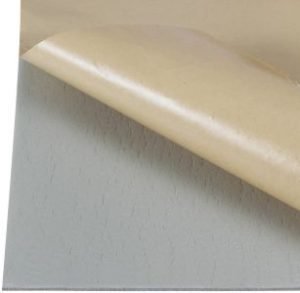
If we were to do this project again we would layer this closed cell foam on the van metal first. Carpet would go on top of the foam. This provides a much better thermal break, some sound deadening, and smooths out the fluctuations in the van metal.
This job would have been way easier if our stove cabinet had not been in the way. Perhaps this is one reason why the door should not be the last project on your list, especially if you have a cabinet layout that overlaps the sliding door. Although we could have demounted the cabinets, the idea of redoing the propane connections to the heater and stove were enough to make us prefer to work through the discomfort!

Insulating the Transit Van Sliding Door
The anatomy of the Ford Transit door creates some good opportunities for adding insulation. There are two “cavities”, one on top, and one on bottom. These can be filled with insulative products. Our van came with a plastic panel closing off the bottom portion of the door, which is standard. This can be removed using a flat head screwdriver and pliers to release the plastic pins.
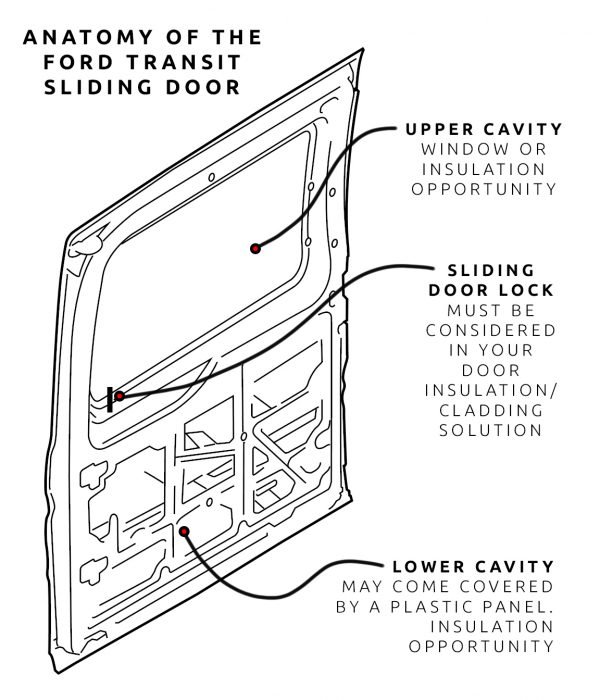
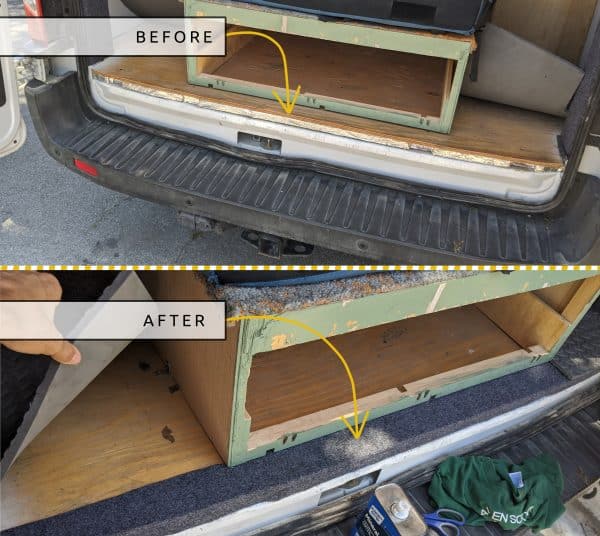
We chose to fill the lower cavity with RockWool, with which we have had great success in other areas of the van. While we failed to take photos of this, we essentially worked the wool into the metal cavities that exist behind the plastic panel. It looks similar to the back door, which we did photograph:

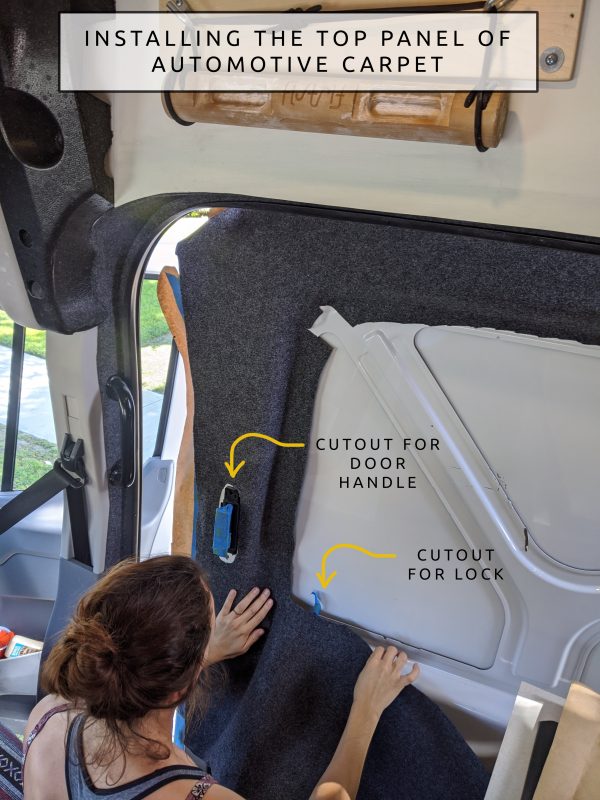
For the upper panel, we decided to inset the whiteboard panel. We did not want a thick material here because it would hinder access to the door lock, and easier quick grabbing of the handle.
In our case we decided that we’re happy with the current insulation our van is providing us, and that we would simply use expanding foam behind the marker board. The expanding foam, in our use, is primarily an adhesive, and secondarily a form of insulation. Because of how close to the wall our marker board was installed, we imagine the thermal value added from the expanding foam is minor. We’ll see when we’re back in colder climates whether we notice a difference.
It’s worth adding that the automotive carpet itself has some thermal properties. If nothing else, the foam and the carpet are providing a thermal break. What was once cold bare metal walls is now soft fuzzy fabric. See this article for testing that shows the big difference it makes to cover the bare metal.
Carpet Lining with Automotive Carpet
Step 1
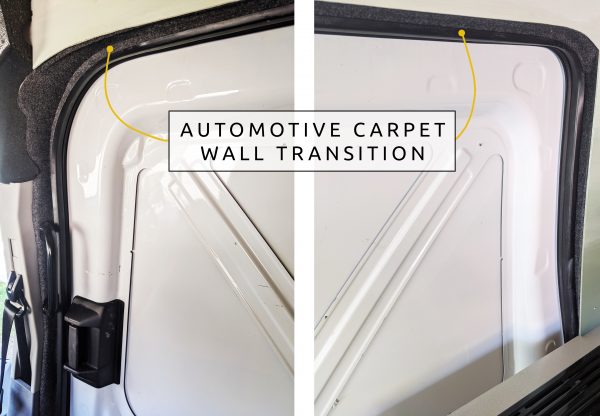
We started off by adding carpet to the gap between the plywood wall paneling and the van metal. This conceals the insulation and furring strips to create a finished look:
Step 2
We gave the metal door surface a good cleaning, and taped off any surfaces that were susceptible to adhesive overspray. We also removed any hardware from the door, including the pull and rubber bumpers. For the Ford Transit, removing the door handle required a T30 Torx Bit, while the lower bumpers required T40 Torx Bits.

Step 3
For the carpet layout on the door, we were limited by the 48” width of the carpet. As such, we chose to do the job in two pieces, starting with the curvaceous top portion. We started by aligning the carpet with the top edge of the door and worked our way down, cutting away the area where the markerboard would be going as we went.
We sprayed both the metal surface and the carpet surface with the Loctite Adhesive for a more permanent bond. Rather than doing the entire area at once, we chose to spray section by section as we worked our way down. This allowed us to work at our own pace, making sure to avoid wrinkles and apply lots of pressure to the surface.
Step 4
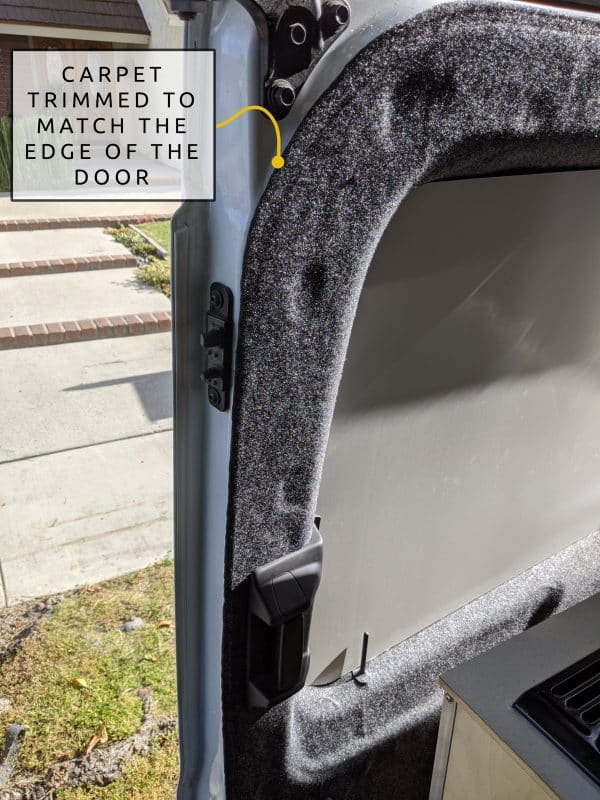
One of the challenges with carpeting the door is, unlike other areas that we carpeted, there wasn’t really a natural stopping point along the edge. Although a bit unconventional, we decided to end the carpet right at the edge, without turning the corner. The sliding door already takes a bit of force to close, and we didn’t want to add any additional depth to the door edge that might increase resistance.
We used a combination of sharp shears and a fresh blade to trim the carpet exactly to shape. Time will tell if this edge is going to peel. If it does, we plan to finish this edge with an outdoor rated vinyl tape, but for now it’s clean looking. We’ll update this article if this changes!
Here’s a time lapse video showing the install for the top half of the door:
Full Disclosure: Going directly over the plastic panel at the bottom half of the door, and the plastic “plugs” that hold said panel in place means a lumpy surface for the bottom of the door. There are ways around this. One is to install closed cell foam under the carpet in order to help smooth out the surface.
The lumpiness is not at all noticeable when we’re in the van, with the door closed. However, when the sun hits it, you can of course see every little change in height under the carpet. Everyone has their own tolerances, and for us, it is something we can live with.

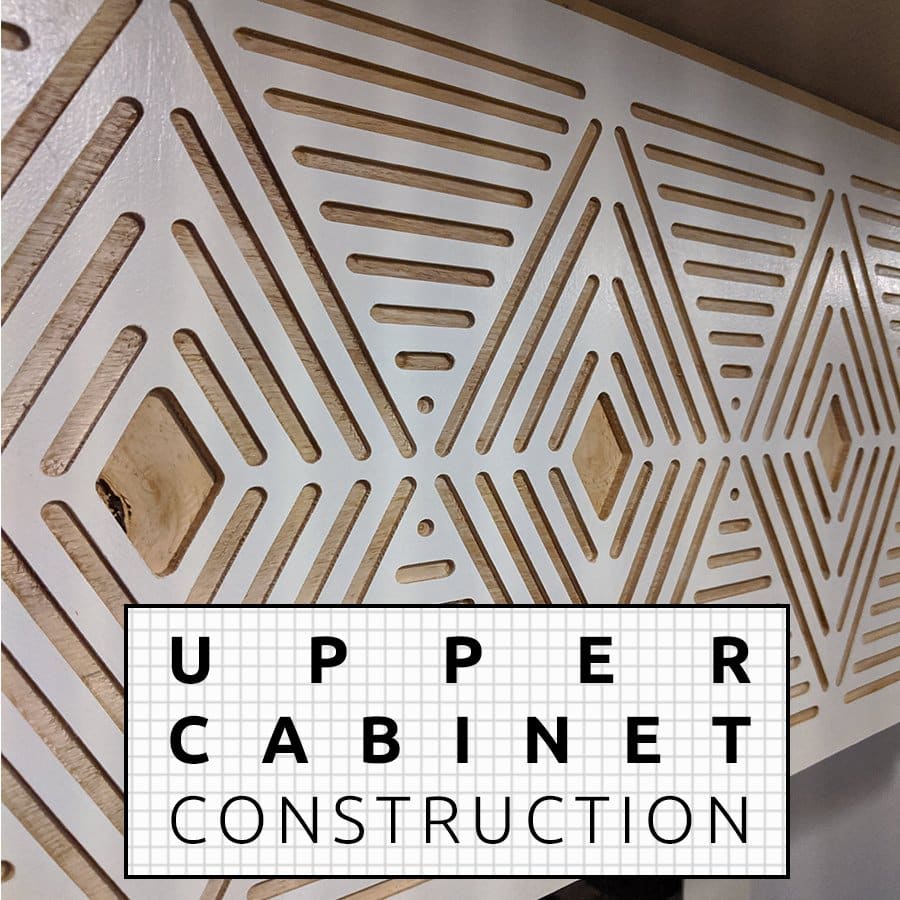
Cutting and Installing the Marker Board Panel
Step 1
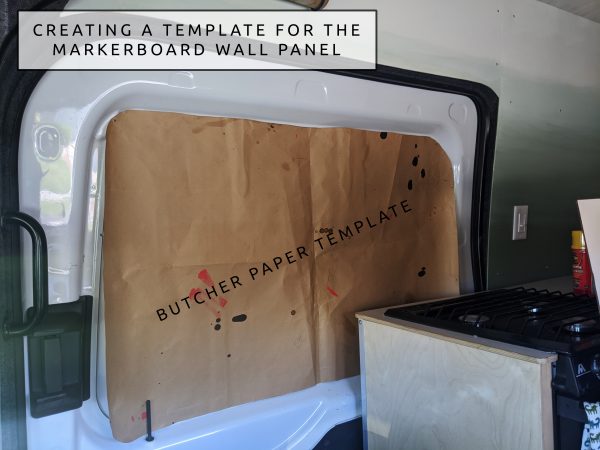
Another wall panel means another template! We used butcher paper to trace the shape of the inset panel in the van door. After cutting the template out, we used some magnets to hold it in place and confirm we were happy with the shape. Note that we have decided to mount the panel close to the wall behind the door lock.
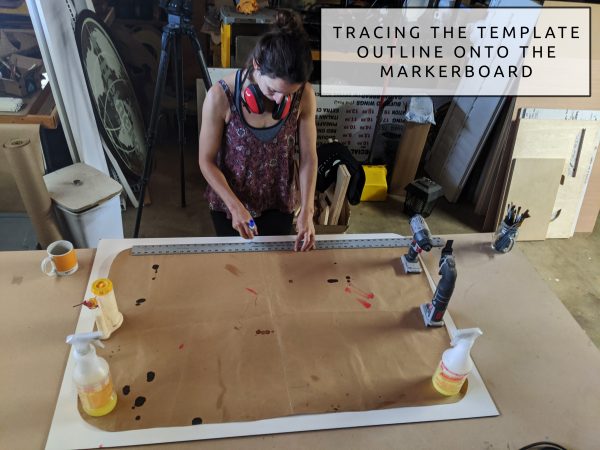
Once happy with the template, we traced the shape onto our markerboard. We used whatever we had around to hold it in place, and used an EXPO dry erase marker to make our cut line.
Tip: Don’t get it twisted! The best way to avoid accidentally transferring your template onto the final surface is to add notes. Top/bottom/front/back – These little words will prevent silly mistakes.
Step 2
It’s a good idea (with everything) to do a test cut, and put some masking tape on your cut line. We used a band saw for the cut, and though we were concerned about chipping, this turned out not to be an issue.
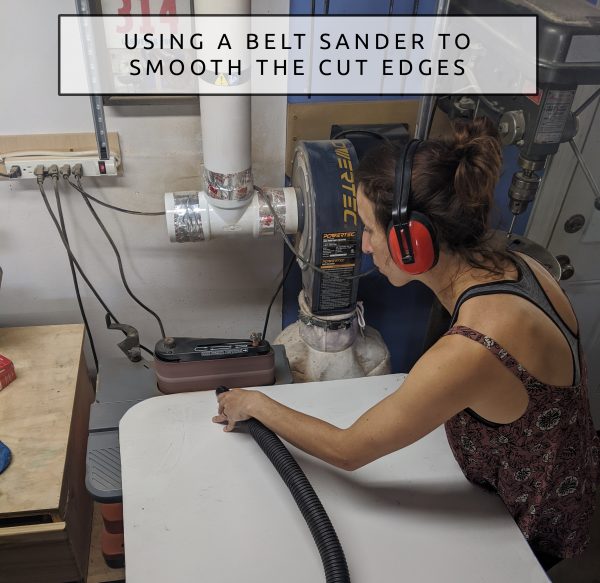
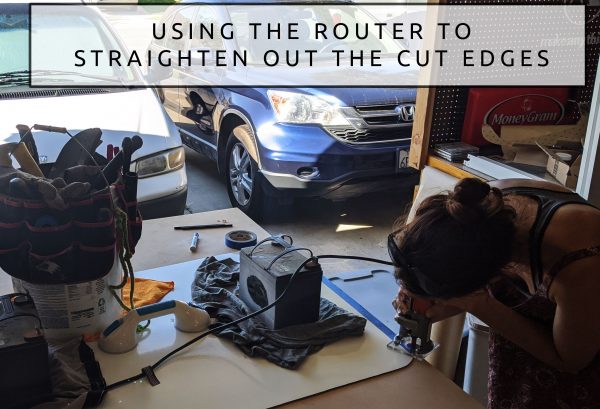
Any imperfections in our cut we were able to either sand down, or straighten out using a flush trim router bit with our work table edge as a guide. The router has quickly become one of our favorite tools!
Step 3
With the panel complete, it’s spray foam time! Spray foam, if you haven’t worked with it, is not the most cooperative product. It can easily get messy, and you must keep in mind that it does expand! Kevin did a great job making sure none of it dropped onto our freshly installed automotive carpet, as you can see in the time lapse video below.
We applied the spray foam over the van metal surface, and carefully placed the marker board directly onto it. Then the fun part – we got to hold it in place for about 10 minutes, which is how long it takes for the spray foam to dry.

Grab Bar Suction Cup
These things are made for lifting tiles in awkward spots. They lock on strong and are super convenient when you need one. Put the handle on a surface, “lock” it, and it can lift many many pounds. Having this on hand made the marker board install much easier.
Step 4
Finally, reinstall all the hardware! For the Ford Transit, the door handle required a T30 Torx Bit, while the lower bumpers required T40 Torx Bits.


The finished sliding door looks great! We’re really happy with the overall look and feel, and the fact that we didn’t add much weight, nor take away significant depth in the process. As a bonus, it was an inexpensive upgrade, with about $25 of material going into insulating and covering the surface.
More Automotive Carpet Projects
Following this project, we proceeded to add automotive carpet to our bench seat, which has flip up seats. This hides some not so nice looking wood, and provides some sound dampening when opening and closing the lids.
As well as to the back floor, where we had yet to add any edging:
Nadia even made a fashion statement with the stuff!

Ready for more info?
Visit the Van Conversion Build GuideWe sincerely hope this information is helpful on your build journey!
This post contains affiliate links that may earn us a commission if a product is purchased. But, we always strive for the reuse and repurpose of materials – so we encourage searching for a local used option before buying from our links.


This is a helpful write up. I have seen very few articles about automotive carpet, but it is a good option. The link to the Patsam Closed Cell Foam isn’t valid anymore. I’m trying to find similar alternative products, but it’s not clear what terms to use for the search. There are many closed cell foams. Have you actually used the material?
Hi Dennis – here is a closed cell foam by Noico https://amzn.to/32N4kdC thanks for mentioning the other product isn’t available. No, we did not actually use closed cell foam in our build, but would use this if we were to do this process again
Thank you very much for your article, it is very helpful. It is giving us more confidence to do our van with carpeting as well. You folks are the only ones from the US that have posted about carpeting the interior of their van. ALL the other videos have been from Europe, mostly the UK and they use a spray adhesive called Trim Fix which allows you to stick and peel away if necessary. Such a shame getting Trim Fix spray adhesive here in the states is such a hassle!