
We're an affiliate
We hope you love the products we recommend! Just so you know, we may collect a share of sales or other compensation from the links on this page. Thank you if you use our links, we really appreciate it!
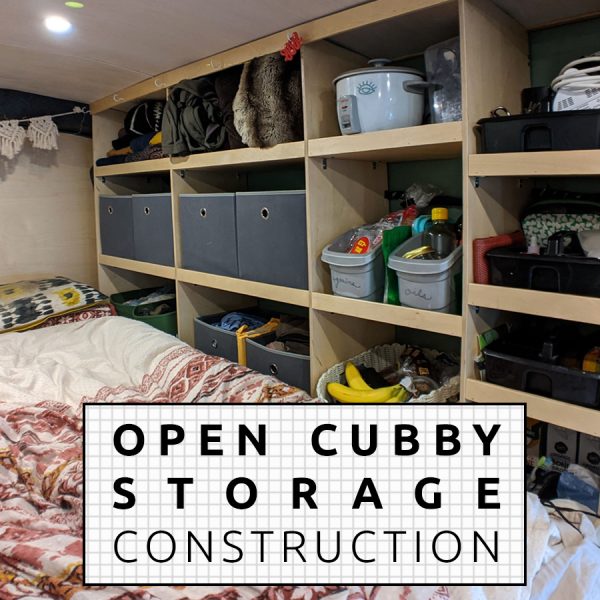
All our clothing is stored in open cubbies next to our removable bed frame. Although we considered adding cabinet doors for the clean look, we ended up deciding on open cubbies for several reasons:
- Open cubbies allow for easy access to our clothing / stored items.
- Going doorless keeps down weight.
- This design allows for the use of standard sized storage cubes, which are widely available in many looks and finishes.
We use standard sized storage cubes for our t-shirts, pants, leggings, socks, and undergarments. We purchased these first, then used the dimensions when designing our open cubbies.
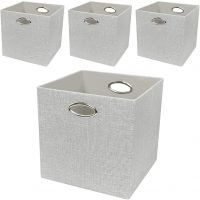
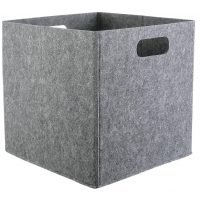
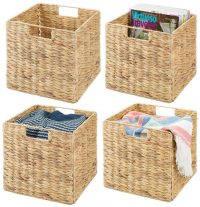
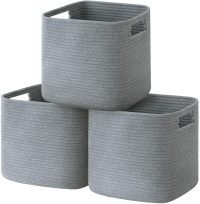
Of course there are many different cubes on the market in various styles, making this a great way to personalize your build and infuse your style. Canvas, felt, seagrass / hyacinth, and woven rope “cubes” are all great options. They can add color or warmth and texture, and won’t rattle while you’re driving.
Designing the Van’s Storage Cabinets
We decided on dimensions in a way that would allow for a little bit of wiggle room for the cubes. As built, we can tilt them for a quick glance, or pull them out entirely without it being prohibitively cumbersome. In the end, these are our “as built” dimensions for the open cubbies.

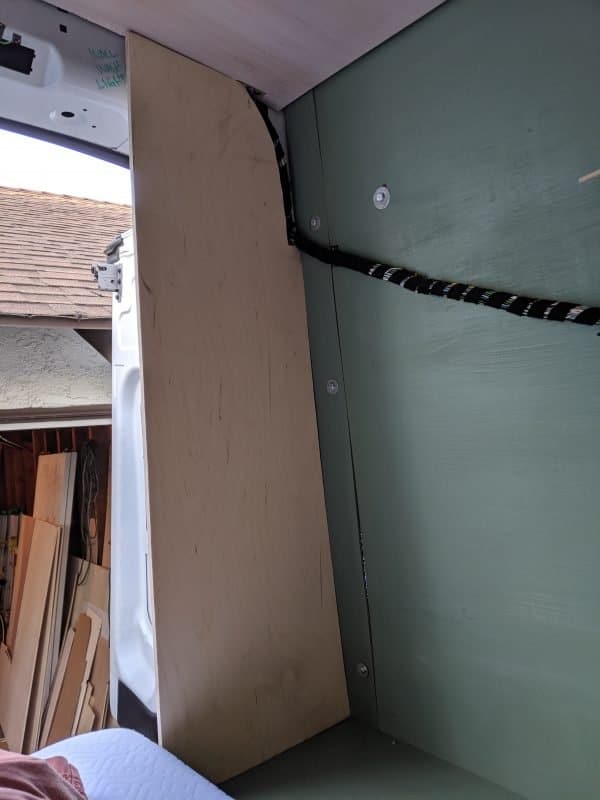
We also decided to have the cubbies sit atop the 2″x2″ wood rail that ran all along the wall, which was part of our platform bed build. As you will see, this would also become an additional point of attachment for the cubbies.
Prerequisites
We installed sound deadening and polyiso insulation before we considered our walls ready for cabinets. And as with everything, we used Plusnuts for attachment to the walls!
We detailed our Sound Deadening Installation prior to the wall panel installation

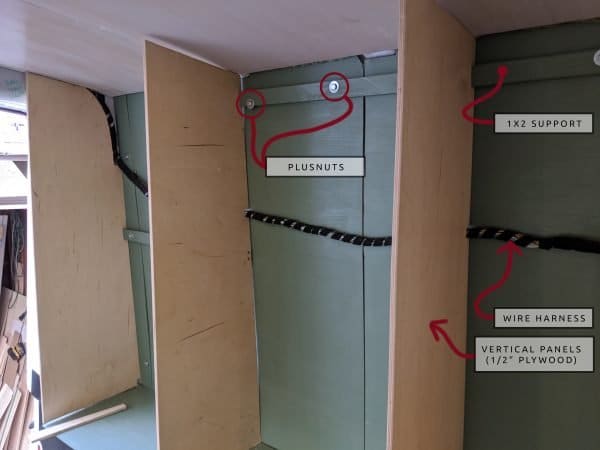
Heard of plusnuts? They provide a very strong fastening point in existing holes in the van, minimizing the need to drill holes and risk rust. Read More >
Build Steps for Van Storage
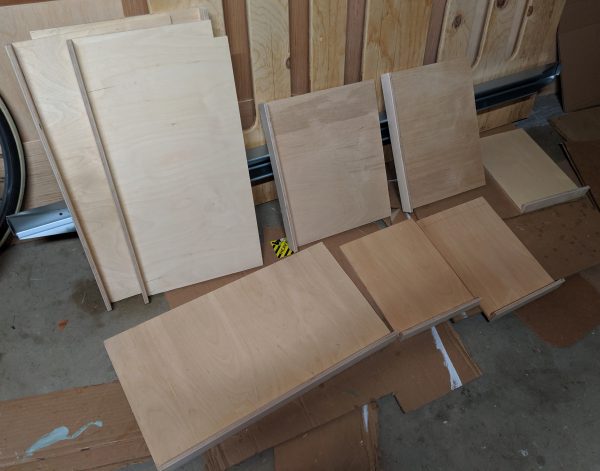
Step 1 – Back Paneling and Bottom
Our first task was to add back paneling in the form of ⅛” plywood. We cut the paneling to size, painted it in Semi-Gloss paint (Sherwin Williams “Privilege Green”) and attached it to the existing holes in the van wall using PlusNuts. This was one instance of wall paneling where we were not concerned with having the PlusNut show, since all of this would be concealed by the things we placed in the shelving anyhow.
The bottom was also cut to size at this point, also from ⅛” plywood. Please be made aware that once loaded, there is some visual warping/bending of the bottom shelf. This is purely aesthetic, but to play it safe one can upgrade to a thicker piece of wood (perhaps ¼”) for this bottom shelf.
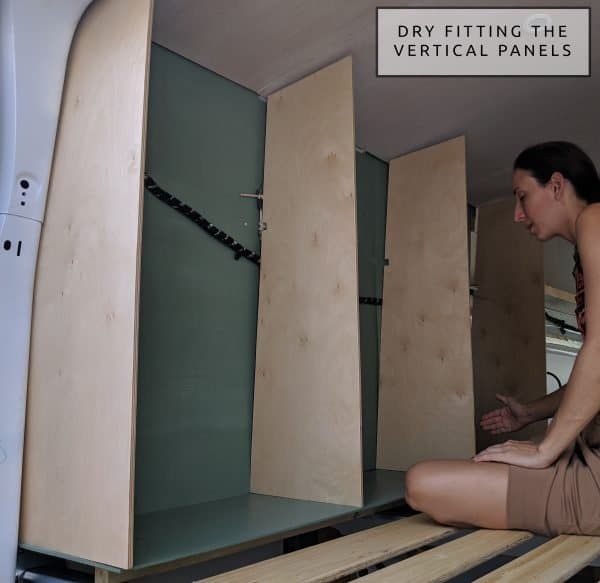
Step 2 – Create Vertical Elements
We measured the vertical elements and cut them all to size. We created notches where there was conflict with the wire harness (Ford Transit specific). We were not compelled to conceal the harness at this location, since it would be concealed by our storage cubes.
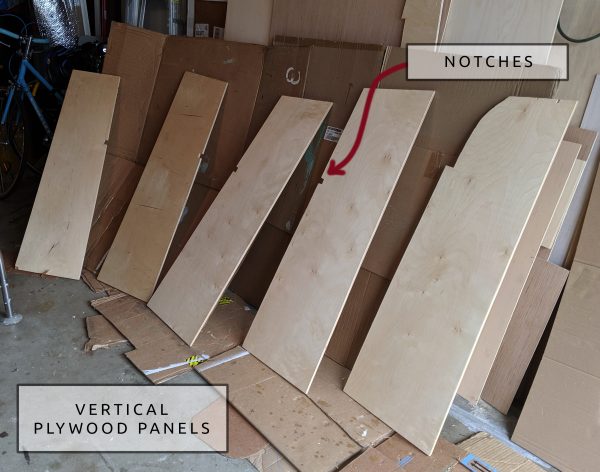
Note that each of these vertical elements was unique due to the irregular van walls, so it took some patience to get them right. Once the fit was satisfactory, we sanded the cut edges and finished in a couple coats of Polyurethane.
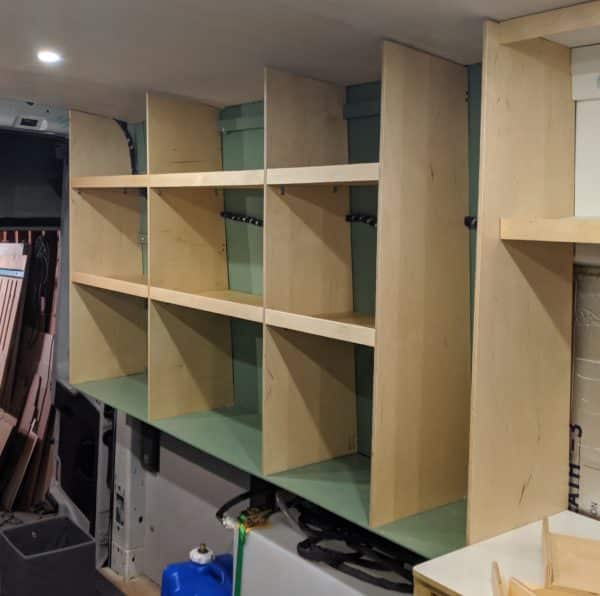
Step 3 – Back Bracing
At this point, the vertical elements are just floating. In the end the whole structure is attached to the wall with these horizontal back braces. These are made using 1×2 lumber, to coincide with PlusNut locations.
Although we could have done this step previously, it was easier to fabricate the vertical elements without it in place, and then go back and notch the vertical elements afterwards.
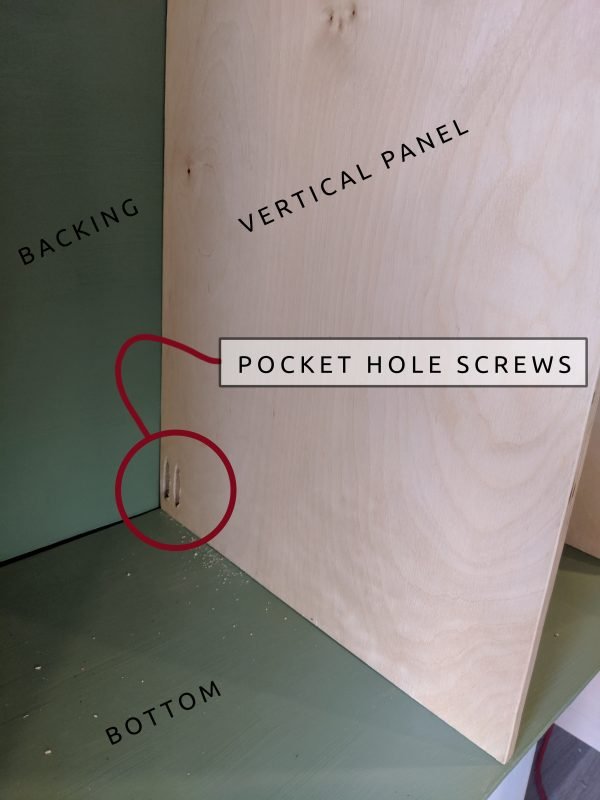
Step 4 – Secure Vertical Elements
Next it was time to secure all the vertical elements. One attachment point was to the 2″x2″ wood rail that runs along the wall and was part of our platform bed build. We used pocket screws to secure the vertical element to this 2″x2″, driving screws downward.
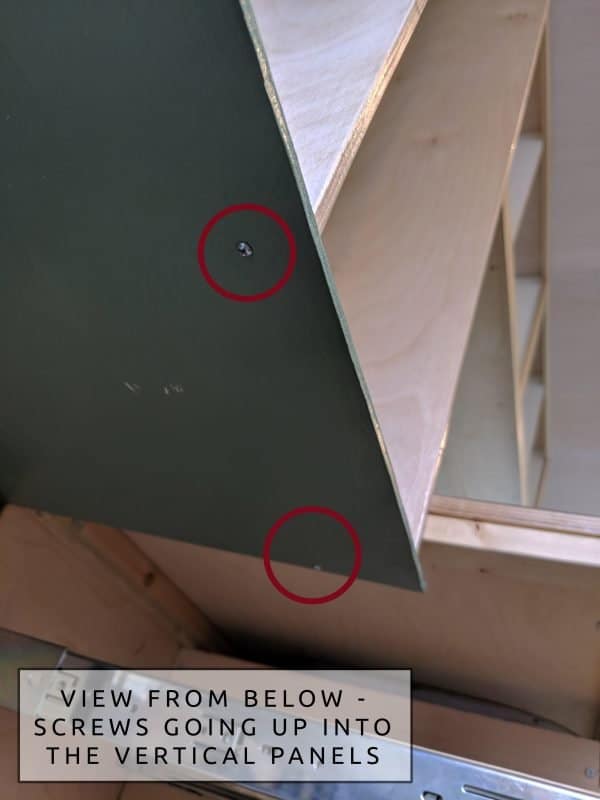
We also drove pan head screws up through the bottom and into the end grain of the vertical elements.
…And we screwed some of the vertical panels into the 1×2 braces from the side, where the opportunity presented itself.
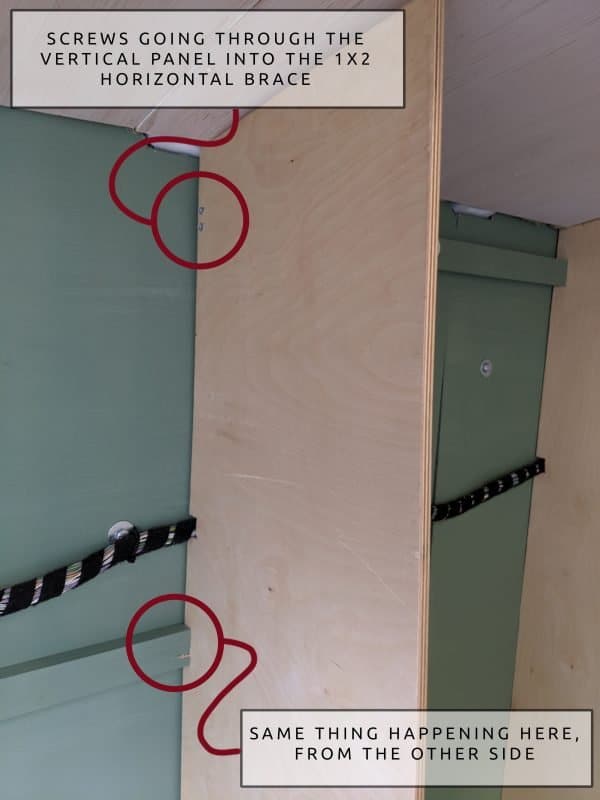
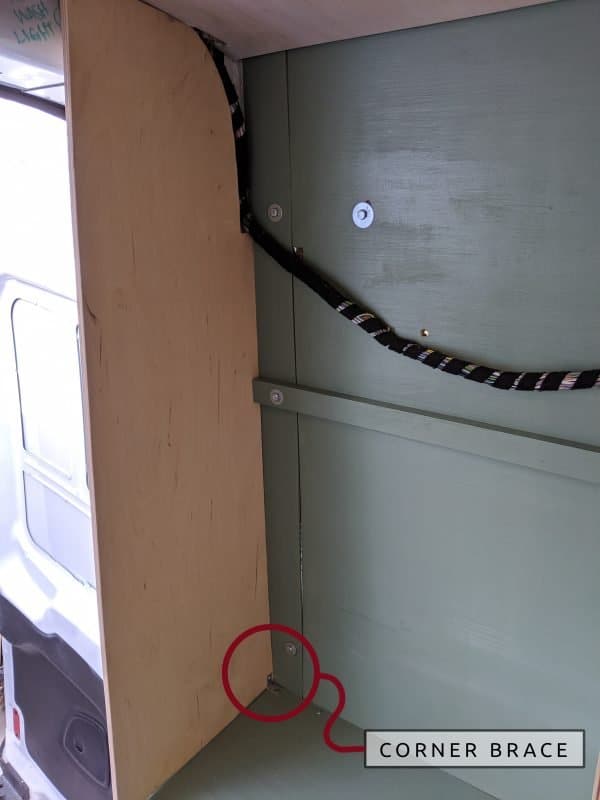
We couldn’t get a pocket hole at this end piece, so opted to use a corner brace to affix to the 2×2 rail below.
As you can see, we employed several strategies to optimize on attachment opportunities that were available to us. The last step of adding the horizontal shelves would add the final level of strength and bracing to the overall assembly.
Step 5 – Fabricating Horizontal Shelves
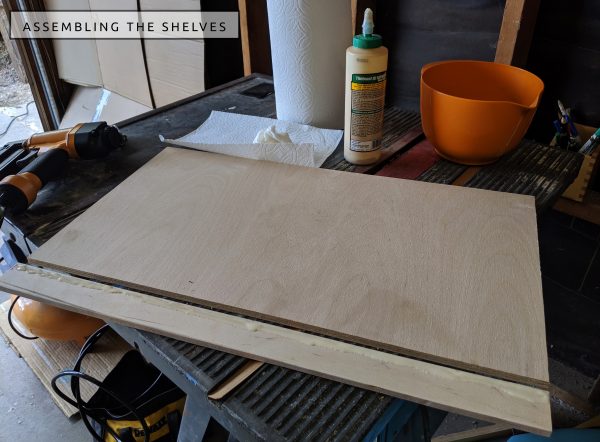
With the vertical elements secure, it was time to create and install the horizontal shelves. We made all the shelves out of 3/8” plywood, and built each one to have a front lip. We used glue and finishing nails to glue the lip to the shelf.
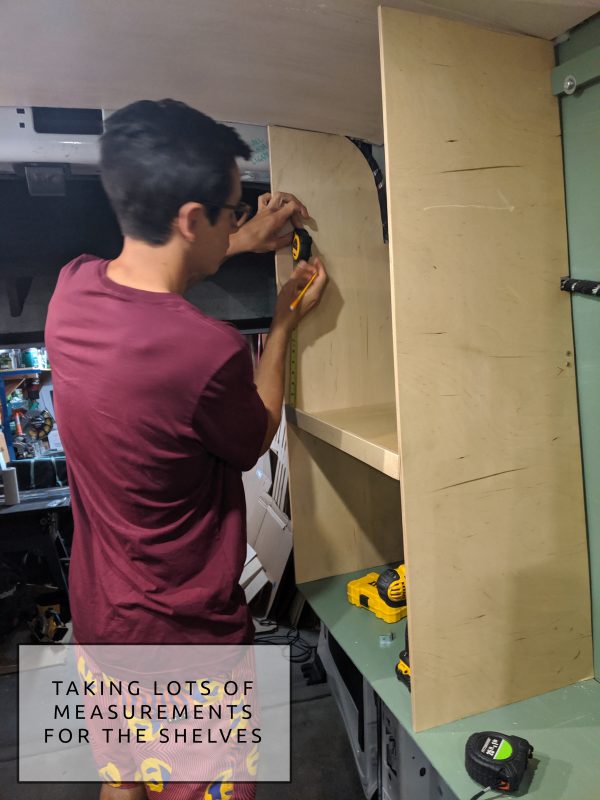
Once again, due to the tilt and curves of the van wall, each of these shelves was a different depth depending on where it was going, requiring lots of measurements and adjustments to ensure they aligned as intended.
Step 6 – Installing Horizontal Shelves
Shelves were installed by attaching them to the vertical elements using corner braces. Corner braces are easy to install, and the shelves are now easy to move or remove.
Regarding the wire harness, we now realize we could have planned for it to run right along the bottom of the shelf to truly conceal it… No big deal, it gets concealed by all of our junk anyway! But worth mentioning if you haven’t yet started this project.
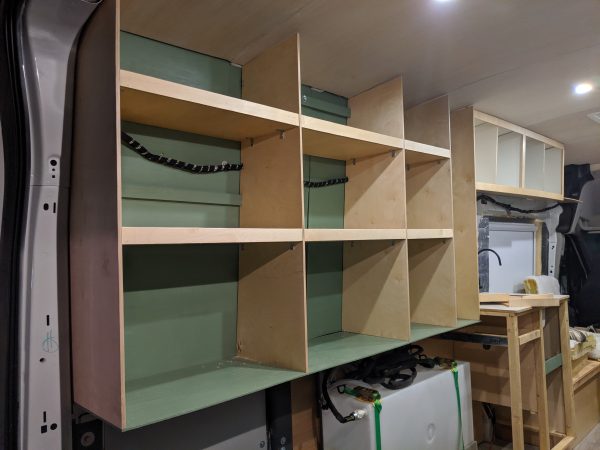
We saved the far right column of shelves for the very end, once we had a better idea of what we would be putting in those.
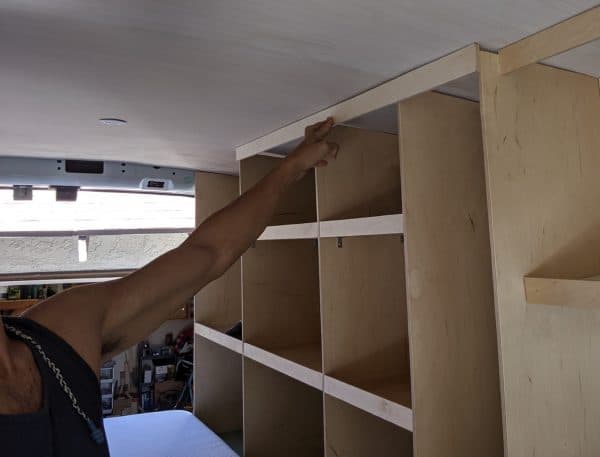
Step 7 – Adding Top Trim
To finish off the look, we added a horizontal plywood trim piece at the top of the cubbies. We later added some hooks all along this trim, which has come in handy for miscellaneous hanging needs.
Stocking the Shelves
Finally it was time to stock our shelves! Here is a shelf tour to give you an idea of how we ended up using these open cubbies.
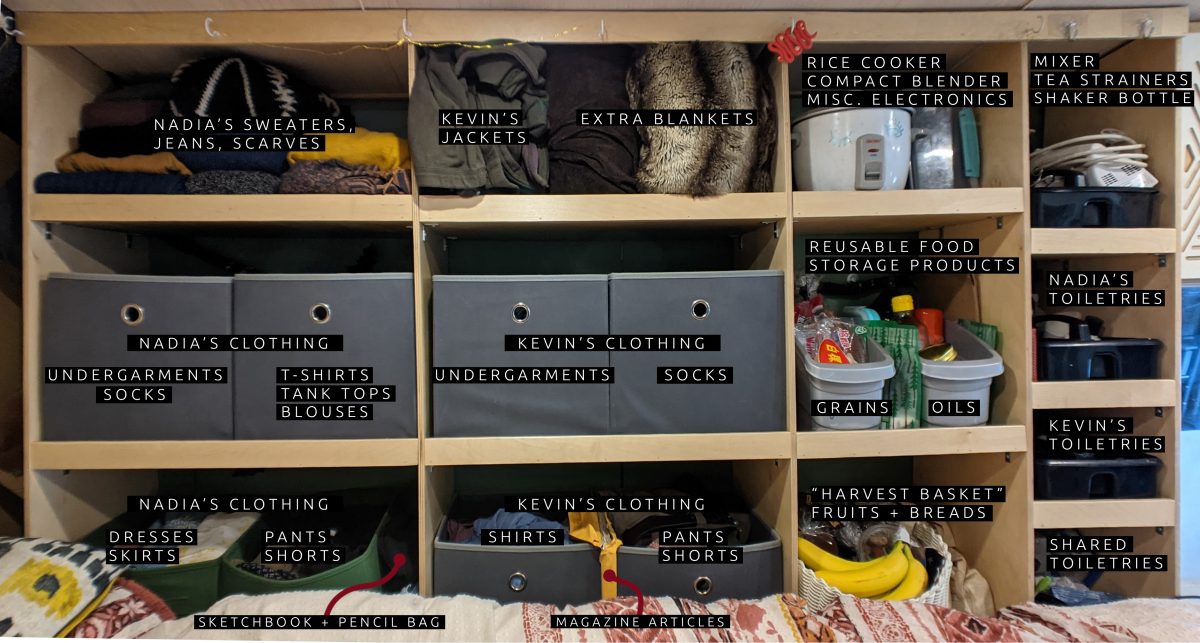
FAQ – Don’t Things Fall Out?
We travel some pretty bumpy roads in search of bouldering spots, and there have been some instances of the “loose” sweaters and blankets on the top shelves tumbling out. We once considered adding bungee cord restraints to the top shelves, but decided that the incident of flying sweaters happens so seldom and was innocent enough that it didn’t warrant additional work. I think the rice cooker fell out once as well, safely onto our bed. Ultimately, we will defend our open cubbies as superior to closed cubbies simply because they make our lives easier!
Ready for more info?
Visit the Van Conversion Build GuideWe sincerely hope this information is helpful on your build journey!
This post contains affiliate links that may earn us a commission if a product is purchased. But, we always strive for the reuse and repurpose of materials – so we encourage searching for a local used option before buying from our links.


You are doing a wonderful service and helping those of us who are not as able or imaginative as you are to have confidence in our ability to build our van interiors. Thanks so much. Chris in the NT in Australia about to start a HiAce Commuter