
We're an affiliate
We hope you love the products we recommend! Just so you know, we may collect a share of sales or other compensation from the links on this page. Thank you if you use our links, we really appreciate it!
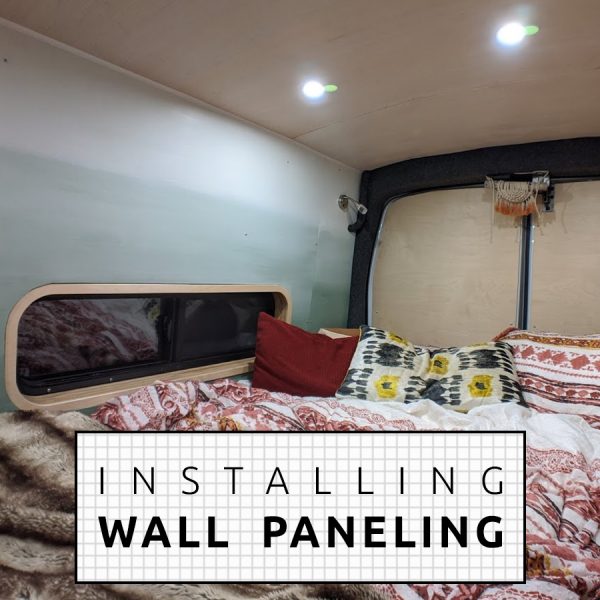
So you’ve completed your electrical wiring and wall insulation. Time to hide all of that business behind some nice clean wall paneling! There are several options when it comes to picking out the wall coverings in your camper van conversion. In our case, we once again aimed to keep things lightweight and inexpensive, yet durable and easy to clean.
Prepping for Wall Installation
Prior to the wall paneling, we installed sound deadening and properly insulated our walls!
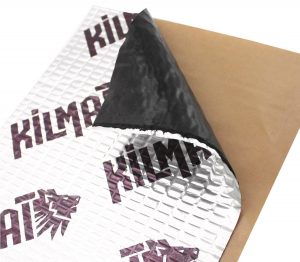
We Installed Sound Deadening prior to the wall panel installation. Read More>>
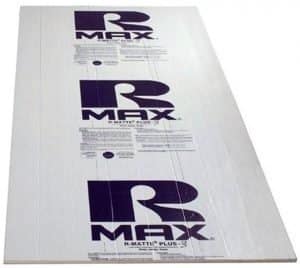
For Insulation, we used PolyIso board on large flat surfaces, Rock Wool for large cavities, and minimal spray foam insulation for crevices. After (way too much) back and forth, we decided NOT to install a vapor barrier. We are very happy with the heat retention in our van.
For the majority of van conversions, including ours, electrical wiring will occur behind the final wall finish. So, this step will also need to be complete prior to putting up your walls. We decided to do our wiring in front of the insulation, rather than behind it, as this would simplify any necessary trouble shooting or changes down the road (Hopefully never necessary!). We taped down the wiring wherever it crossed over our insulation to minimize any movement.
Additionally, we used conduit to house the wires where they weave into the metal van cavities, to avoid the sharp edges of the van cutting through the wires over time.
Wall Panel Priorities
Priorities for our build were to:
- Minimize Weight
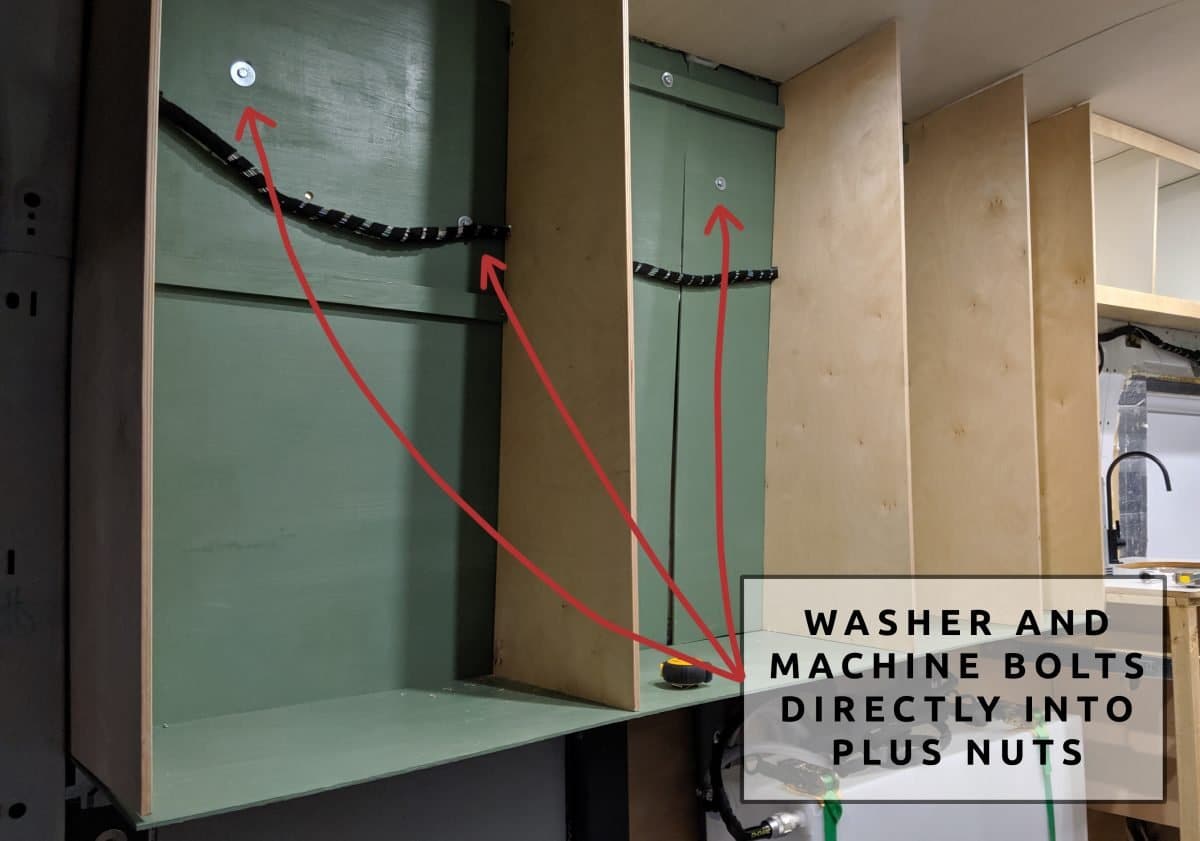
- Use existing holes with PlusNuts rather than creating new holes in the van body.
- Keep down cost of materials

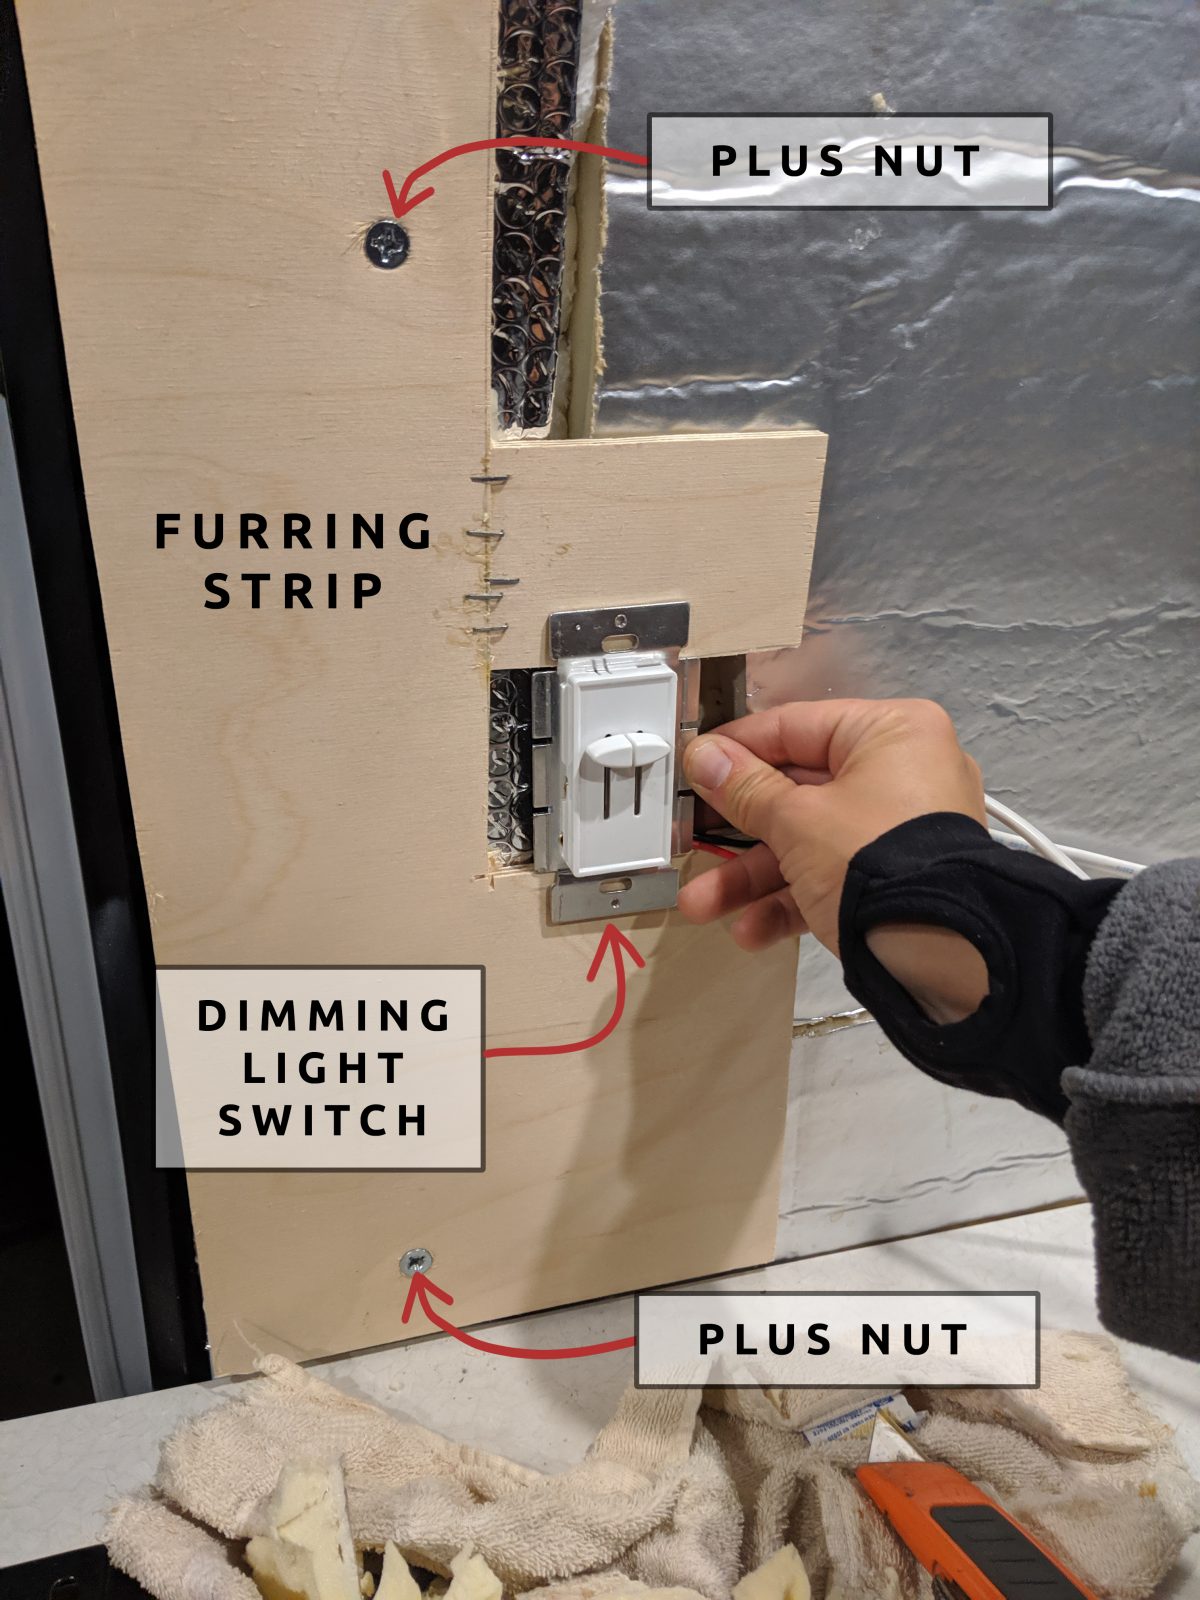
Heard of plusnuts? They provide a very strong fastening point in existing holes in the van, minimizing the need to drill holes and risk rust. Read More >
Note: In most of the van build we used standard hex head bolts in conjunction with the plusnuts. But for the furring strips we used machine screws, because their conical head will sit flush into the furring strips. This creates a smooth surface for the wall panels.
Installing the Passenger Side Wall
Step 1
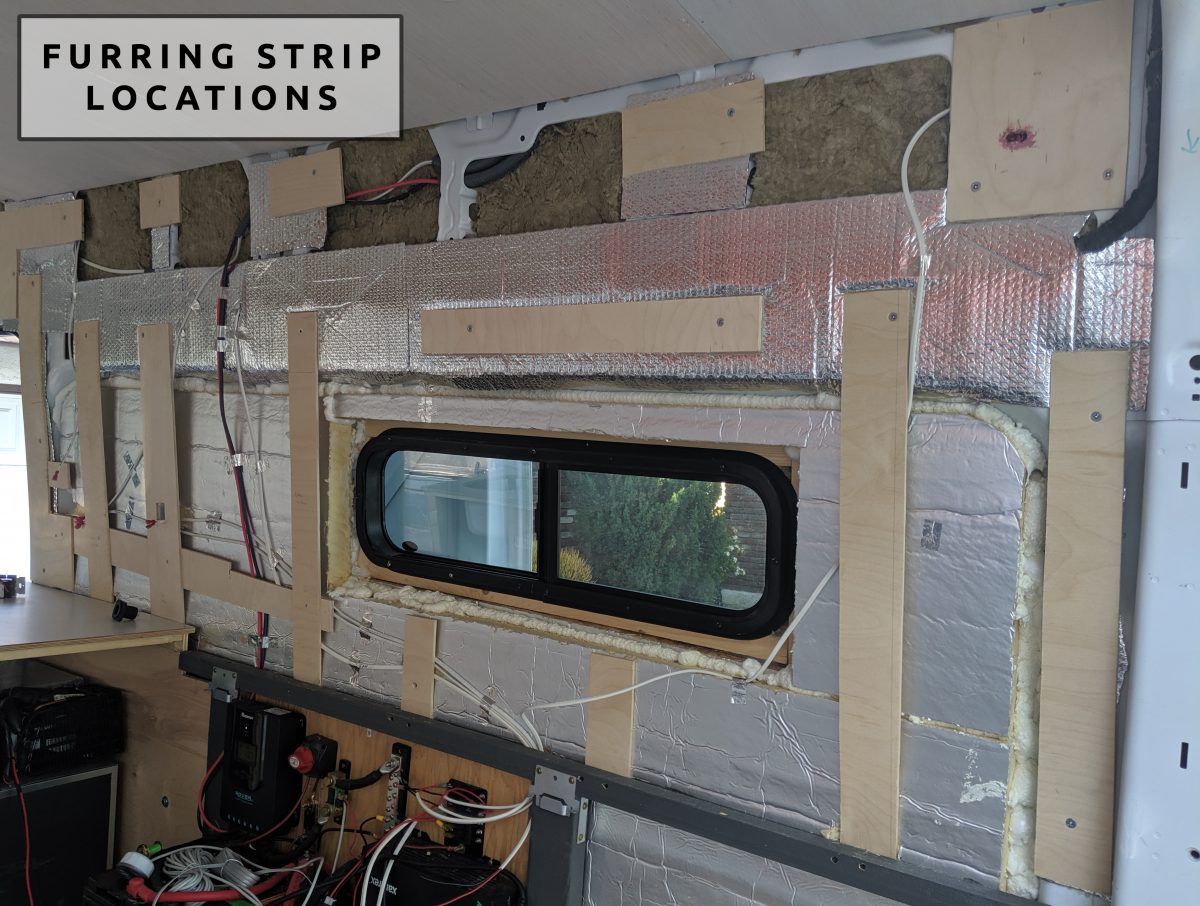
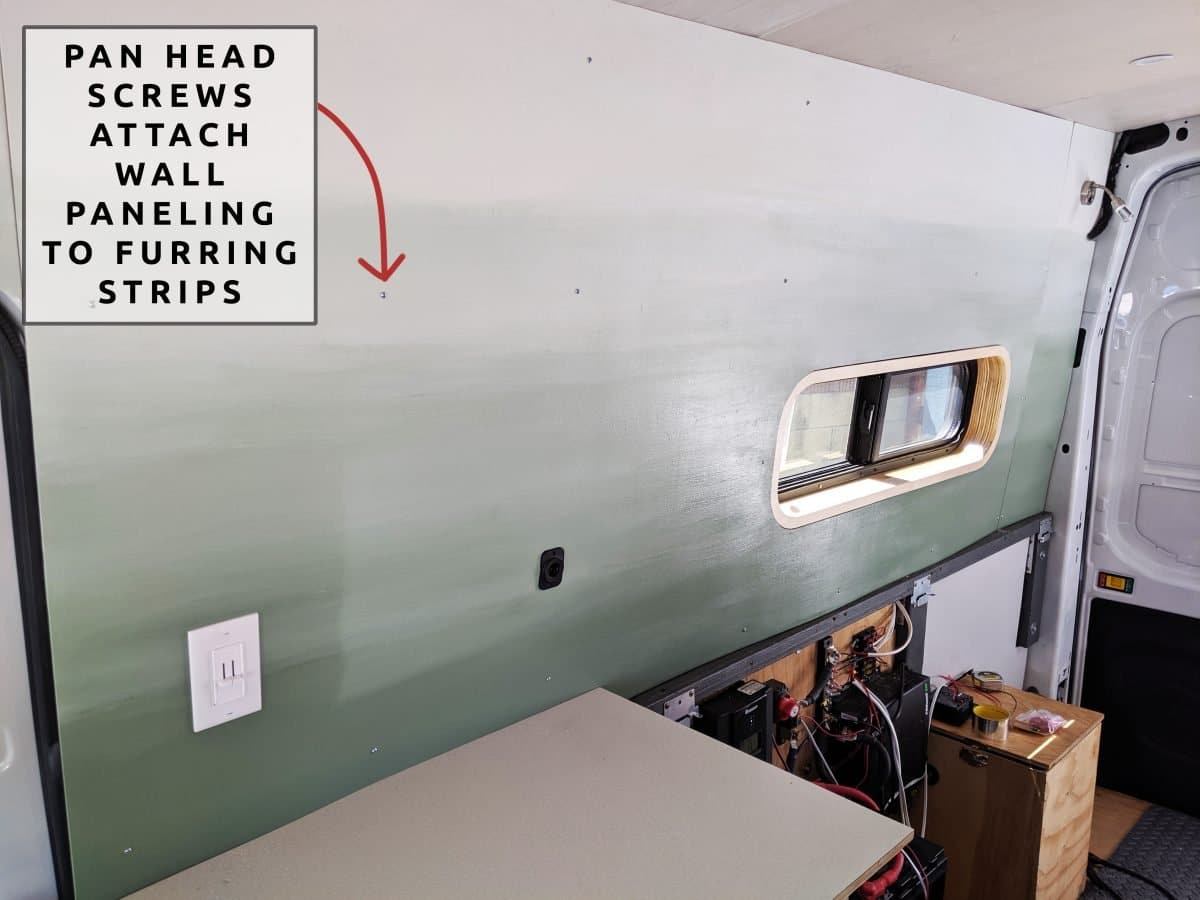
The first step was to create and install furring strips. Furring strips are pieces of wood backing that the final wall paneling can be attached to. We created these using ¼” baltic birch plywood, and strategically attached them directly on the van metal. Placement was decided based on:
- Locating existing holes in the van walls that we could use to attach the furring strips using Plus Nuts.
- Providing sufficient backing to ensure the final wall paneling would feel solid and not wobbly.
We were cautiously minimal with our furring strip locations, and the wall does “flex” slightly if pushed at some spots, but unless actively seeking these “squishy” areas, we don’t notice this on a day to day basis. This may also have more to do with our thin wall paneling choice (5mm plywood) than the furring strip quantity and placement.
Note: We used threadlock on the machine screws that were inserted to the plus nuts to ensure they would not loosen over time.
Step 2
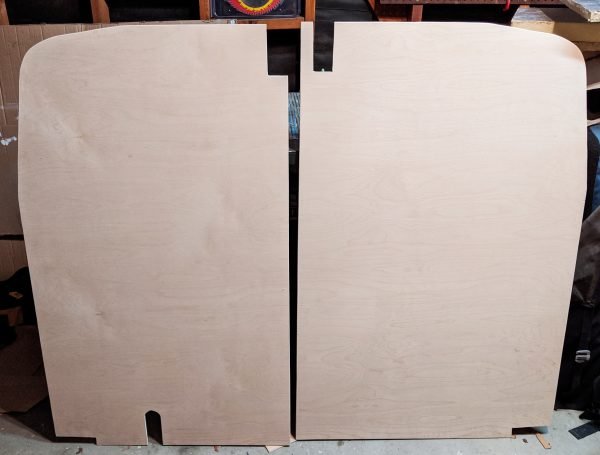
Our wall paneling of choice is lightweight 5mm plywood (approximately ⅛” thick) wood paneling. It is the same material used for installing our ceiling panels.
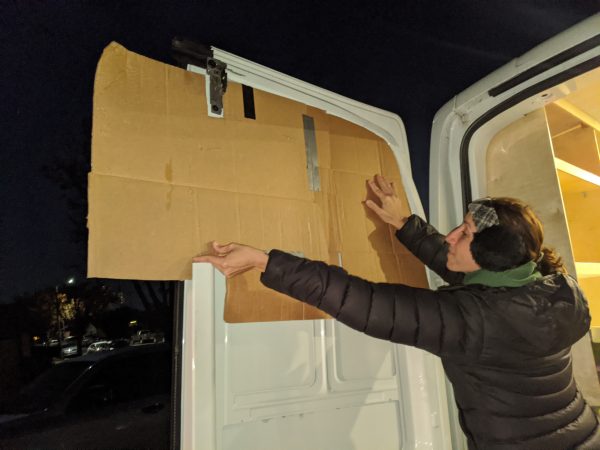
We cut our wall paneling to size, using cardboard templates for the curved areas around the sliding door. We used a circular saw for the straight cuts, and a scrolling jigsaw for the curved cuts. We always use masking tape on the cuts to avoid splintering, and sand cuts afterwards.
Note: If like us you’re far from being a master carpenter, it’s a good strategy to be slightly conservative with your curved jigsaw cuts and sand away any excess as needed. This can add time, but it’s easier to take away material than it is to add it back!
Step 3
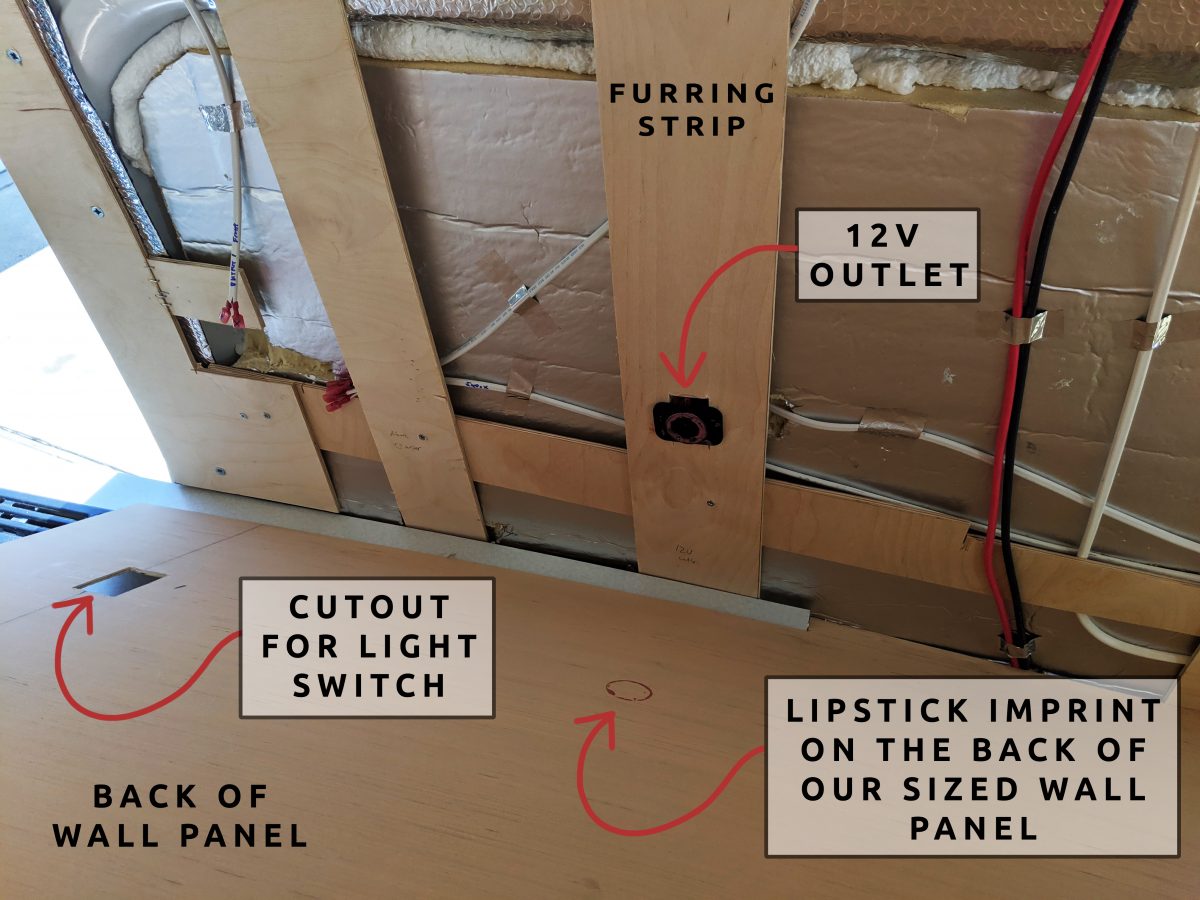
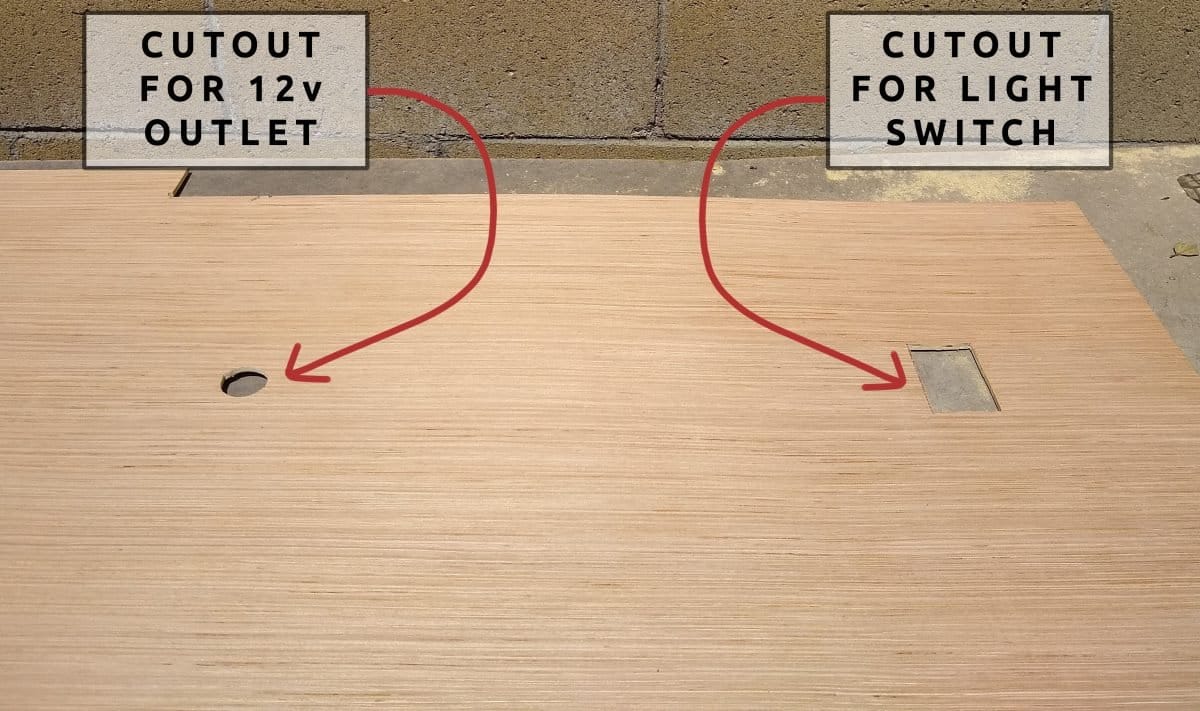
We created a backing and mounting opportunity for our dimming light switch. We simply measured for the location of the light switch and traced this onto our wood paneling.
We also created a cutout for a 12V USB charger at this wall. In this instance we slathered the charger location with lipstick and pushed the wall panel up against it in order to give us our cutout location. We used a jigsaw to cut out these openings.
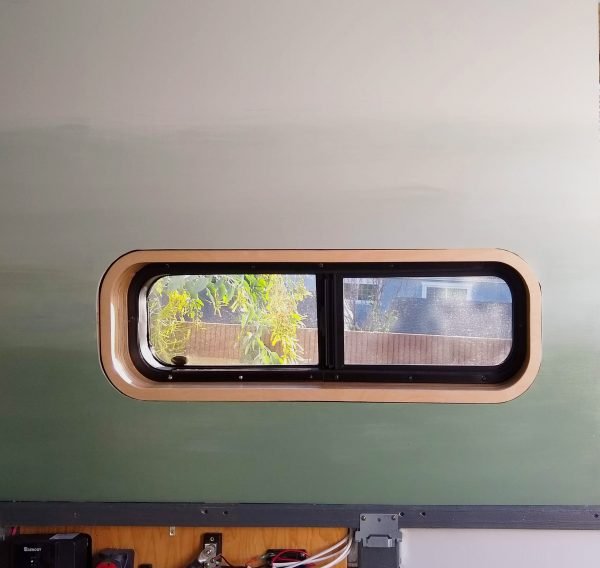
We used a similar tactic of lipstick in order to determine the cutout for our slider window. This was definitely tricky and required some craftsmanship, and even with care we did end up overcutting at one corner and having to fill some gaps with bondo.

Step 4
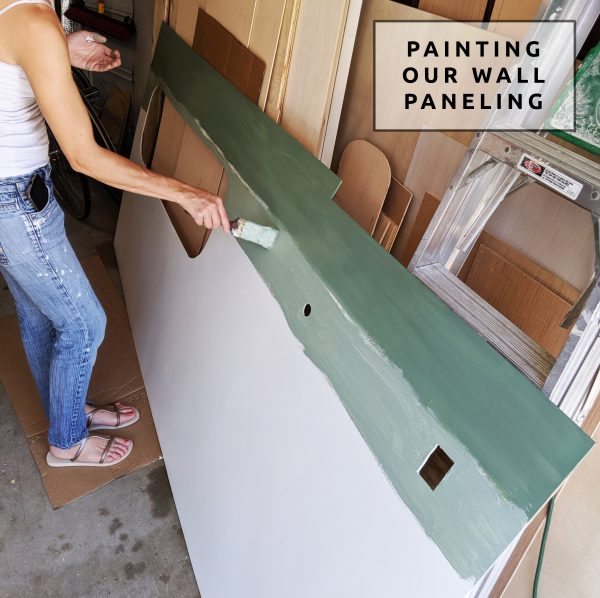
Next, the fun part – painting our wall! We decided to use some paint we already had on hand from our home to create an ombre like wall paint. The paint’s semi-gloss finish allows for it to be easily wiped down.
The green color is Sherwin Williams – Privilege Green and the white color is Sherwin Williams – Alabaster. The greens in between are simply varying mixtures of the white and green paint in order to create the fade.
Step 5
Finally, we attached the wall to the furring strips. We had the option of attaching using finishing nails for a seamless look, but decided that we were okay with small pan head screws. This way, removing the wall paneling is easy should we ever need to take them off. We also kept the seams between panels exposed, but one could add trim pieces or perhaps fill with a joint compound if so inclined.
IMPORTANT! These pan head screws are 3/8″ in length. We have 1/8″ plywood walls + 1/4″ furring strips = 3/8″ of material. Behind that is the van metal!
Note: Trim pieces (also known as moulding) are great for any transitions you wish to hide. They conceal imperfections and create a more finished look.
The Van’s Sink Cabinet “Backsplash” Wall
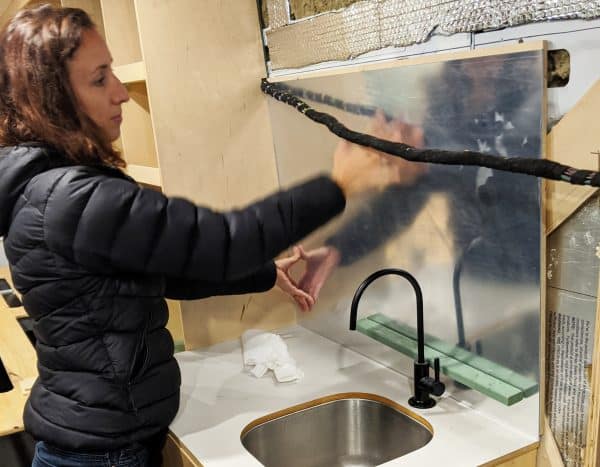
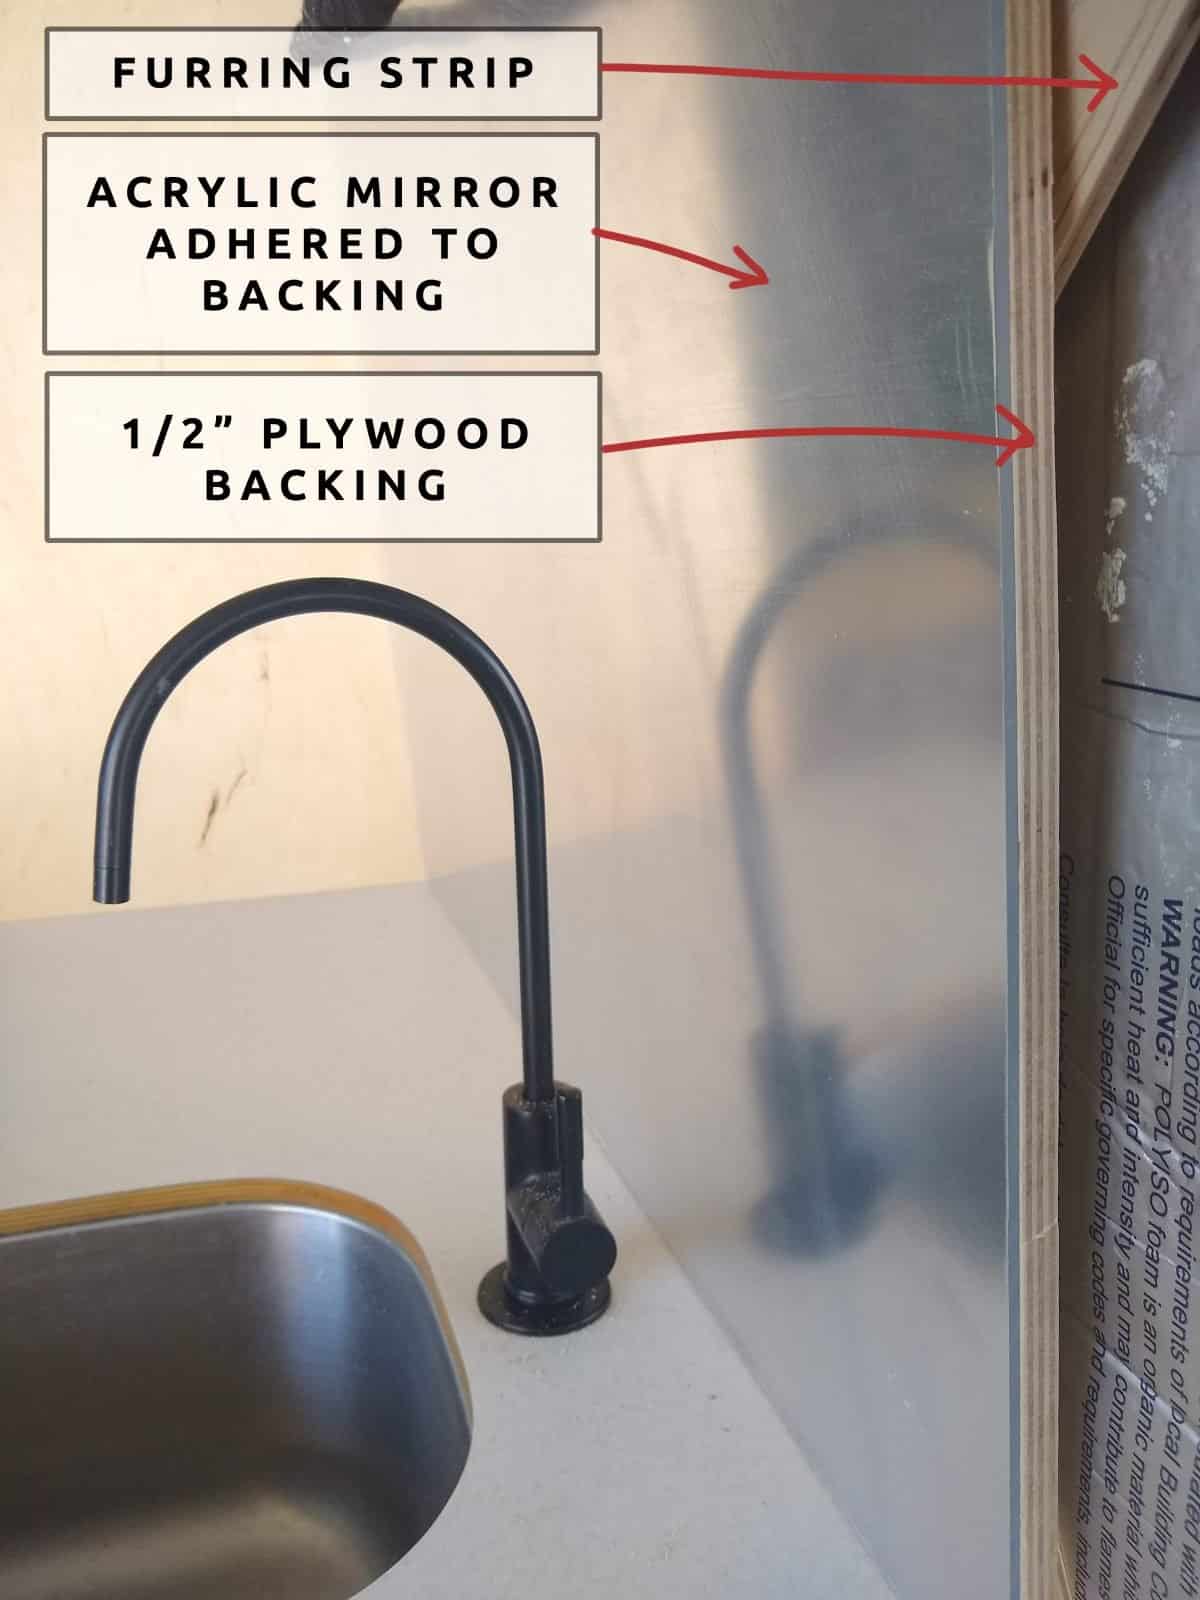
For our sink backsplash, we opted for an acrylic mirror panel. Acrylic (plastic) is a much lighter and safer material for a van than a standard glass mirror. We ordered the custom sized mirror from a local vendor for about $65. A curved mirror would give us fun house vibes, so we did our best to prevent any warping by backing the mirror with stiff 1/2” plywood. We believe this could also be a good substrate for peel and stick tiles, another popular “light weight” backsplash option, but always confirm with the vendor of your product of choice.
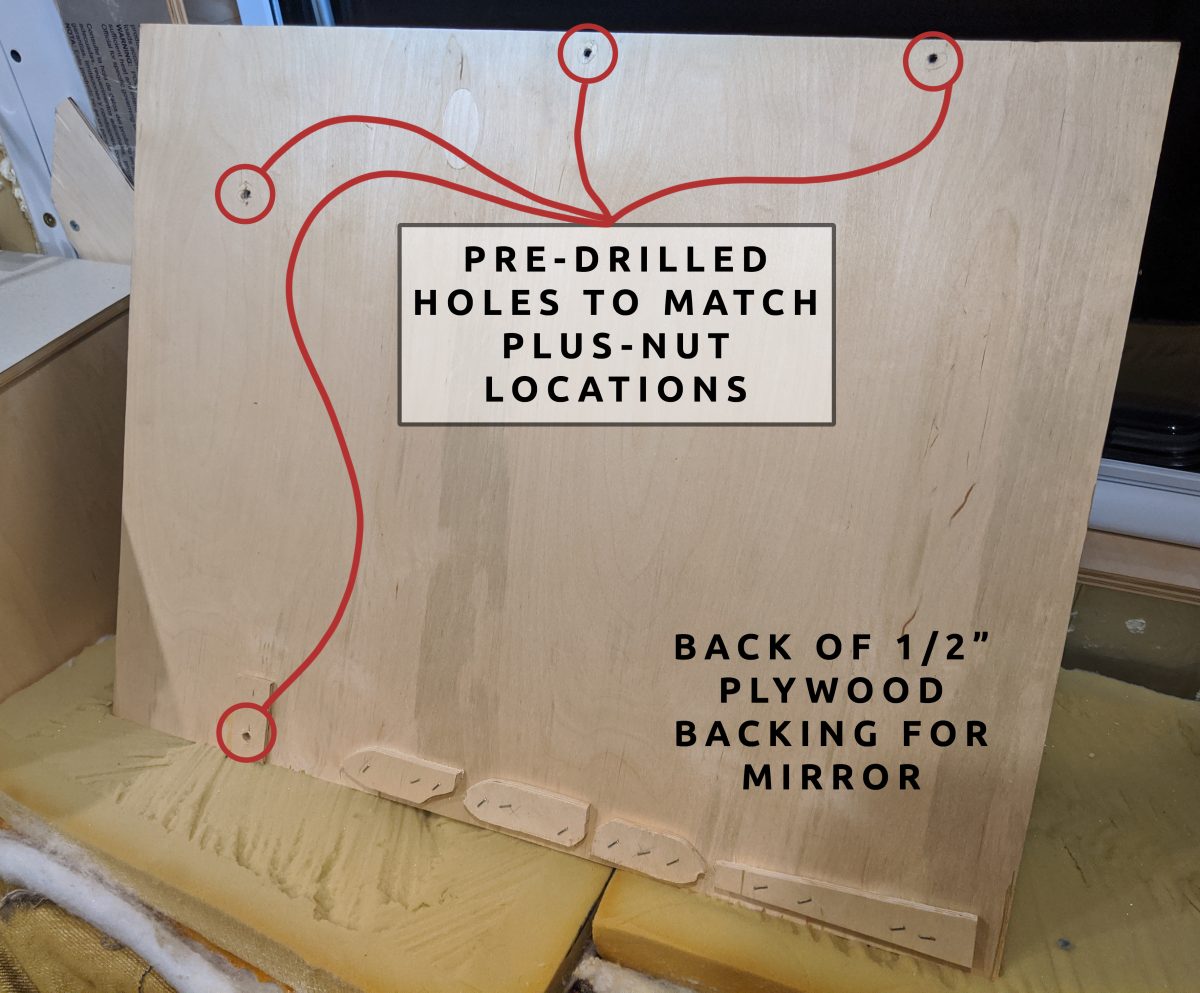
We used machine screws and Plus Nuts in the existing van holes to attach this panel directly to the van metal wall.
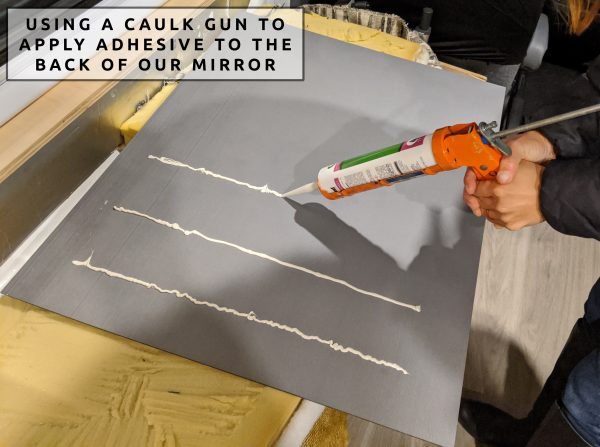
We used an acrylic mirror adhesive to attach the acrylic mirror to the plywood, following the instructions that came with the product:
Here is a side view of the mirror glued to the ½” plywood backing:
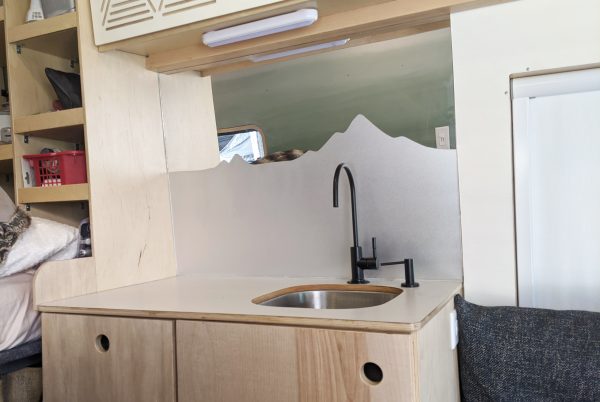
ON SECOND THOUGHT…
After installing the mirror, there was too much of a reflection of the countertop/sink because the angle of the van wall points slightly downward. As a creative solution to this, we bought a peel and stick window film that we cut to create a custom mountain profile. We made sure that the “peak” of the tall mountain occurred at the faucet, because we liked that our black faucet stood out against the white window film material.
Installation of the window film was simple – all it took was water and a squeegee. Thanks to the magic of static cling, the film stuck right to our acrylic mirror. It’s still sticking there today, half a year later! It hides water stains, is easy to wipe down, and we do appreciate having the mirror here.

Our pick for Peel and stick window film
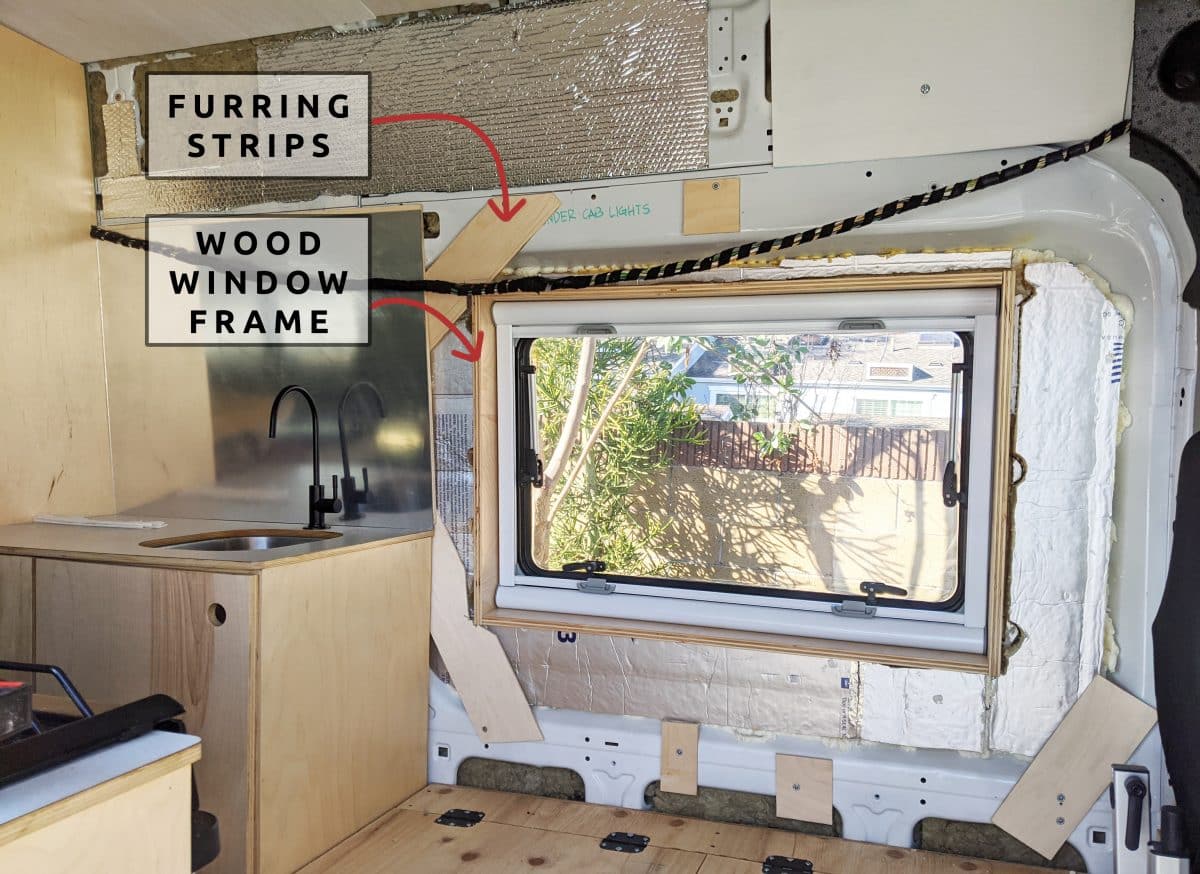
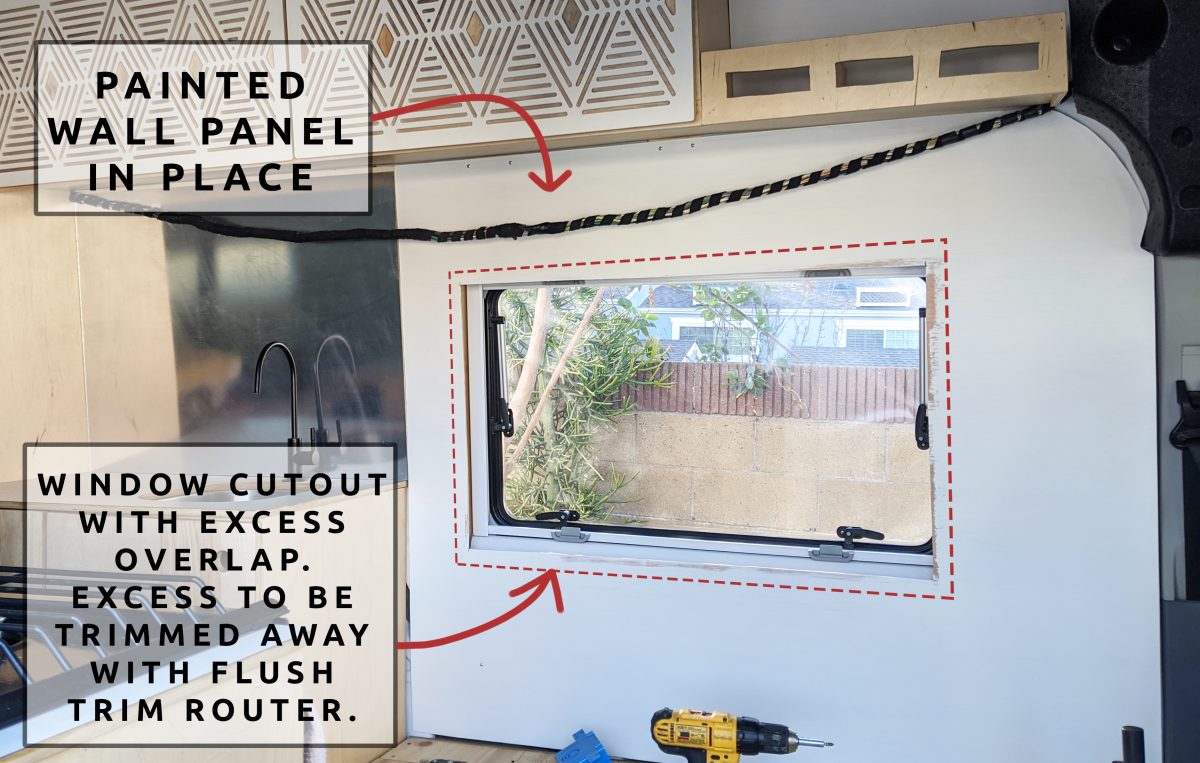
Driver’s Side Wall
For the wall adjacent to our sink cabinet and around our window, we used a similar strategy of ¼” furring strips. Here however, the wood window frame itself would become the main point of attachment for the wall paneling:
You know the drill by now! We created a cardboard template for the curved portion of the wall:

For the window location, we cut a slightly smaller opening than we wanted, as we would then use a router with a flush trim bit (one of our favorite tools) in order to trim away an excess with the paneling in place. This created a perfect flush cut against the window frame.
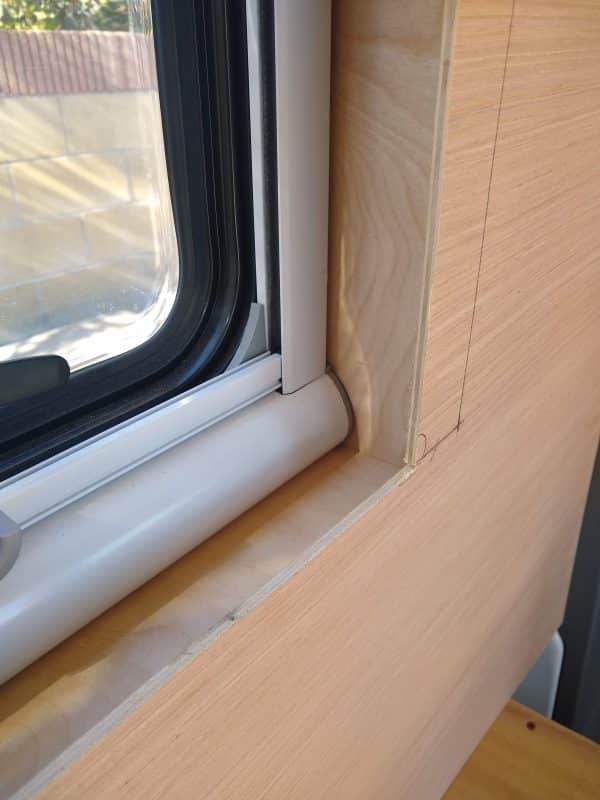
Note: When we first started making this cut, we left some major burns in the wood. If you’re fighting your tool, then you likely need a new blade!
We painted the panel with white paint in an eggshell finish (Color is Sherwin William – Alabaster), and installed using pan head screws to the furring strips and to the window frame. Once again, if wanting a “seamless” finish without screws visible, another option would be finishing nails. We are not bothered by visible screws, and also want the option of easily removing the panel if needed.

Wall Paneling at Open Cubbies and the Garage
In some less visible areas, such as behind our open shelves at the bed and in the “garage” under the bed, we were okay with attaching paneling directly to the van metal (no furring strips). We simply used Plus Nuts in the existing van holes. The items in our open cubby closets conceal most of these anyhow!


Back Door Paneling
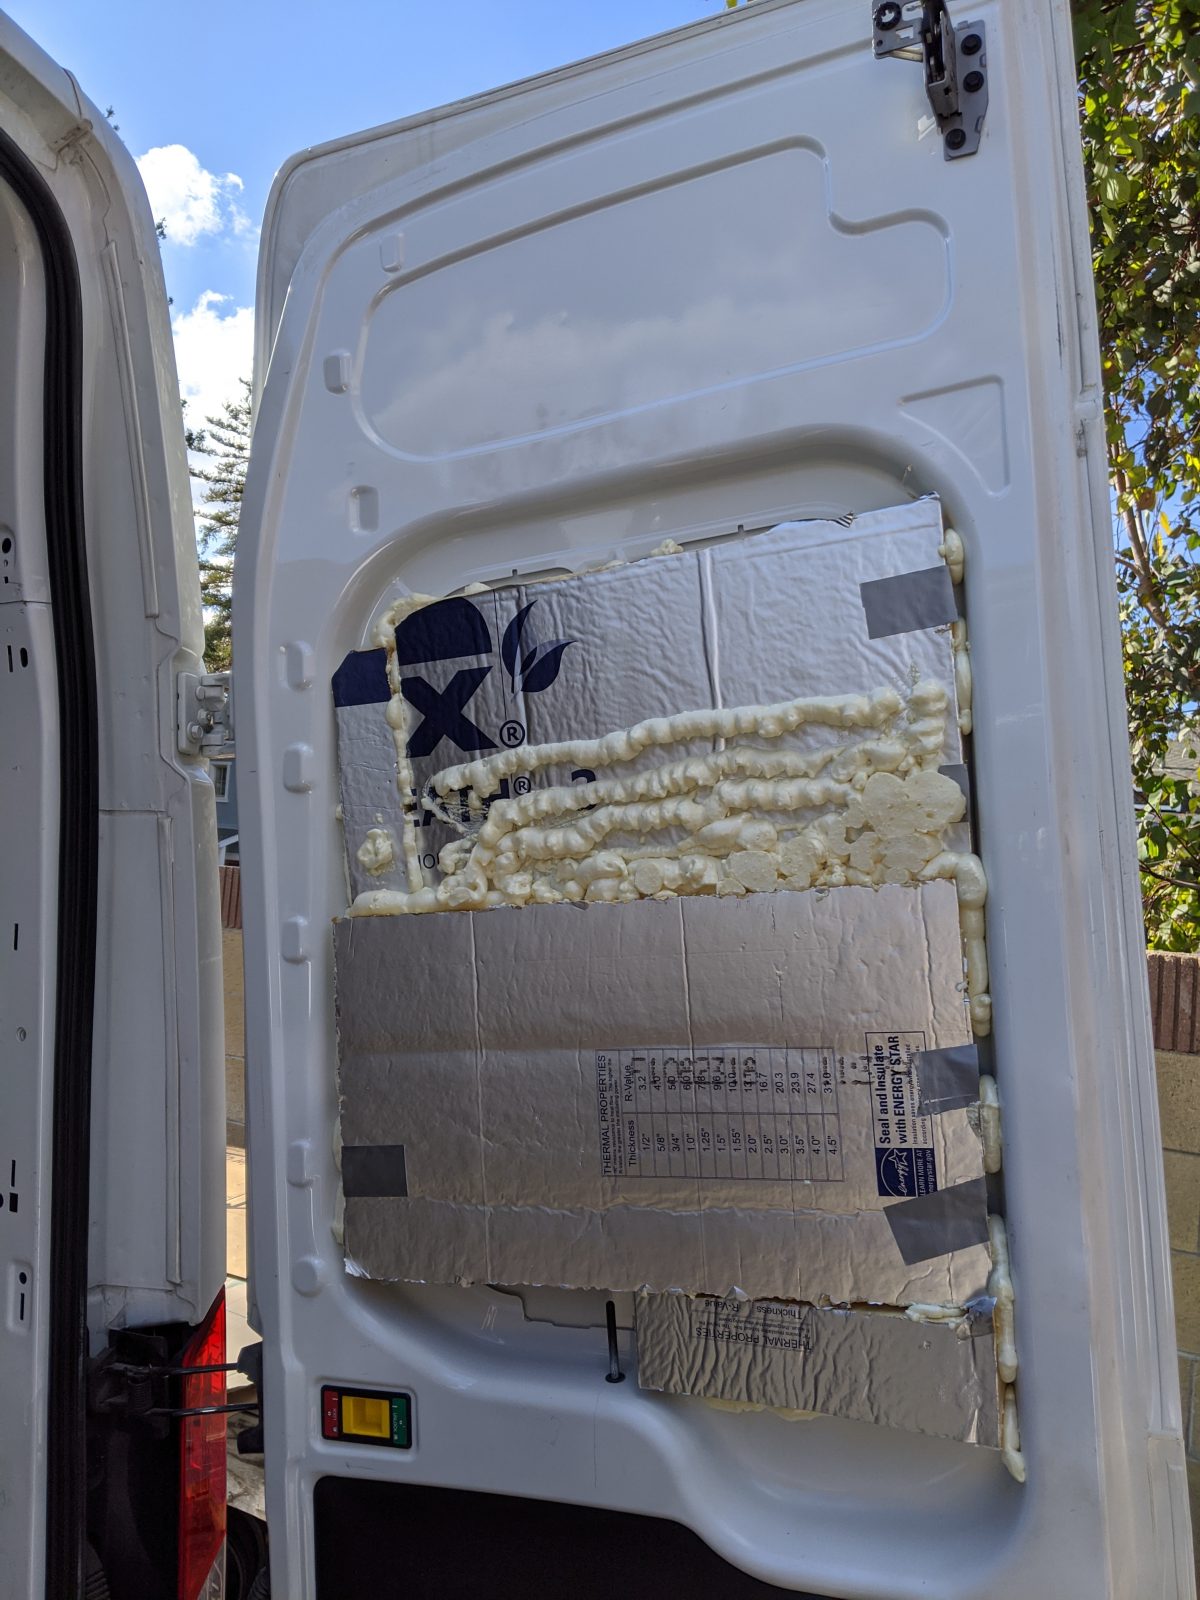
For our back doors, which also serve the function of our bed headboard, we went with ¼” thick baltic birch plywood (the same as was used for our cabinet facing). We figured this should be more sturdy than our other walls, since we regularly lean against it while in bed. But first, insulation! For insulation at the back doors, we used 1” polyiso insulation within the cavity behind the wood paneling, using spray foam to adhere it to the cleaned metal surface.
We used a circular saw for the straight cuts, and a jigsaw for the curved portions. We sanded the cuts for a smooth finish, and finished in a couple coats of polyurethane.
The installation for this paneling was a little bit different, as the doors don’t have existing holes for using plusnuts. Instead, we used self tapping screws directly into the door metal, all along the edge where we have hollow metal cavities to work with. We used a total of 6 screws per panel, spaced pretty evenly all along the outside edges. This is the only place on our particular build where we screwed directly into the van.

Note: We decided to leave a cutout for the back door lock, so that we could manually unlock the back door in an emergency. We can reach down behind the mattress and pull it up to unlock.
Ready for more info?
Visit the Van Conversion Build GuideWe sincerely hope this information is helpful on your build journey!
This post contains affiliate links that may earn us a commission if a product is purchased. But, we always strive for the reuse and repurpose of materials – so we encourage searching for a local used option before buying from our links.

Where did you get the oblong wooden window surrounds?
I think you’re referring to the frame for our small black window. In that case – we made the frame! As detailed here: https://vanconverts.com/curved-window-frame-sliding-camper-van-conversion-window/