
We're an affiliate
We hope you love the products we recommend! Just so you know, we may collect a share of sales or other compensation from the links on this page. Thank you if you use our links, we really appreciate it!
It’s a breeze to install luxury vinyl plank in our van. We had leftover LVP from installing it in our home, and we knew it was a durable choice. Still looks great in the van, and is easy to clean.
Our vinyl flooring was manufactured by Shaw. We bought it from a local flooring distributor in Southern California.
We had EXACTLY the right amount to complete the front of the van. Although a continuous floor is nice, we decided we were okay with a foam mat flooring for the back garage portion of the van.
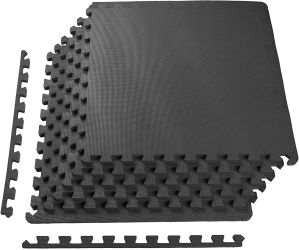
BalanceFoam Interlocking Foam Tiles
Vinyl went in our living area, and we used foam flooring in the garage area of our van. Looks aren’t as important there so it’s all about functionality and cost. It was easy to install, cheap, and lightweight. It’s pretty easy to wipe or vacuum. If we had rugged sharp gear it might be prone to tearing, but it’s just fine for our bouldering mats.
Some background: we wrote up a comparison of types of flooring for a van conversion (spoiler: we would’ve gone for something other than vinyl 😉 )
We documented the (important) process of installing our sub-floor.

Planning the Flooring Layout
To start, we needed to plan out the plank layout. The nice thing about working in the van is that there is not all that much surface area to plan around! We simply laid our planks out side by side to understand where the planks would begin and end relative to the cabinets that we had already installed.
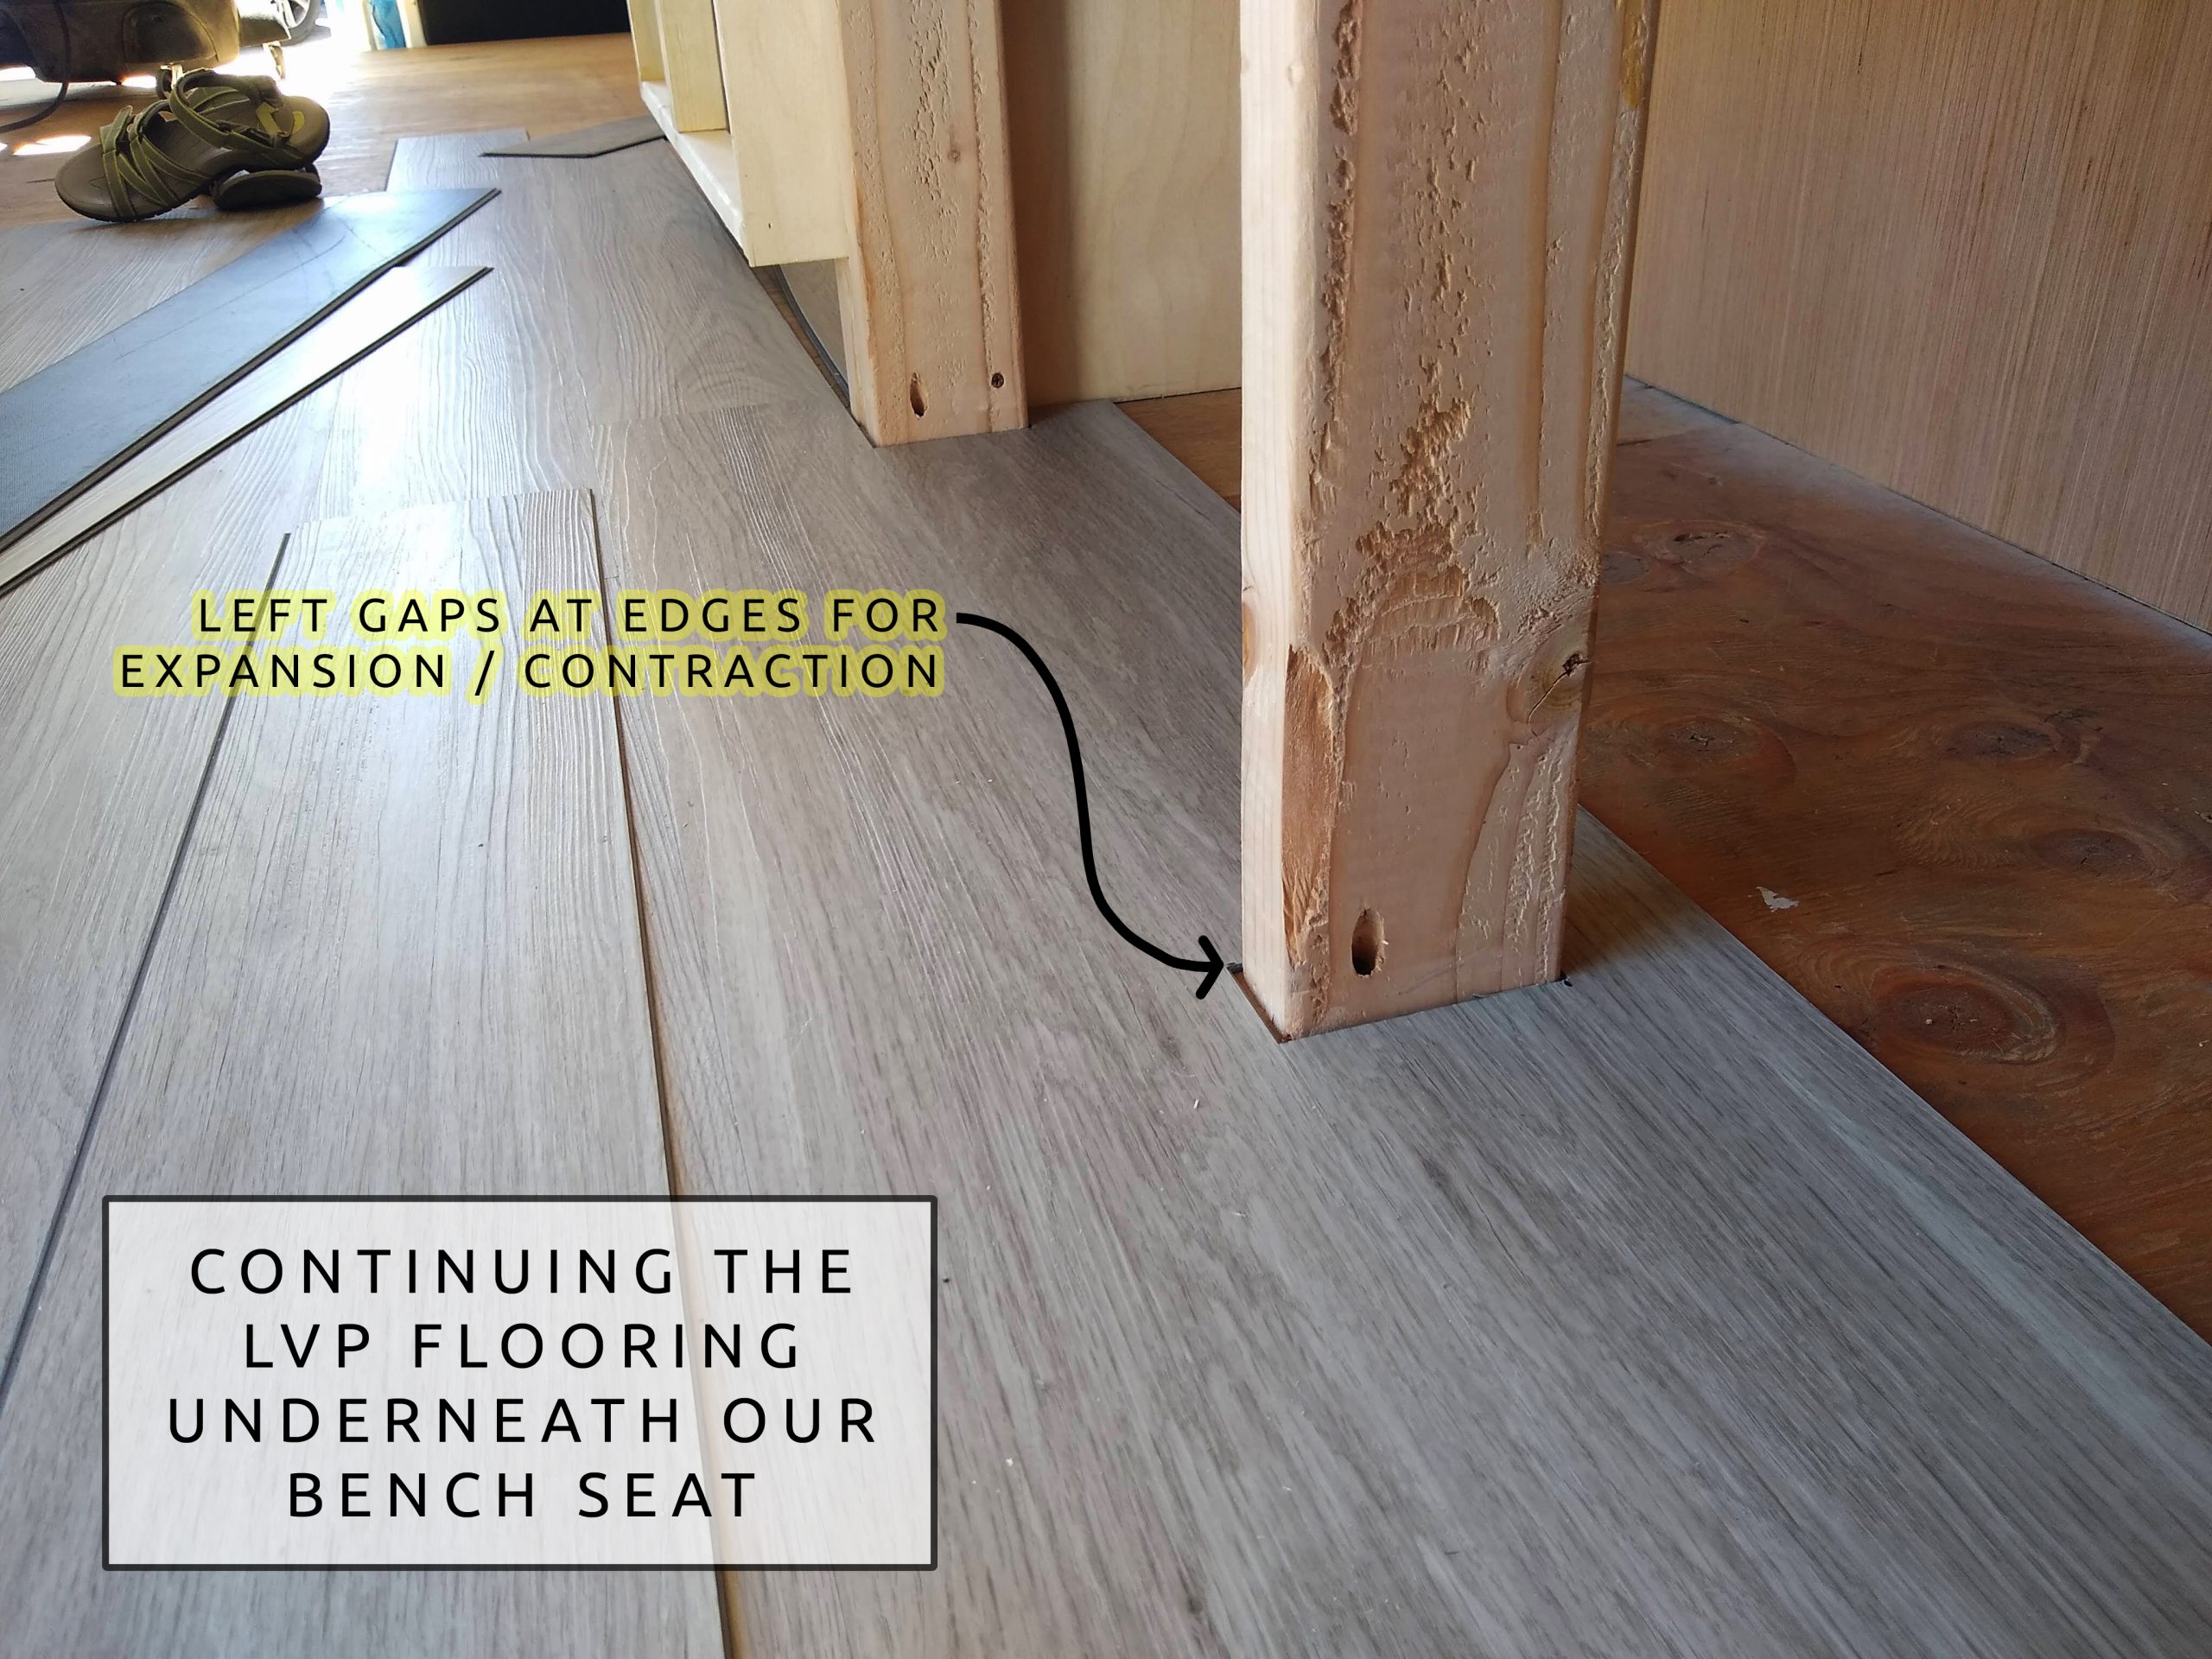
Note: Not all floor installs will want to occur prior to the cabinet build. In our case, it made sense to work around some of our cabinets since we are working with a floating floor that needs expansion gaps to expand / contract with changes in temperature.

Connecting the Planks
Click lock LVP planks have a tongue and groove type installation. This means they lock into each other like a puzzle, creating a tight seal that keeps out moisture and keeps the planks from separating from one another. Our particular product is thin, and did not require much force to click together two pieces. There are thicker LVP products that do install more like a typical laminate flooring, requiring a little hammering to get the planks to engage.
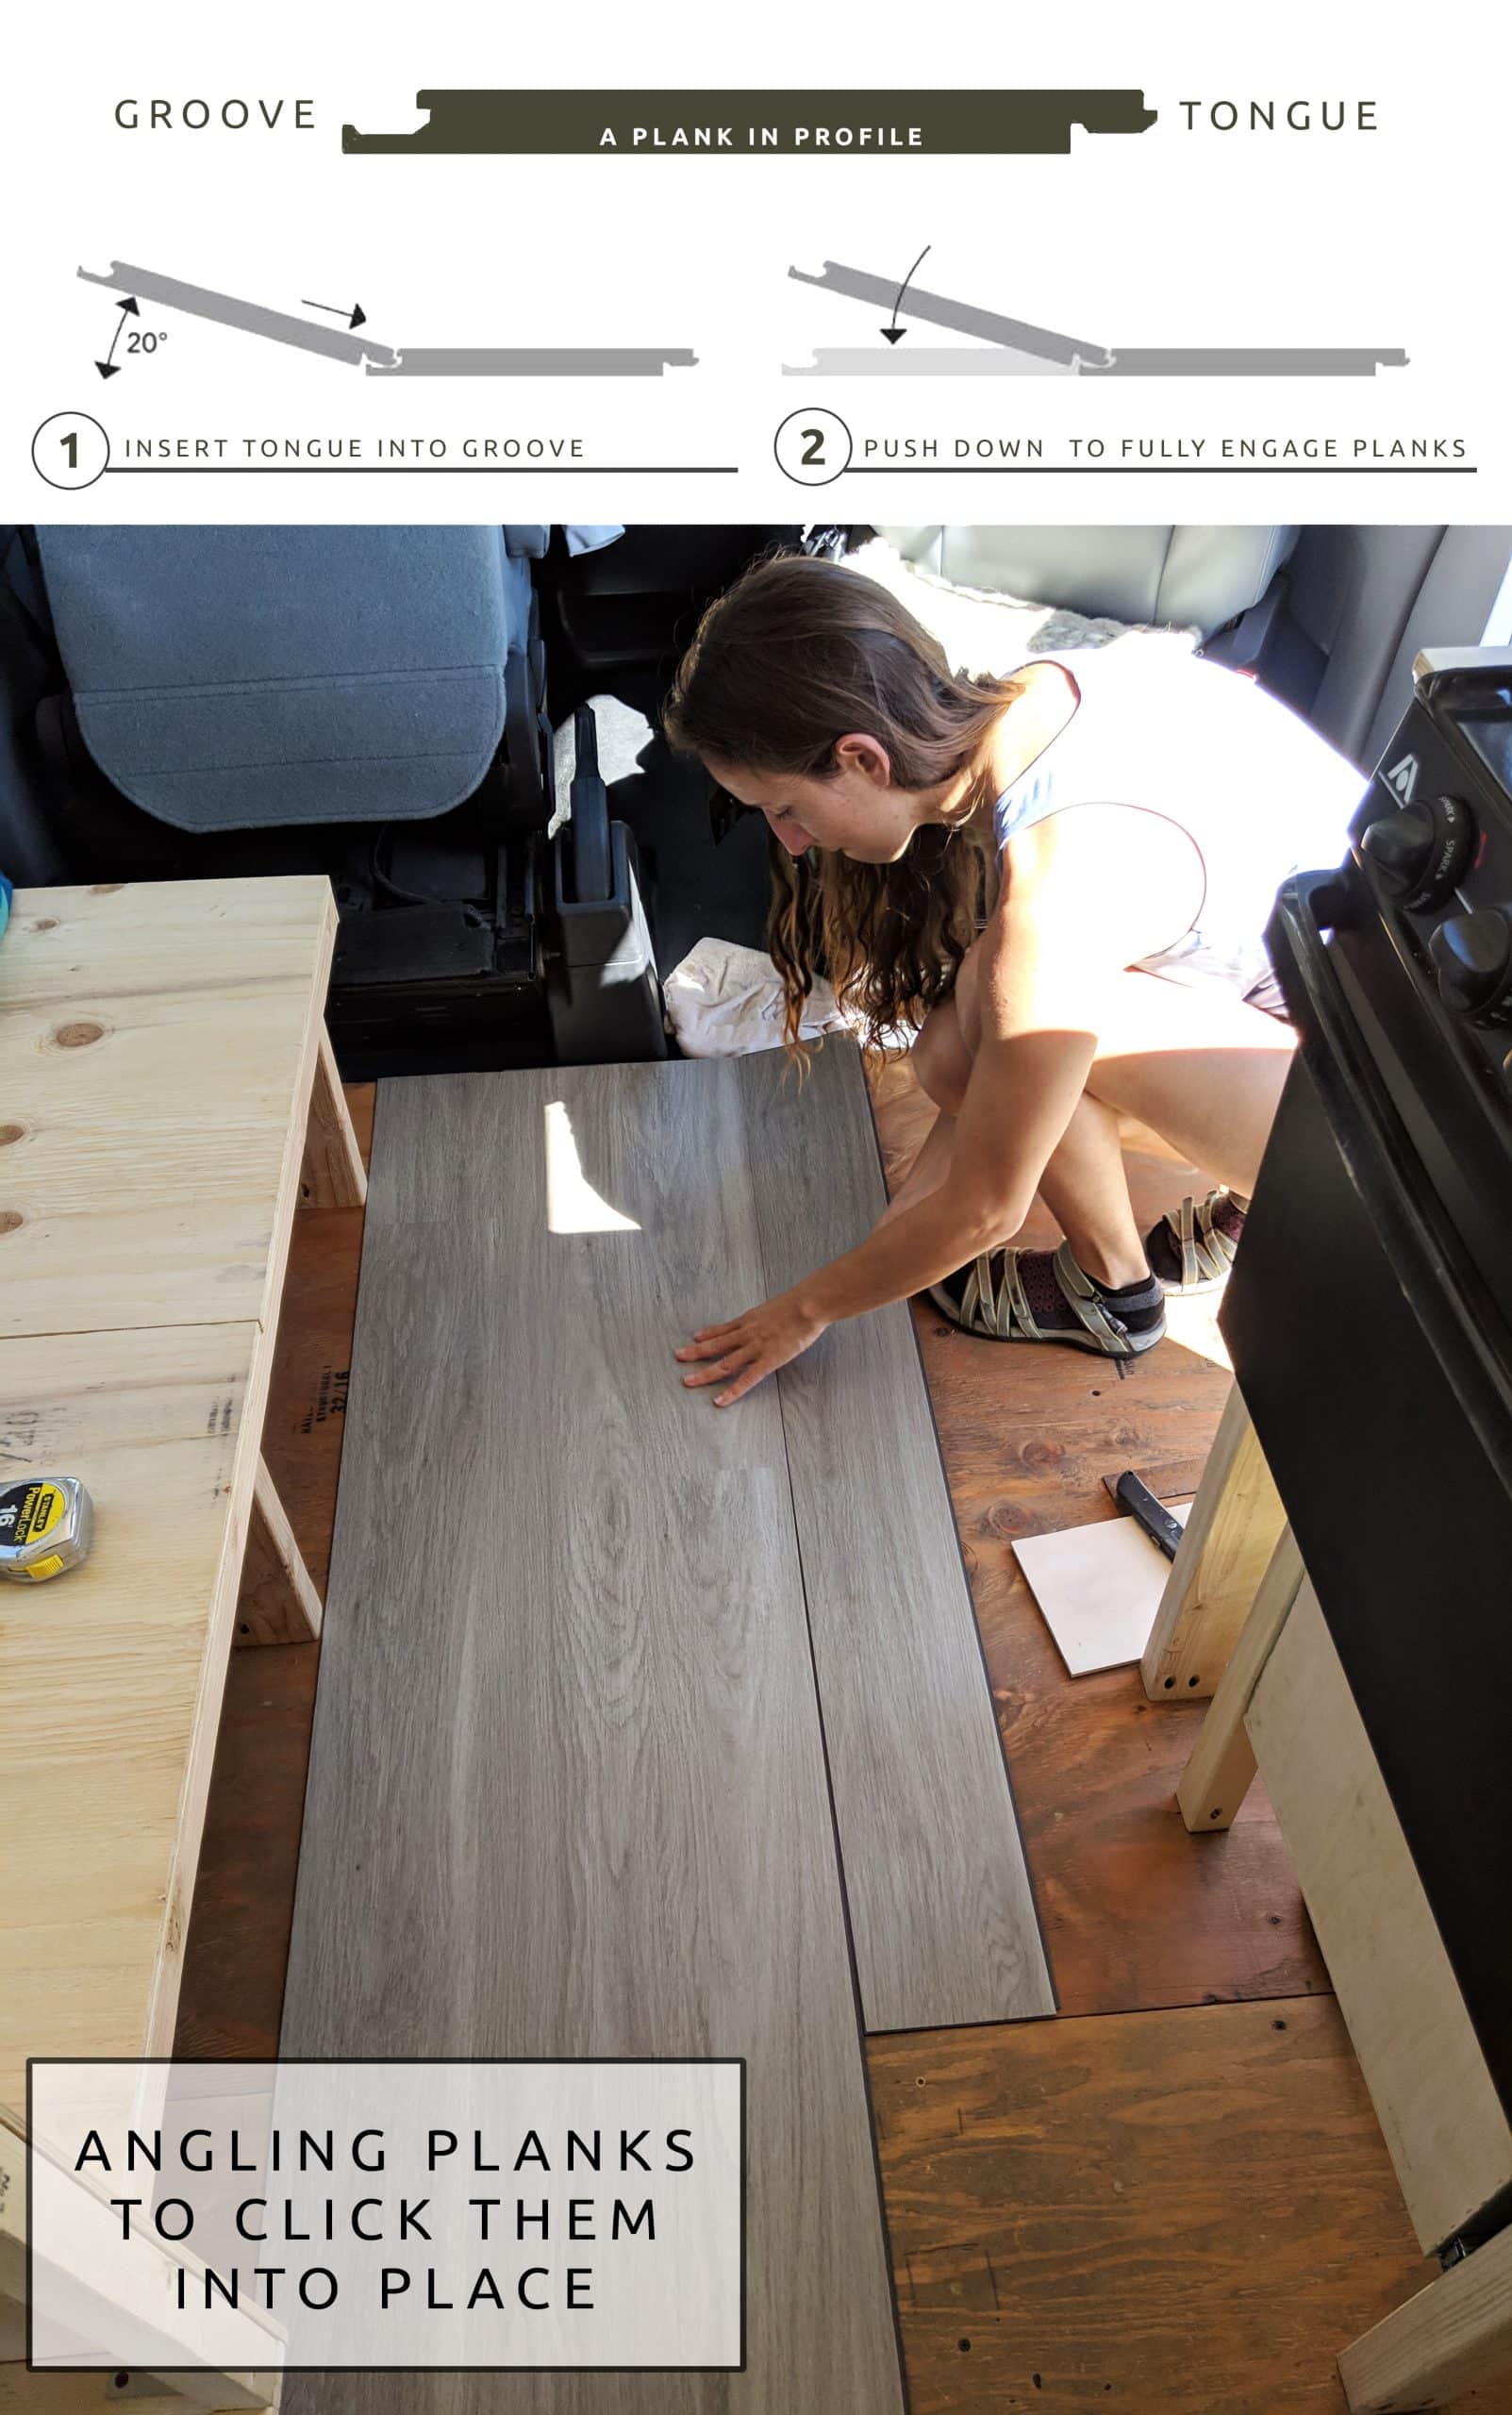
Here’s a video that gives general installation advice for floating LVP flooring:
Providing Flooring Expansion Gaps
One concern we see voiced a lot is whether vinyl planks will separate at the seams. Since they are loose lay, we can see how this might be a worry. However, that has not been the case for us. We did not install the flooring under our cabinets, partially due to the limited material we had on hand. Secondly, loose lay LVP needs room to expand and contract with changes in temperature. By leaving some expansion gaps at the edges, you eliminate this concern:
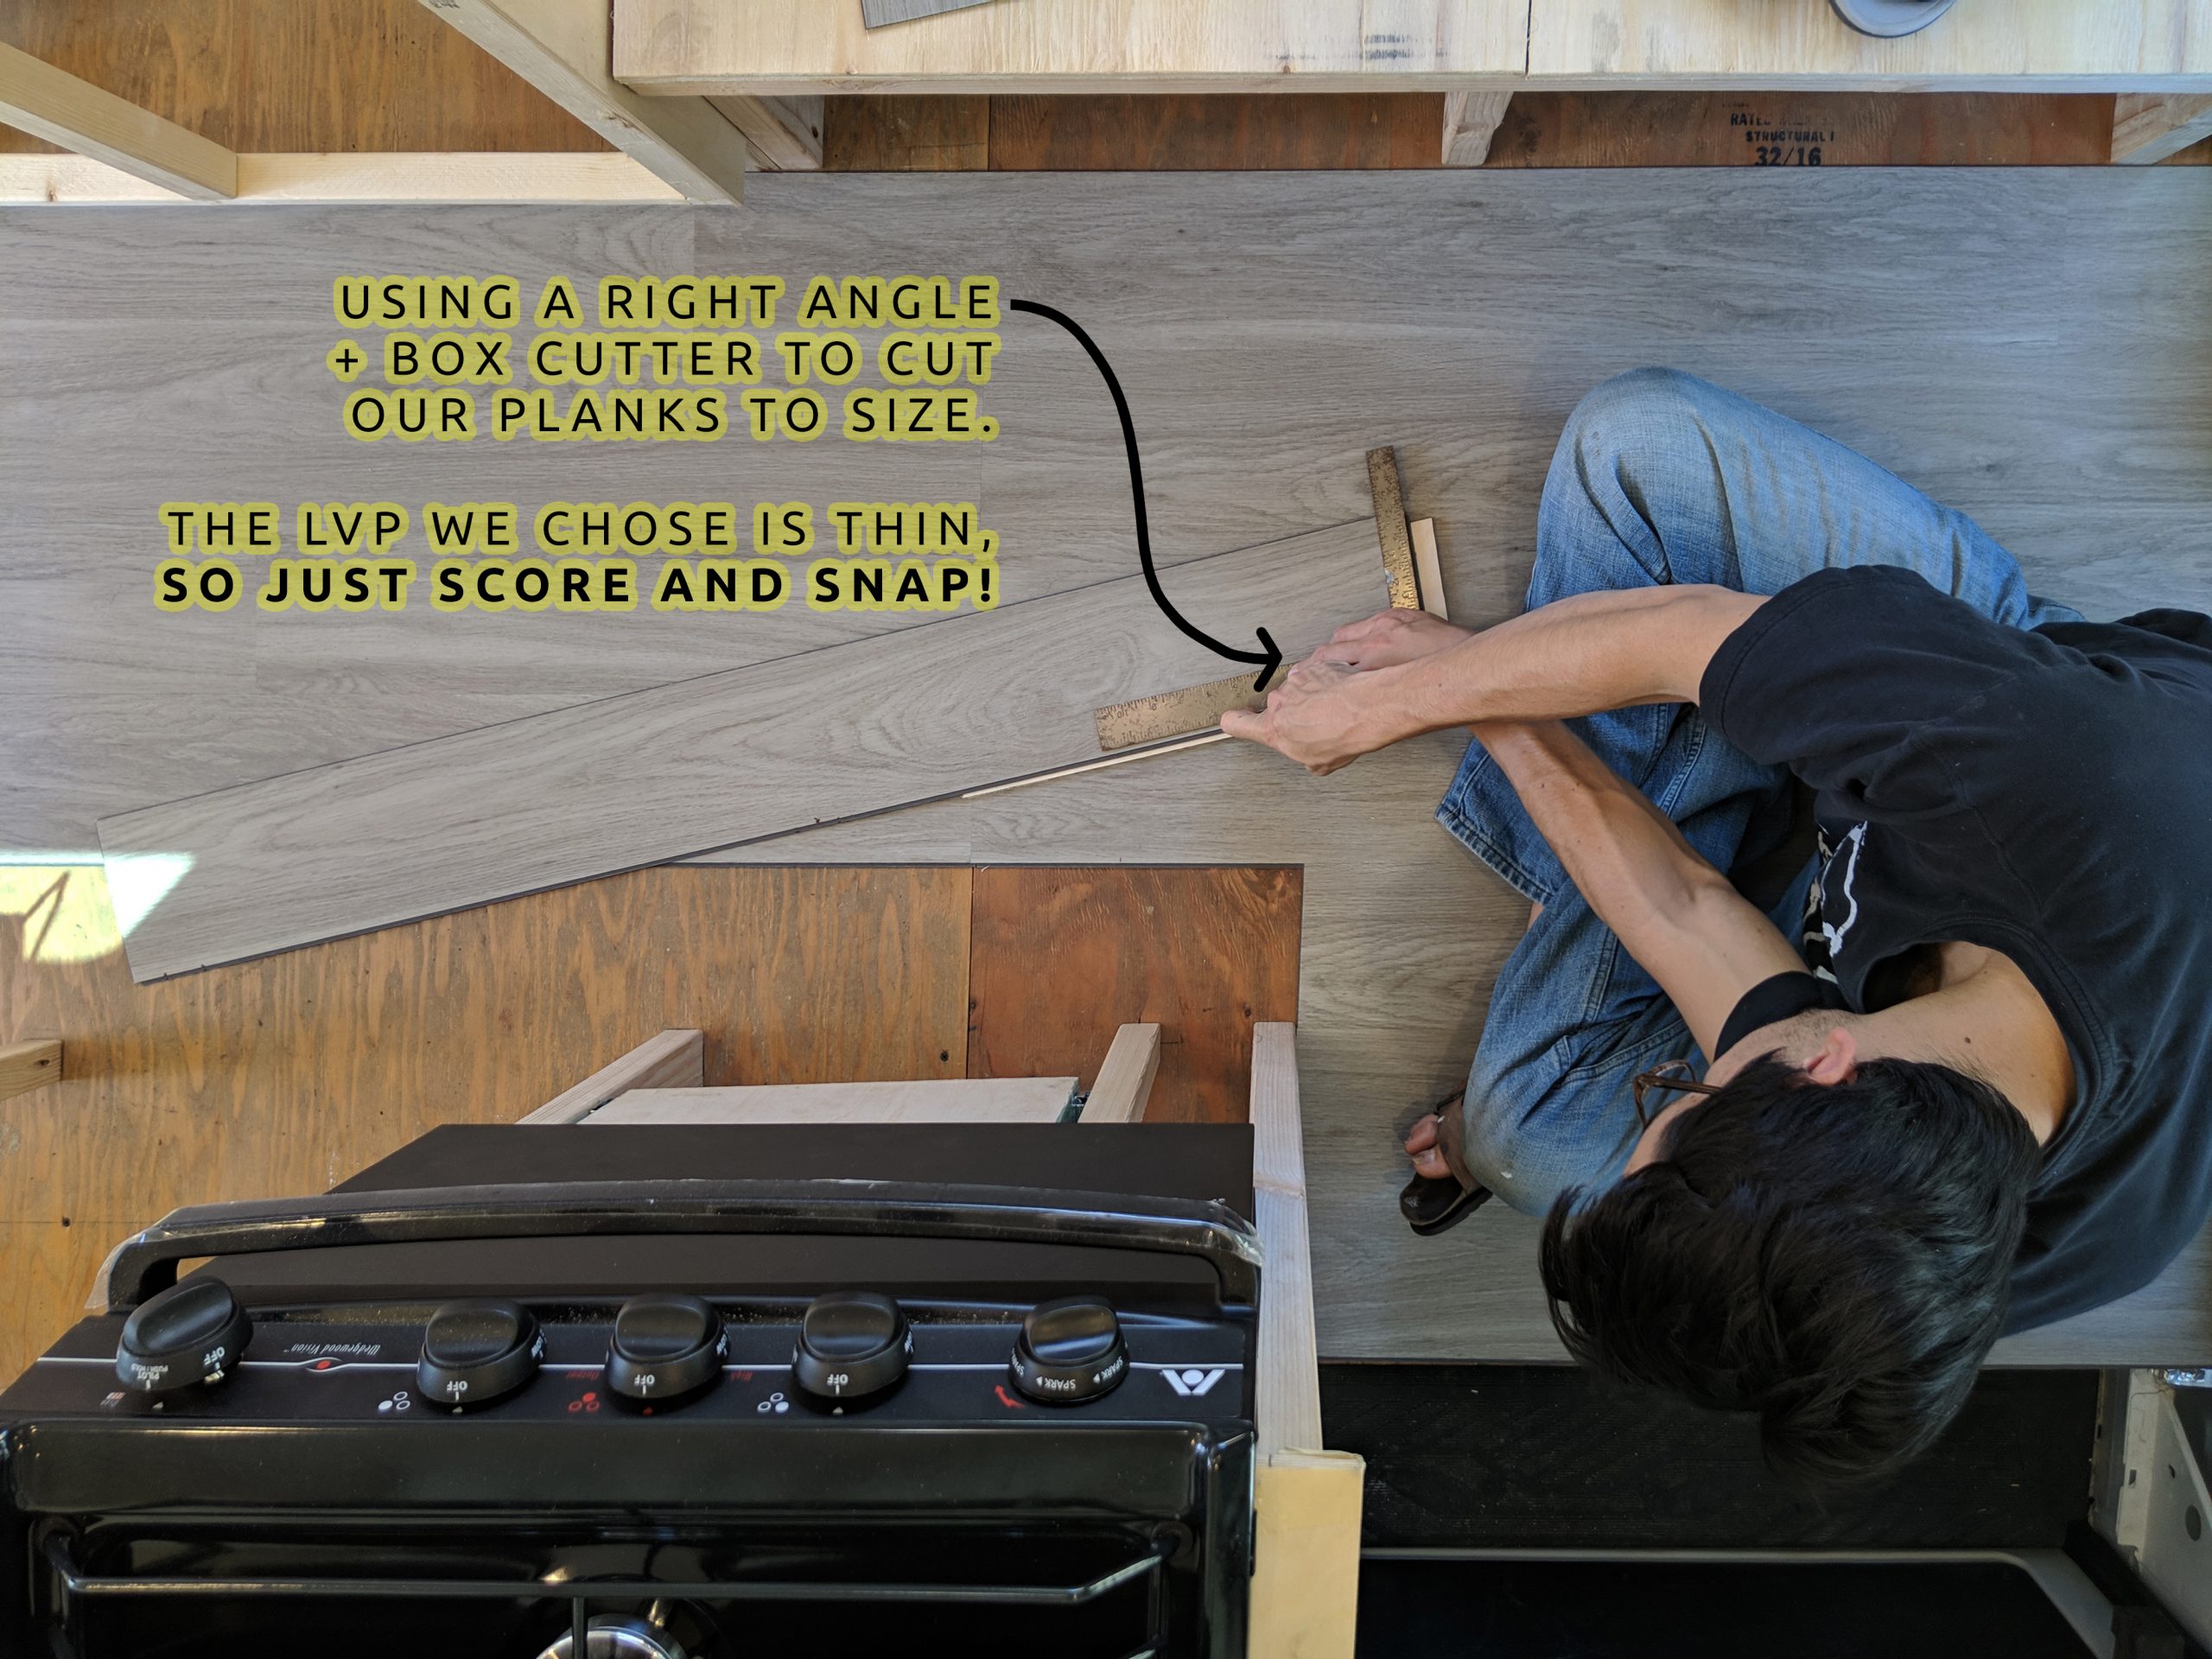
Cutting the LVP
Another perk to LVP flooring is that the tools you will need are ones you most likely already have on hand. There are different thickness options, and ours was the thinnest there is at about 1/16” height. We simply needed a box cutter to score the plank on the top, and then snapped it for a clean break. On some slightly smaller or more intricate cuts, we used needle nose pliers.
Our Garage Flooring Install
We only had enough LVP for the front “living” space of the van, and were okay with transitioning to a different floor type in the garage. Three factors we kept in mind for the garage portion of floor were: cost, durability, and cushion. We knew we might be crawling around under there on our knees, so why not choose something comfy? With all this in mind, we decided to give tile gym flooring a shot! So far we really love it. We get the impression that it’s pretty dang durable and THICK! It’s also easy to install, with a straight edge and blade being all you need to slice through the foam. We did not glue down, which gives flexibility for future replacements should they be needed, but this could be an option if desired.
All this said, our main garage inhabitants are bouldering crash pads, which don’t have sharp edges, so it may not be an option for everyone. Always keep your own lifestyle in mind when making van build decisions. We’ve seen other van builders use industrial style rubber flooring for their garage space.
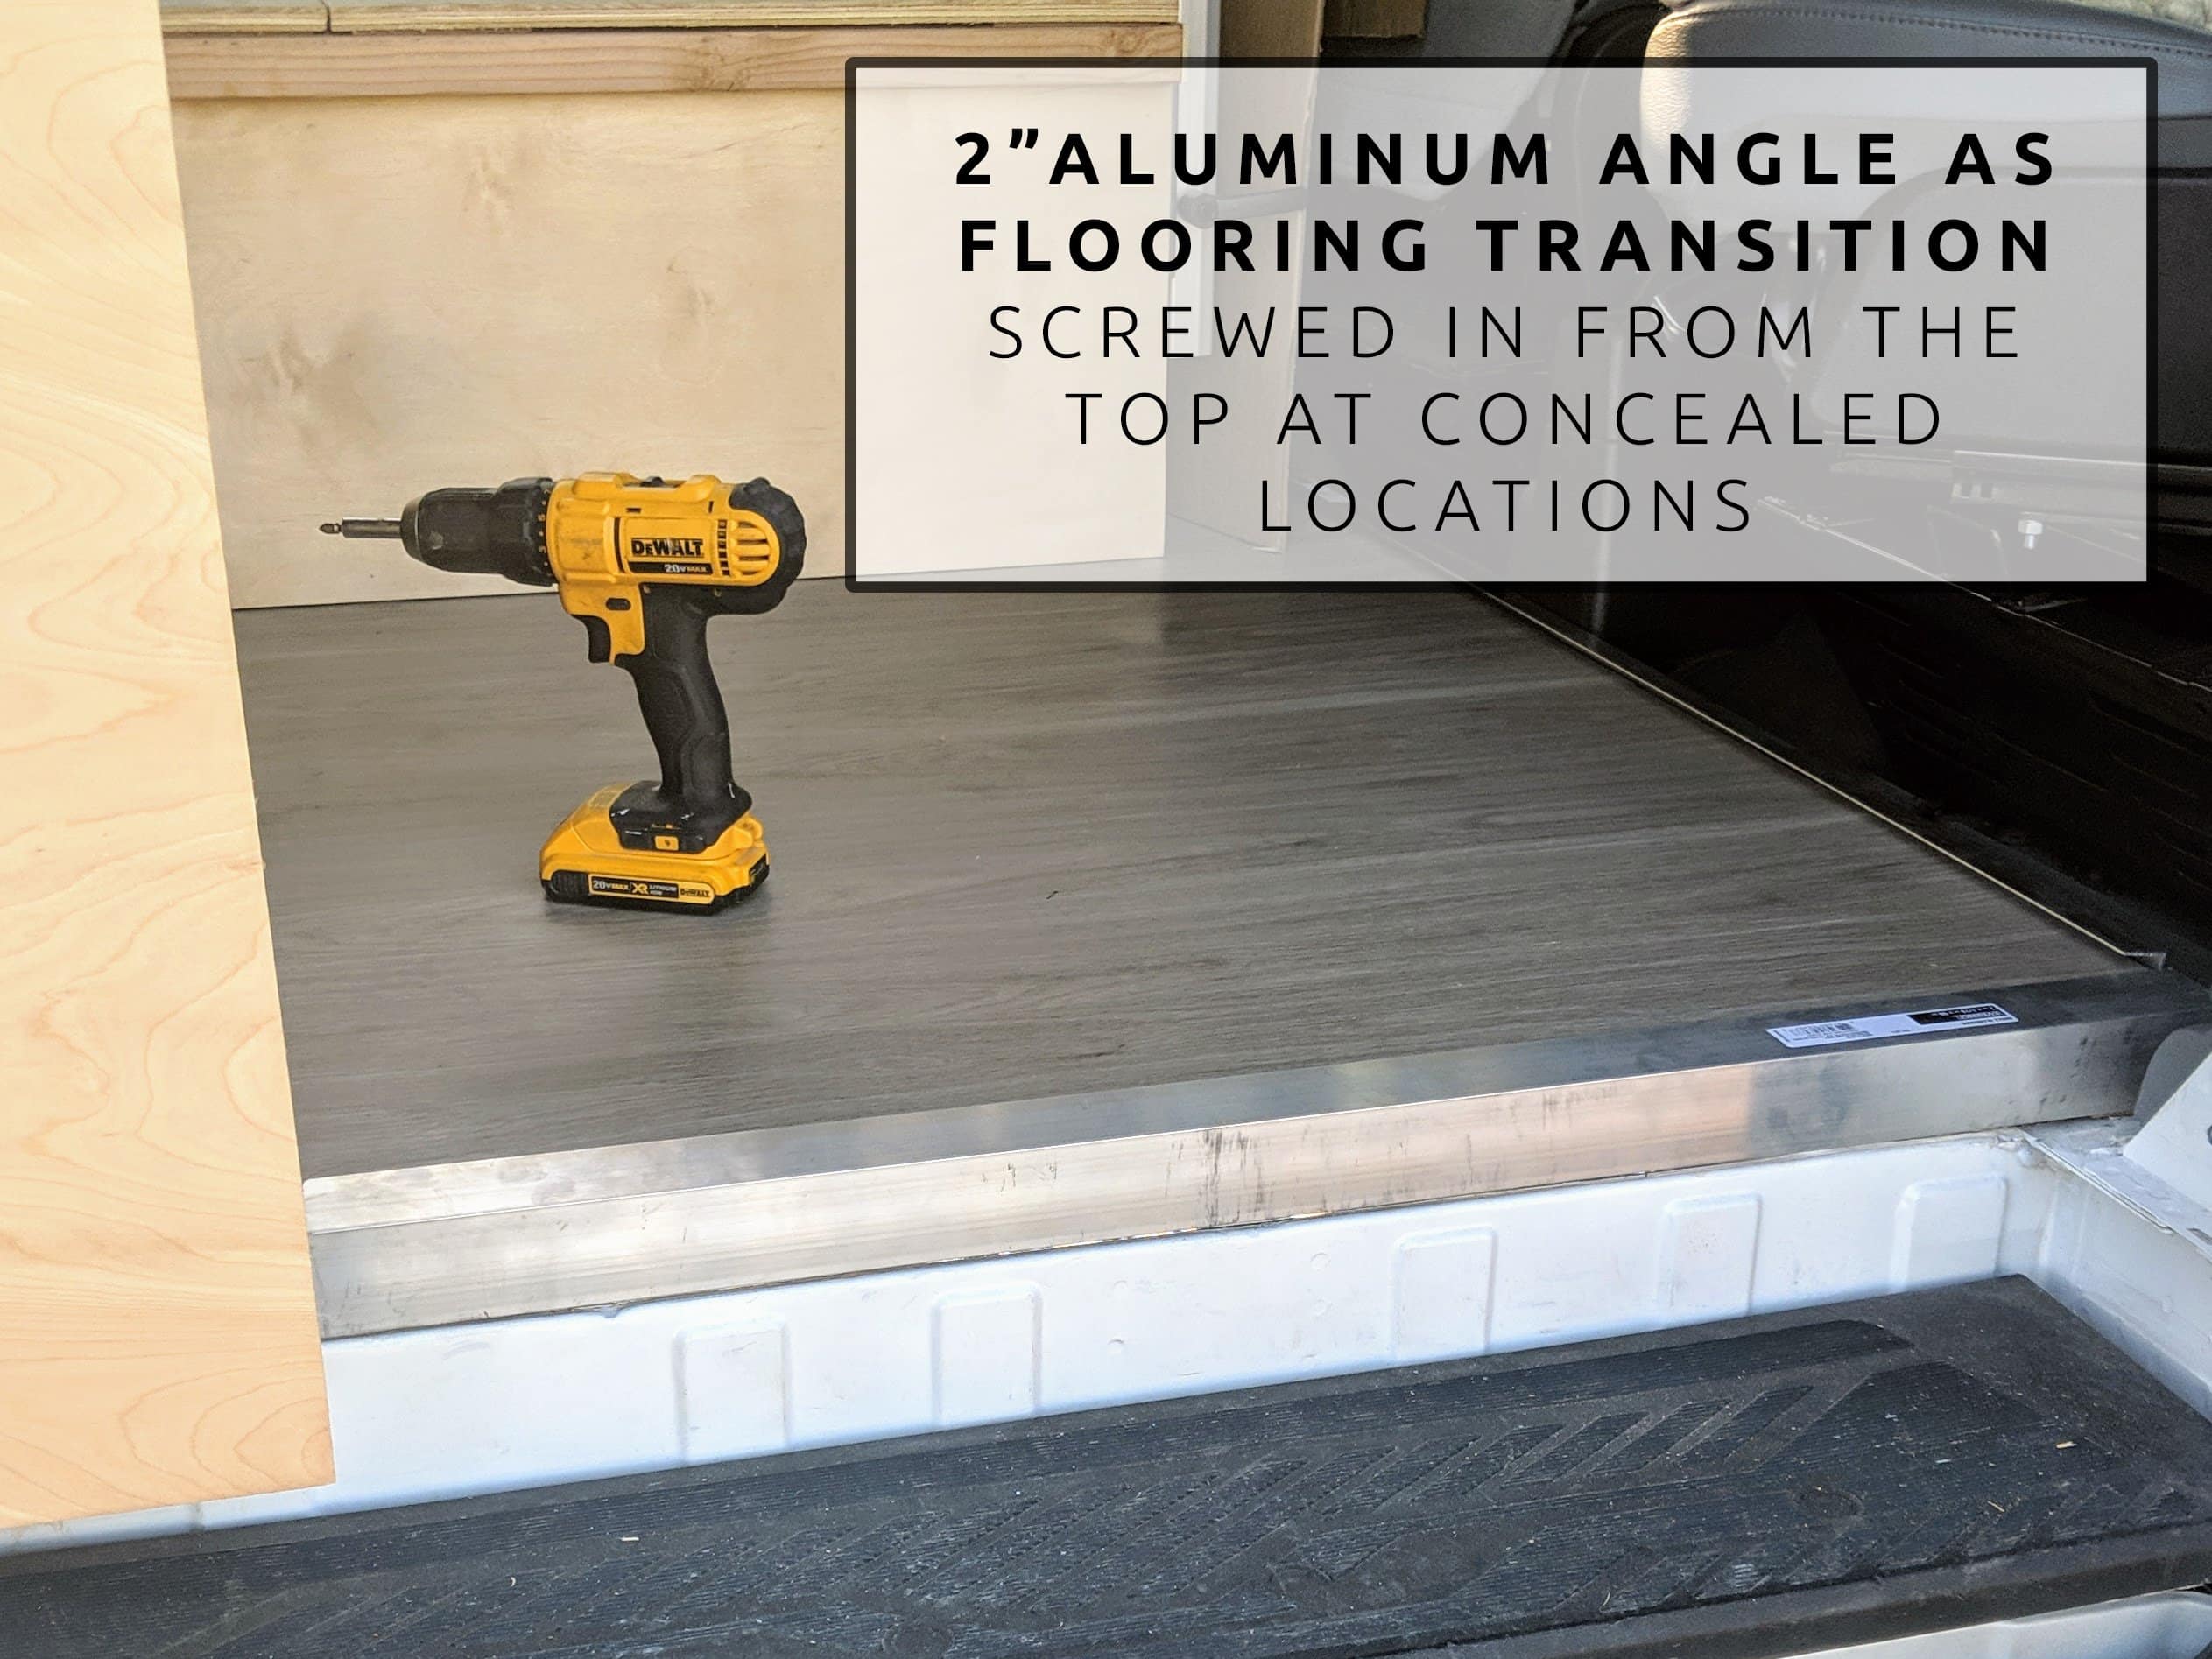
Finishing the Van Floor Edges
We finished the edges with aluminum angle. The aluminum was screwed down through the floor into joists. We added the trim after installing our cabinets and vinyl plank flooring (in that order). Yep, we had to ensure there were joists installed on the edges of the floor. This ensured stability at the edges, and material for screwing in this aluminum angle.
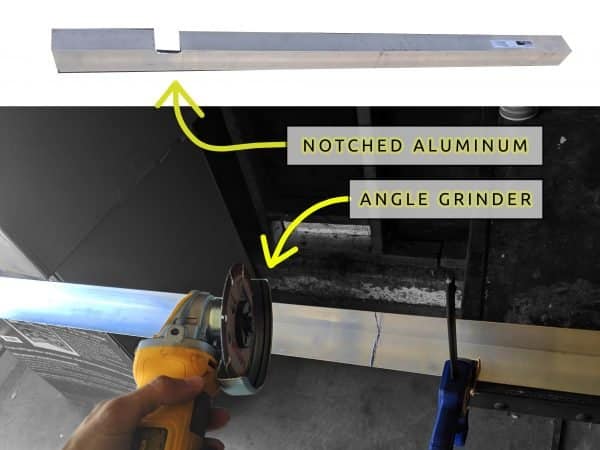
Since we did this part of the build after our cabinet install, we had to notch the aluminum to work around the cabinet. We did this using an Since we did this part of the build after our cabinet install, we had to notch the aluminum to work around the cabinet. We did this using an angle grinder. We also used the angle grinder to cut the pieces to length. We also used the angle grinder to cut the pieces to length.
Ready for more info?
Visit the Van Conversion Build GuideWe sincerely hope this information is helpful on your build journey!
This post contains affiliate links that may earn us a commission if a product is purchased. But, we always strive for the reuse and repurpose of materials – so we encourage searching for a local used option before buying from our links.


My sister and her husband love camping. However, now that they have a child camping in a tent is a little trickier. So, they want to fix up an old trailer this winter and upcoming spring. I liked that you explained that they will want to consider the thickness of the vinyl flooring they use on the floor of the trailer.
I’m considering using genuine reclaimed old-world teak wood (more sustainable) from a US supplier for my camper van flooring since teak is hard, strong and can handle moisture well (used on boat decks) and since it is so warm and beautiful and less “plastic” looking than Vinyl or Laminate flooring planks. Any concerns about it?
Teak will be awesome! All the points you mentioned are true. The downside that comes to mind is its weight – teak’s density means its quite heavy, which will hurt your gas mileage.