
We're an affiliate
We hope you love the products we recommend! Just so you know, we may collect a share of sales or other compensation from the links on this page. Thank you if you use our links, we really appreciate it!
So we got our van and we have big plans! We didn’t buy a new van (ours had 27k miles and was owned by a rental company), so we need to do some prep work to make sure our van is a clean slate! It’s not the most fun step, but it’s worth it to ensure the “bones” are in good shape, ready to accept the finishes to come.
Demolition!
If your van came with floor mats – you’re in luck! Even if you don’t want to use those in the final build, save them for use as a template in the future. Remove any existing floor mats and wall panels. Remove adhesives.
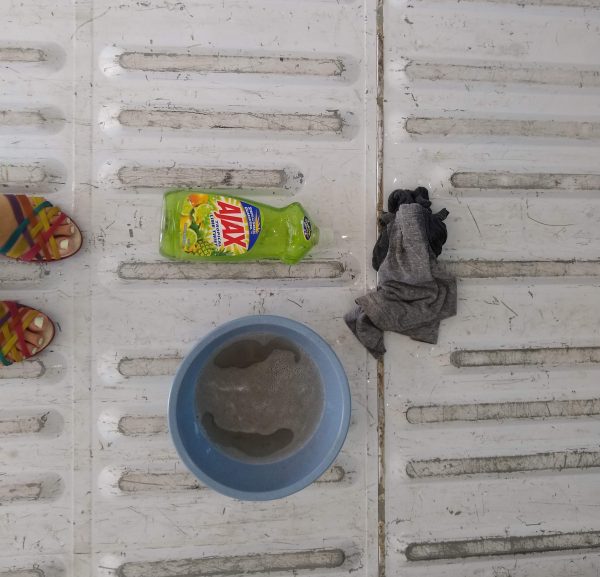
Wipe down all surfaces with a degreaser. Our van was used by a catering company evidenced by the hot sauce splatters on the ceiling! This will provide a clean surface for sound deadening material to adhere to.
Don’t know about managing road noise in the van? Check our guide to sound deadening.
Removing Rust in the Van
Rust is a hidden killer! It would be so sad to spend countless on our van conversion, but underneath it all the van is slowly but surely rusting out. We plan to keep our van long term, and therefore rust prevention is a priority.
Raw sheets of steel can rust through in just a few years. Automotive steel is treated with highly durable coatings. During assembly, the bodies are dipped in baths of anticorrosion agents applied before the painting process. Knicks in paint means some of that protection is gone.
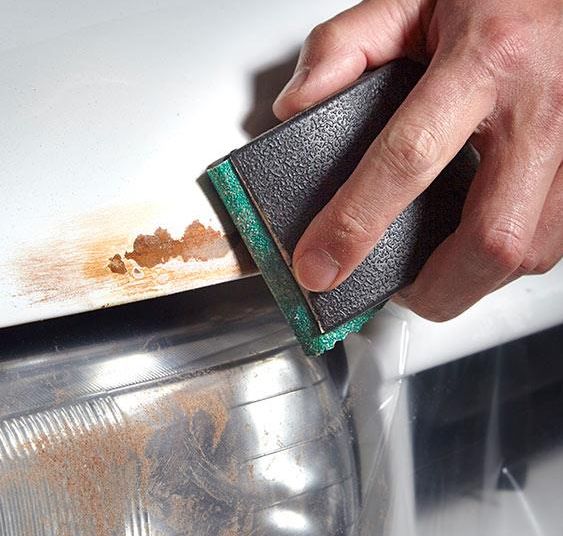
We didn’t have much rust to contend with, just some knicks in the paint here and there that had started to show signs of rust. All metal surfaces should to be painted! To mitigate, we followed these steps for interior rust:
- Removed the rust by sanding with coarse sandpaper (this pack of sanding blocks may be the only sandpaper you need for your build-out)
- Cleaned with denatured alcohol
- Primed, and painted. We weren’t too worried about spray painting beautifully since all these metal surfaces will be covered in the build.
A more advanced rust situation (deeper rust that can’t be removed with sanding) calls for a rust converter/neutralizer. These contain tannic acid, which reacts with the rust and chemically converts it to iron tannate, a dark-colored stable material. For a larger area get a big bottle, and for a smaller area a spray can is adequate.
Worst case scenario: the rust so widespread and deep that it’s unsalvageable means it’s time to bust out the welding equipment. One needs to cut out the rusted metal, and weld on a replacement piece. If your van is at this stage, we hope you had budgeted for this when purchasing!
Containing Sawdust and Debris
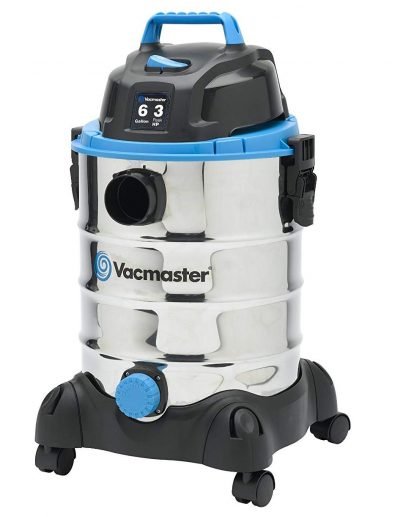
More fun tasks.. we are always aware of keeping sawdust and miscellaneous debris cleaned up. A workshop vacuum is a favorite tool that we use all the time! Why do we care about sawdust? It’s an organic material for mold to grow on. Our insulation material is inorganic and therefore avoids mold, so we strive (but don’t obsess over) to limit the amount of sawdust that falls in cracks or gets left on the ground.
Now that we’ve prepared the van, our next step was installing the roof vent fan. Funny that we got everything nice and clean in preparation for cutting a hole in the roof, sending metal shards everywhere..
Ready for more info?
Visit the Van Conversion Build GuideWe sincerely hope this information is helpful on your build journey!
This post contains affiliate links that may earn us a commission if a product is purchased. But, we always strive for the reuse and repurpose of materials – so we encourage searching for a local used option before buying from our links.

Leave A Comment