
We're an affiliate
We hope you love the products we recommend! Just so you know, we may collect a share of sales or other compensation from the links on this page. Thank you if you use our links, we really appreciate it!
Installing the roof fan in your van conversion is one of the first tasks to be completed. The fan is an absolute necessity because the ventilation minimizes condensation in the van. Cooking is the biggest culprit and we need exhaust to suck out the steam and scents.
We placed our fan in the forward area, approximately over the stove. Our sliding window in the back provides cross ventilation, with air coming into the window, across the bed and living area and exhausted through the fan. If your van will not have a window in the back, consider a second fan.
Choosing a Roof Vent Fan
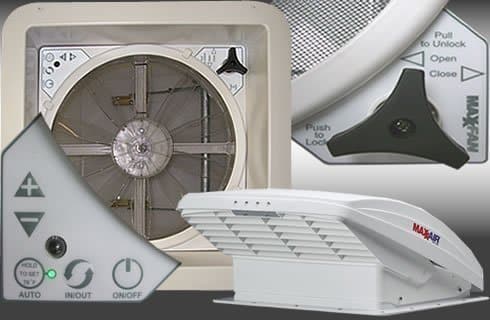
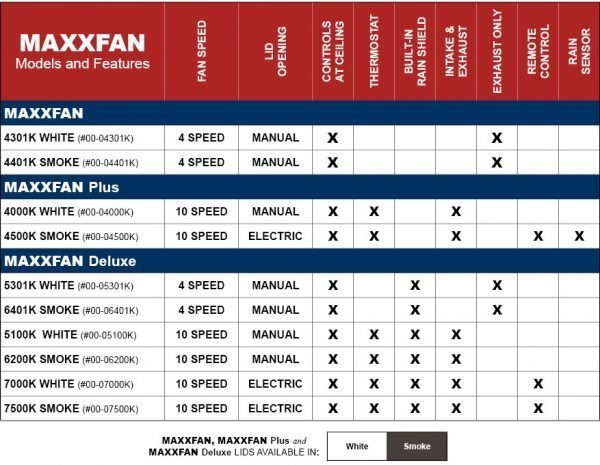
There are two major fan models: MaxxFan by AirXcel, and Fan-tastic Vent by Dometic. Why did we choose the MaxxFan 5100k over other models? Reversible intake capabilities (for hot days) in addition to exhaust, and a built in rain shield. There’s no way we will completely avoid rain on our travels, and on those humid days the ventilation will be extra necessary to prevent condensation and get rid of cooking fumes. Take a look at MaxxFan’s model comparison chart:
Fan-Tastic Vent has similar products at a higher price point. For example, the Fan-Tastic Vent 3350 is comparable to our choice of the MaxxFan 5100k, but is about $40 more expensive. Also, all Fan-Tastic Vents have a black top, which we felt was more conspicuous on our white van.
This was not the most exciting toy to spend over $200 on, but we know that the vent fan is likely the single most necessary purchase for a van conversion.
Should I Use an Adapter?
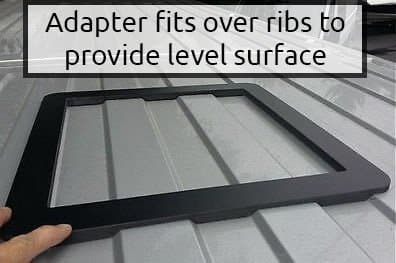
The fans are made for a flat roof (like an RV), but a van roof has ribs and curves. Impact Products makes a roof adapter custom designed to the specific roof profile of a variety of vans including Transit, Promaster, and Sprinter. When set on the roof, this provides a flat surface for the fan.
Check out Impact Products vent fan adapters and other van conversion products on their eBay store
If we opted not to use the adapter, we would still need to level out the gaps in the van roof. We have a friend that did this with Butyl tape, a gummy/rubbery product used for weather sealing windows. The downside however is that it is not a strong surface for the fan to sit on, and the fan’s plastic may be more prone to cracking when under tension from screws. Additionally, it means more than half of the fan is essentially floating since the tape provides little structural support.
After installing our fan, our vote is yes, the adapter is worth the price because it creates a stable platform for the fan screws and seamless material for waterproofing. We are risk-taking people who would skimp out on a product if we think we can get away with it, but a leak or need to re-install the fan would be such a pain-in-the-ass that we sucked it up and paid for the adapter to do it the right way.
Note: on the eBay listing for the adapter, you can add on butyl tape and framing strips. The framing strips can be useful to some but aren’t necessary structurally. The butyl tape goes between the fan and the adapter and is a good purchase because it’s necessary for waterproofing the installation, and the add on price is reasonable.
Cutting the Roof and Priming
This fan was our first time cutting metal and we can report that it’s not actually so difficult. A jigsaw is the easiest tool for the job (the other common alternative being an angle grinder), and be sure to purchase a fine tooth metal cutting blade.
The inside of the adapter is a perfect template for the cutout. After drawing the cut out on the metal, we covered it with painter’s tape which helps smooth the sawing.
We suggest sitting on the van and cutting from the top. Do your best to contain the metal shards created, because they will rust! Taping a bag to teh roof inside the van is the best method, or someone can be inside the van vacuuming while cutting (our method, it wasn’t perfect), and also any stray shards can be picked up with magnets after the fact. Also be sure to brush off any metal shards from the roof of the van.
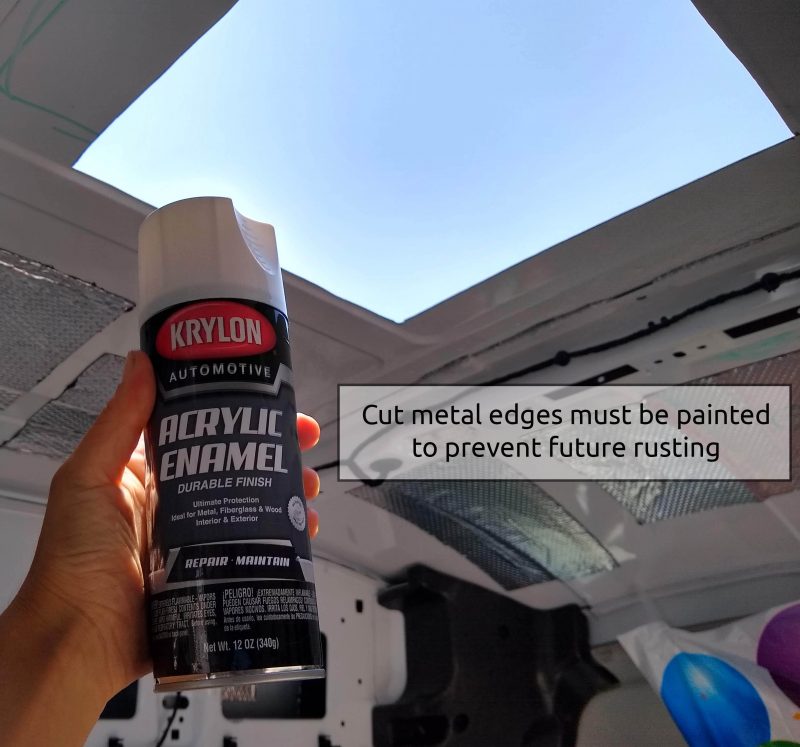
Once the cut is done, we tested the fit of the adapter and fan to make sure the hole is the correct size. Afterwards we spray painted the cut metal with primer then white automotive spray paint. This is critical to prevent rusting.
Adapter, Fan Flange, and Sealants
Now that the hole is cut, assembling and fastening the adapter and flange is actually pretty easy! Order of operations:
1. Clean a 2-inch area around the cut out with isopropyl alcohol.
2. Apple a line of Sikaflex 221 on the bottom of adapter, and place it. Why Sikaflex and not Silicon? Silicon will never come off the roof, and no other sealant, including silicone, will ever stick to it.
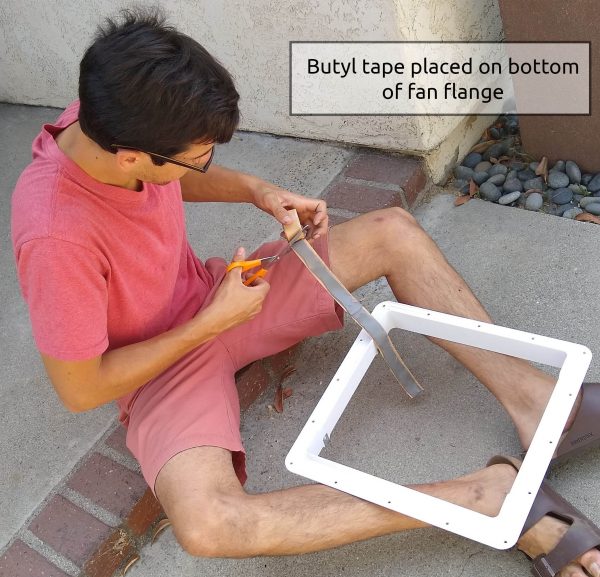
3. Apply butyl tape on bottom of white fan flange, and place it on the adapter
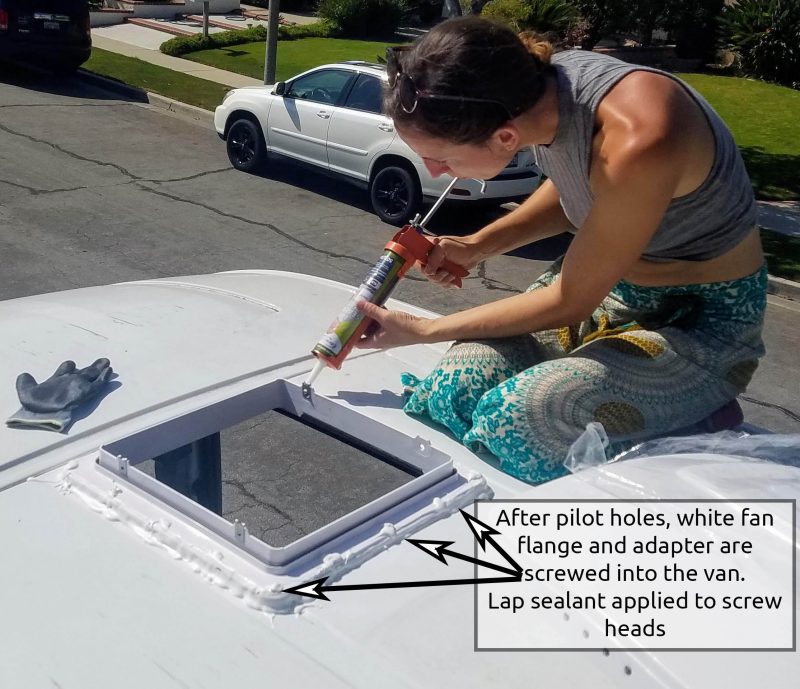
4. Clamp or hold the assembly down while you drill 16 pilot holes for the screws provided with the fan
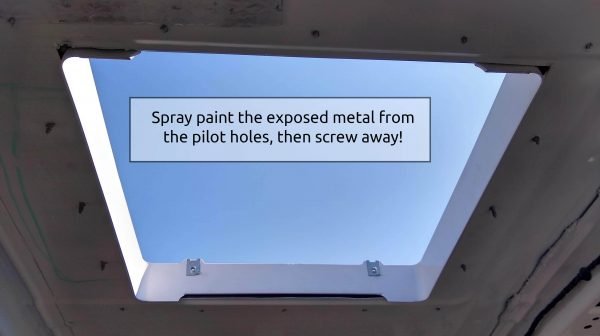
5. Spray paint (from the underside) the exposed metal in the pilot holes
6. Screw the ! Do not overtighten when fastening plastics, the fan flange can crack.
7. Apply Dicor Self-Leveling Lap Sealant around the edges and on screw heads (yes, water can travel down screw threads). We found it best to do a second layer of lap sealant the next day after the first layer self-levels.
Note: There are a few fastening methods that can be used for the fan:
- Screws only (already provided with fan)
- Screws into a DIY wooden frame that is glued inside to the van ceiling
- Bolts instead of screws
The latter two are more secure. However, we opted for screws only because it’s simpler and structurally adequate. Even though the screws aren’t “biting into” much (just the van sheet metal), 16 screws used for a standard installation are a lot for the small surface, and the fan feels totally secure.
Finishing the Fan
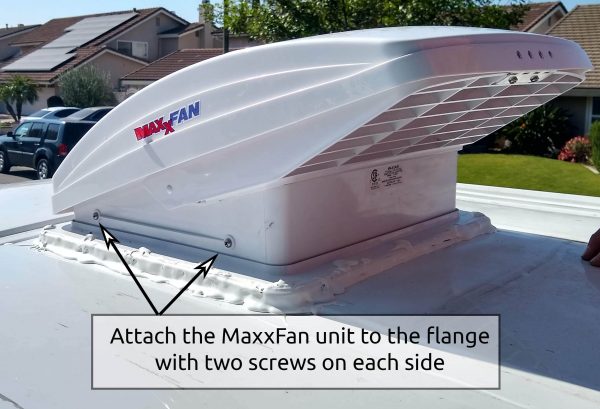
Attaching the Maxxfan unit itself, the part with all the electronics, is as simple as placing it and attaching it the flange with four provided screws. Once again, it’s plastic so we made sure not to overtighten. Last but not least we removed the MaxxFan sticker because we are picky like that 🙂
The fan trim ring eventually goes inside and makes it look pretty on your can ceiling. The trim ring is installed after a ceiling is installed. It’s quite simple but there is one important note – the trim ring is installed with screws, so make sure that the ceiling material is thick enough to hold the screws.
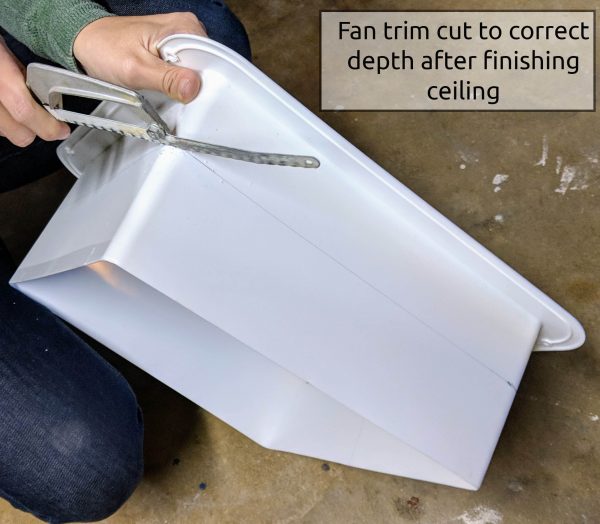
Ready to install your trim ring? Check how we finished our ceiling with lightweight & flexible plywood.
Our 1/8” plywood ceiling is thick enough; the trim ring is really lightweight. If our ceiling material was going to be a thin plastic or something with equally weak holding power, we would have built a wooden frame to go inside the ceiling (mentioned as one of the methods of fastening the adapter/fan flange).
What about a Vent Fan Cover?
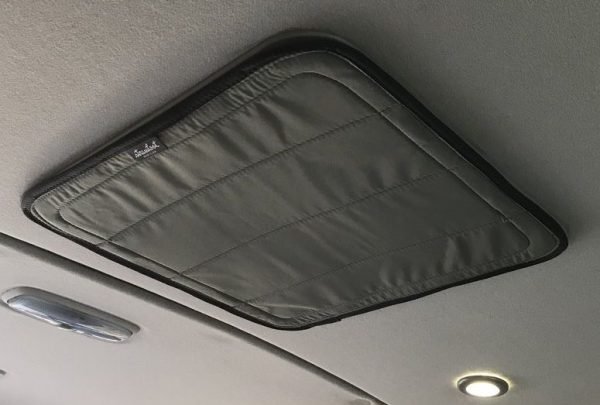 Some vendors are creating vent fan covers (Impact Products, Straw Handmade) that attach to the trim ring with magnets. This wouldn’t be used in hot weather (the open vent allows heat to exhaust), but at first glance it seems like a no brainer in cold weather. After all, why heat the van and spend all this time on insulation and window covers when there is a gaping hole in the roof?
We elected to forego an insulated vent fan cover for a simple reason – in cold weather we want the open vent to allow moisture to escape.
We know first hand that a cold van exterior plus humans inside breathing moisture equals condensation. Before we finished our ceiling insulation, we slept with 4 people in the van on a night that got down to 15 F. When we woke up in the morning, the ceiling was literally dripping wet. Waking up to water dripping our face from the ceiling is not how we want to experience van life! We are willing to sacrifice some heat loss for this moisture to be vented.
Ready for more info?
Visit the Van Conversion Build GuideWe sincerely hope this information is helpful on your build journey!
This post contains affiliate links that may earn us a commission if a product is purchased. But, we always strive for the reuse and repurpose of materials – so we encourage searching for a local used option before buying from our links.


Hello,
Thank you a lot for your great build artickels!!
Can I ask plese, us the real Window hole 40x40mm?? Is it not too big?
The frame size is going acording to fan sides as on yiur pictures?
Thank you, Best regards Jane