
We're an affiliate
We hope you love the products we recommend! Just so you know, we may collect a share of sales or other compensation from the links on this page. Thank you if you use our links, we really appreciate it!
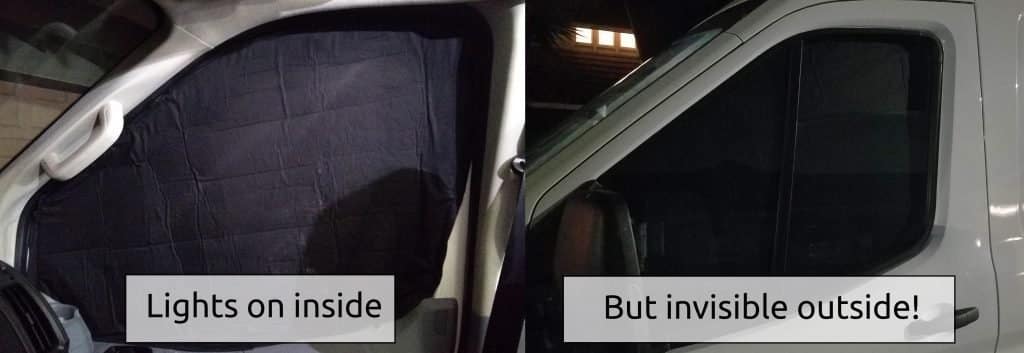
We made dual-sided window coverings for our van conversion: Reflectix on one side and black canvas fabric on the reverse. Windows are the climate control “weak point” of the van, plus they need to be covered at night to sleep comfortably. The black canvas faces outwards at night and completely blocks light in and out – no one outside can see lights on in our van.
The coverings can be flipped depending on the circumstances. When it’s hot out, we want to keep the heat out of the van. The window coverings are placed such that the Reflectix side is facing outward, to reflect the sun’s rays. In the cold, with the Reflectix facing inward, it helps to keep heat trapped inside the van where we want it. Overall we are really happy with how these work – they’re easy to put in place, and provide great privacy and full light blockage from both the inside and the outside.
Related: Choosing the Best Solar Panels for a Camper Van Conversion
Note: if you cover Reflectix it essentially negates its insulating value as its mechanism of action is reflecting heat off its aluminum face (hence the name). Sandwiching Reflectix between two pieces of fabric means it is doing very little insulating. If you take nothing else away from this article – please, for the love of God, leave the Reflectix exposed on one side!
Covers for the Side Windows
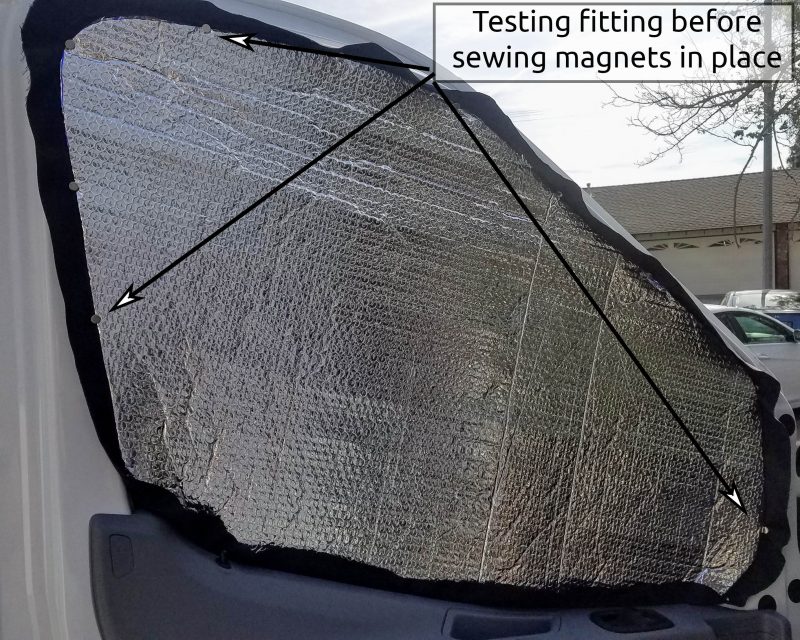
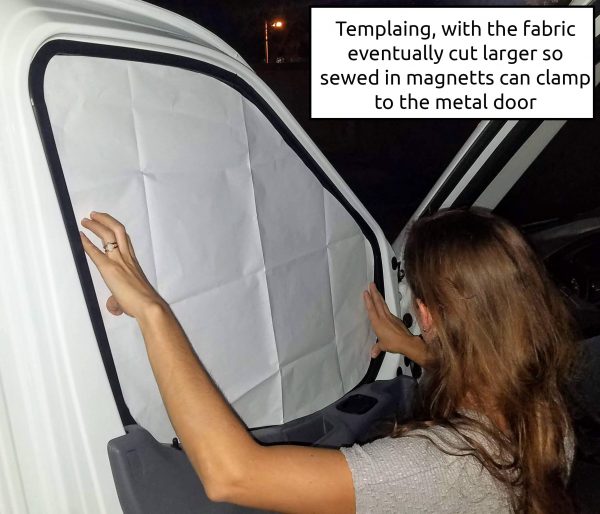 The first step was to template the size of the window with butcher paper (or in our case, plotter paper from the waste bin at work). This involved tracing in place, cutting the template out, test fitting, and making adjustments as needed to ensure proper coverage. Nadia was aiming for the template to cover the black weather stripping, since the magnets would need to reach the metal beyond. Once the template was acceptable, we traced the shape onto Reflectix with a Sharpie, putting thought into the orientation of the “bubbles” for foldability. Just play around with folding the Reflectix and you’ll see what we mean.
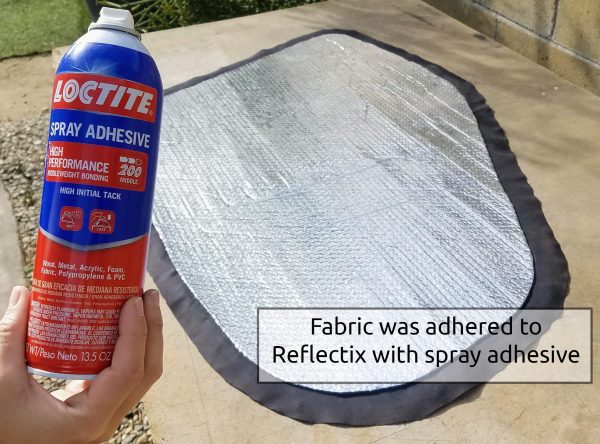
Next, we traced the cut out Reflectix onto the black fabric using a white prismacolor colored pencil. We eyeballed an additional inch allowance beyond this line and cut out. Now with all our pieces cut out, it’s time to put them together! For this, we used spray adhesive, which we sprayed onto the reflectix and adhered the fabric, smoothing down the fabric upon contact to ensure a smooth finish
Note: It may seem like common sense, but the side windows are mirror images, which can get confusing. We made sure to put the black fabric on the opposite side for each piece, so that a covering will function as the black out shade on one side of the van, and flip to serve as the reflectix shade on the other side.
Finally it’s time for magnets! We used small and mighty Rare Earth Magnets along the perimeter, we spaced them as shown in the photo below and it works really well. We used tape to keep them in place temporarily.
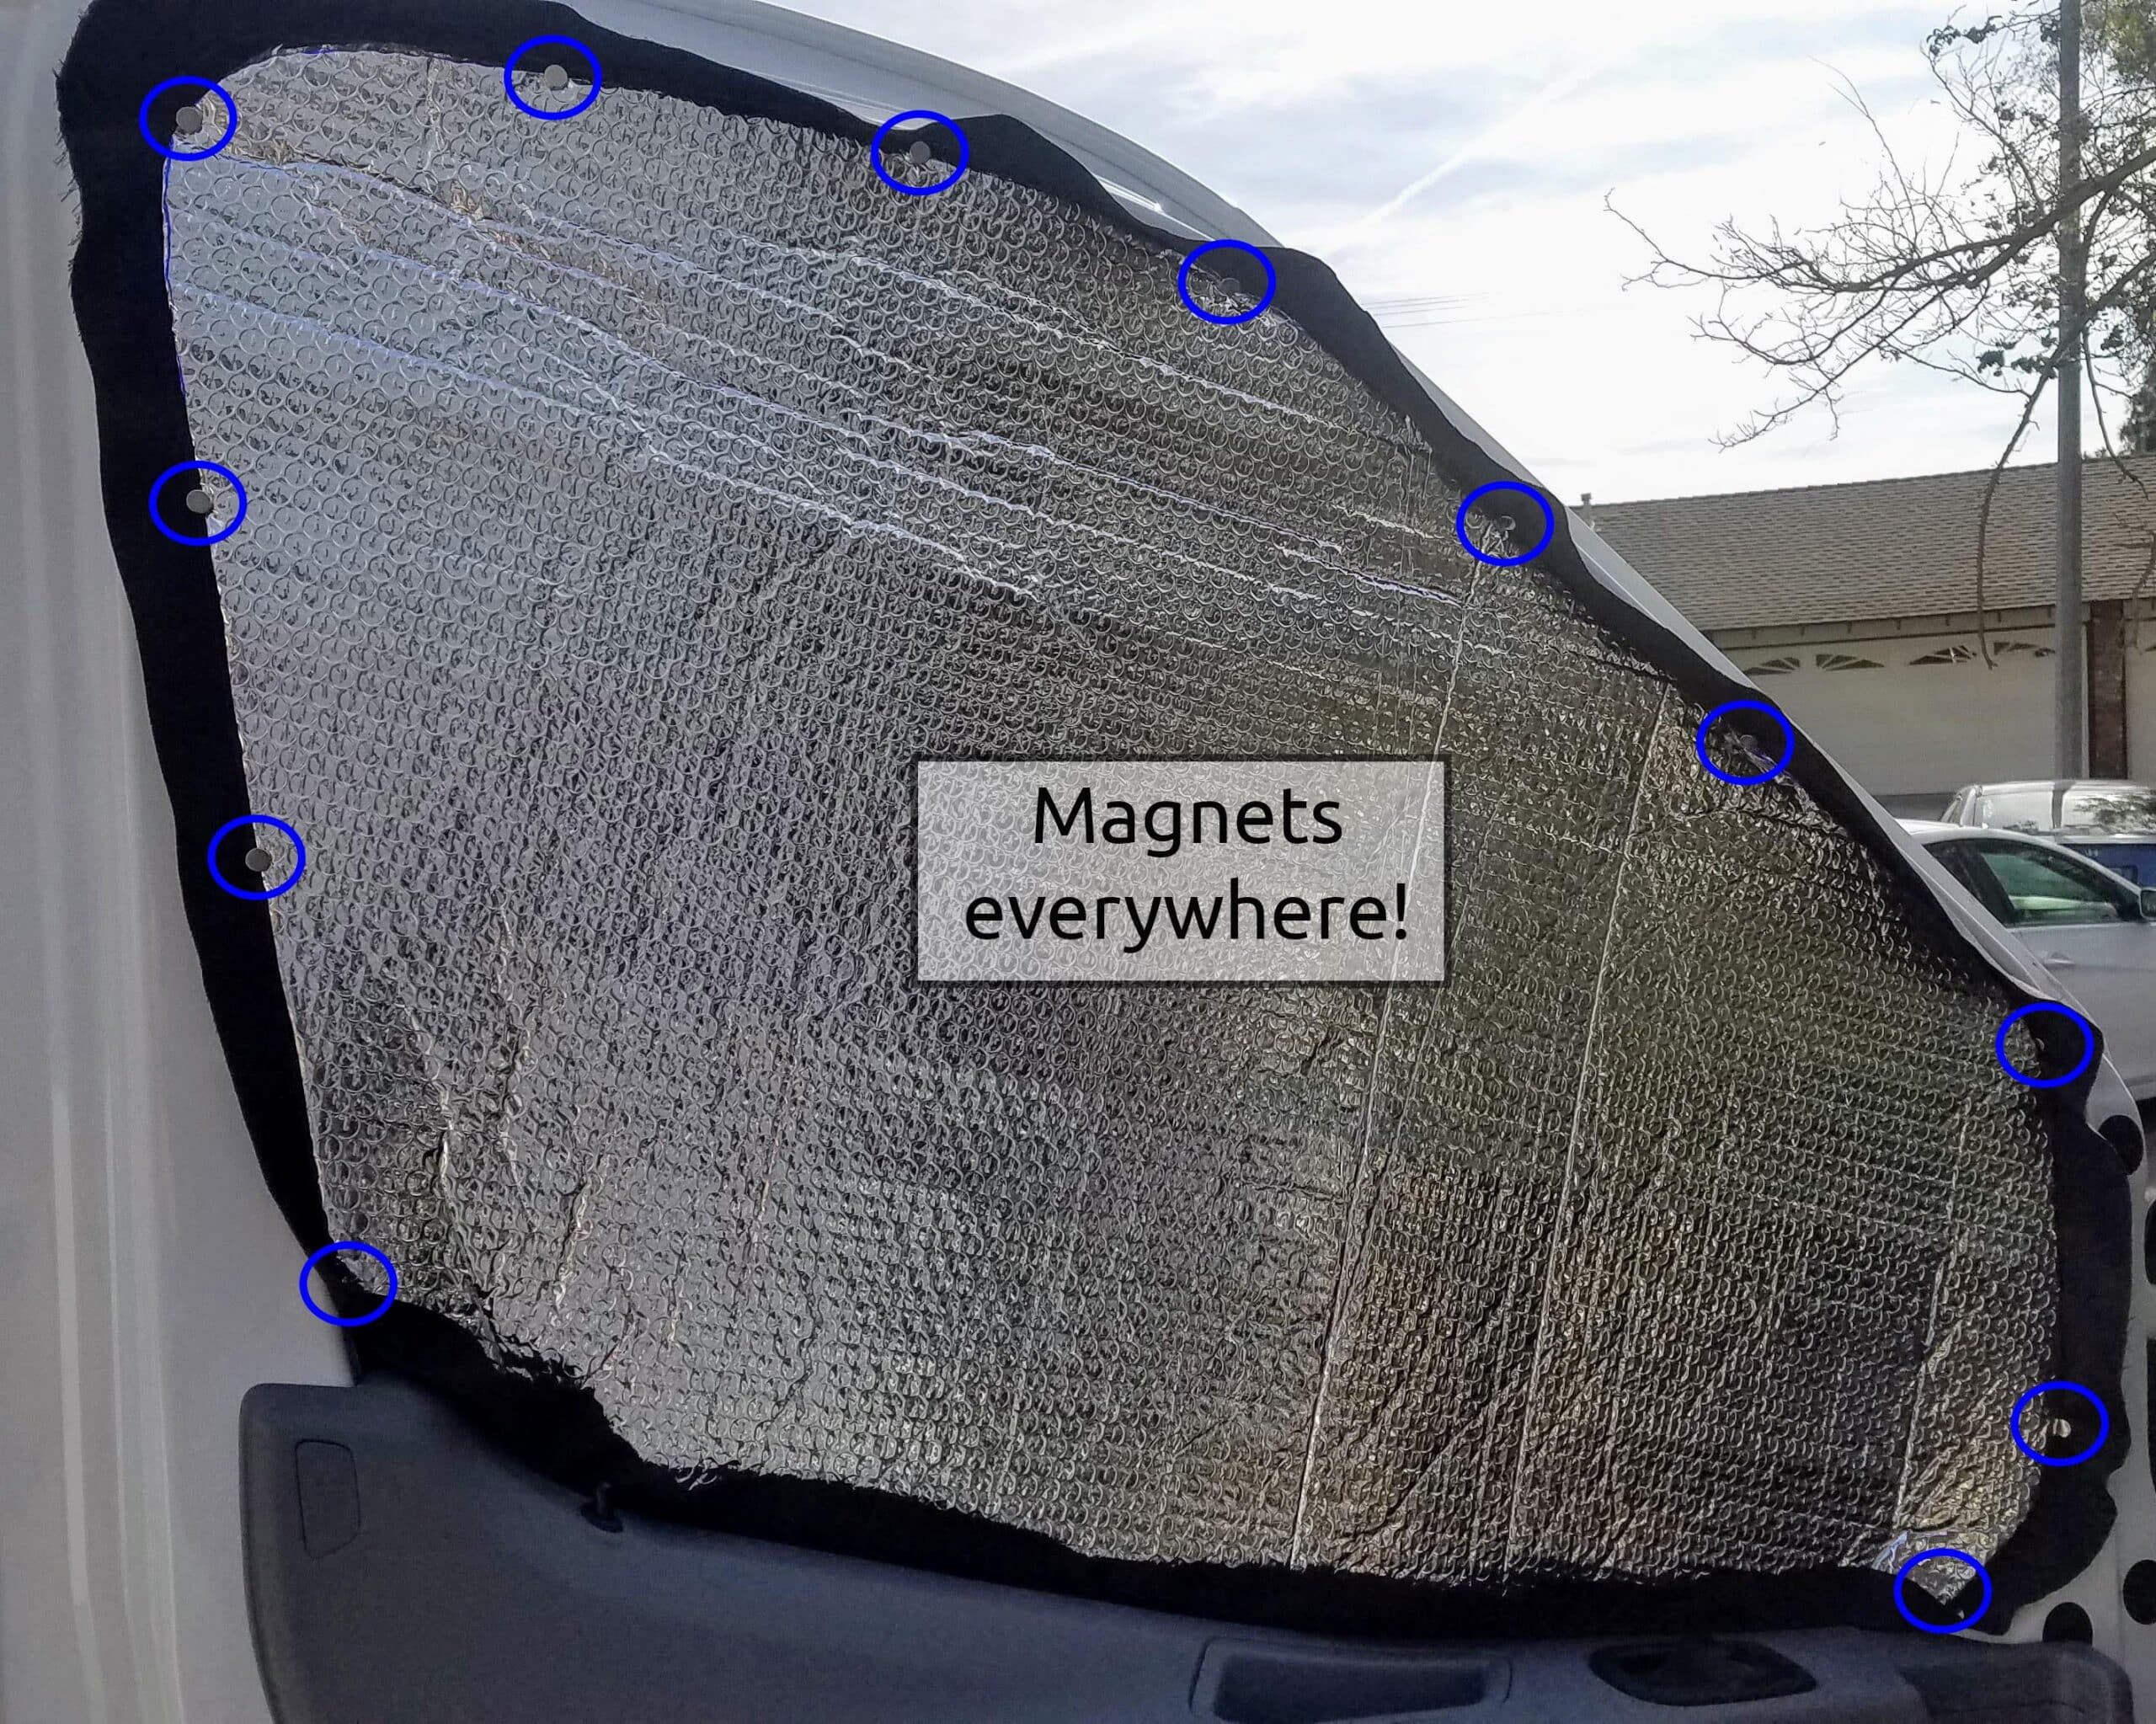
- Fold the fabric over the magnets and hand sew them into place, stitching around the entire perimeter of the magnet.
- There is no metal for the magnets to attach to on the bottom edge of the window, so I left this as a flap of fabric to ensure full light blockage.
- Once all magnets were sewed into place, we took to the sewing machine to finish the job, sewing along the full perimeter of the flap, stopping short of the magnets.

The window coverings are super easy, and thanks to the click of the magnets, very satisfying to put in place.
Cover for Front Windshield
The front windshield cover was fabricated in the same way, with one notable difference: no magnets! The windshield has no accessible metal. As of now, the cover is held in place by folding down the sun visors. However, this is not very tight and the cover sags, leaving a gap around the rear view mirror. We are exploring options including suction cups!
Ready for more info?
Visit the Van Conversion Build GuideWe sincerely hope this information is helpful on your build journey!
This post contains affiliate links that may earn us a commission if a product is purchased. But, we always strive for the reuse and repurpose of materials – so we encourage searching for a local used option before buying from our links.

I really dig your design and plan on doing the same thing you did. Do you think an additional later of insulation like this (https://www.joann.com/utility-fabric-insulated-fabric-white/16935579.html) would provide additional insulation?
An additional layer of insulation, between the black fabric and the Reflectix, would definitely increase the R-Value! Be sure not to stuff too much insulation there though. Consider how you’ll be storing these window covers. We fold ours for storage each day. If there’s too much insulation it could be tricky to fold, unless you design with that in mind
Thank you!
When using Reflectix on windows does it matter how tight the fit it to the window? Is it effective to have a loose fit where the Reflectdix is help up by a counter and there is an inch or so gap between the reflectix and the window?
The gap is fine. Reflectix is reflecting the sunlight so any gap to the glass doesn’t affect its reflection
Hi please can you tell me which side of the reflectix faces the out side of the van and which side is facing inwards, (flat and bumpy side) it’s hard to tell on these videos, and I read you said for better results only cover one side , while a lot of people do black on the outside and then something different for the inside to match their decor , I note you’ve used glue to stick the fabric on, is this strong enough for magnets or would you need to stitch , many thanks, Sam.
We switch which side Reflectix faces based on the season. In the summer it faces outwards to keep the heat out. In the winter it faces inwards to keep the heat in. Also yep, the spray adhesive keeps the fabric attached to the Reflectix really well!
Very good tips, but have a question. Since the magnets are all on one side of the reflectix, are they strong enough to hold tight when flipped and are having to pull (through) the reflectix. What size & shape magnet are you using?