
We're an affiliate
We hope you love the products we recommend! Just so you know, we may collect a share of sales or other compensation from the links on this page. Thank you if you use our links, we really appreciate it!
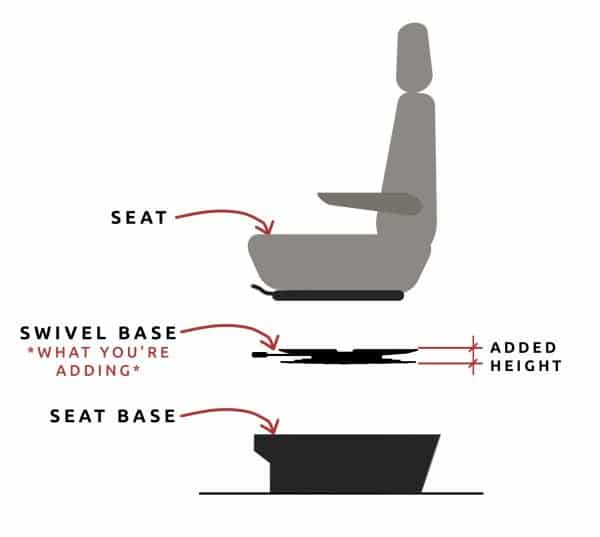
Installing a rotating swivel base to one or both of the front seats in your camper van conversion is a game changer for increasing the livable area. The swivel adds additional seating and flexibility to your van layout.
For our specific layout, we decided to add a swivel to the passenger seat only. Adding a swivel to the driver’s seat didn’t make sense for our layout, and would also have required the relocating of the parking brake, which we were happy to avoid.
Choosing a Rotating Swivel Seat for a Van and for your Ford Transit

There are a handful of van swivel seat bases out there. For all of these options the seat must be unbolted and temporarily removed as part of the installation.
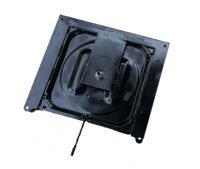
We opted to go with Discount Van Truck’s Transit Swivel Base due to the lowest price, acceptable added height, and relative ease of installation. We’re pretty happy with the swivel base, although it does take more effort to rotate around than we would like.
The Scopema Swivel is the best option, if you can find it in stock!
Here’s a clip showing the DiscountVanTruck swivel seat in action in our Ford Transit Van Conversion:
Choosing the Right Swivel Seat for your Van
The swivel seat adapter must be specific to your van. Most of the swivel manufacturers discussed here make swivels for Transit, Promasters, and Sprinters. Our links direct you to the Ford Transit swivels, but be sure to buy the right model for your vehicle!
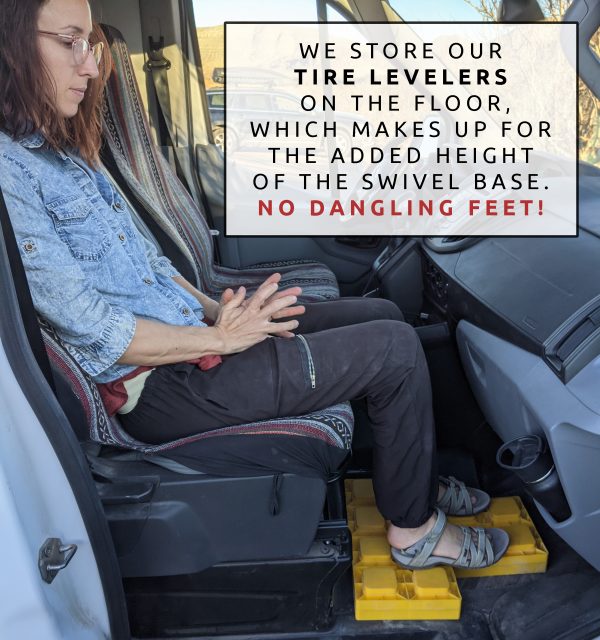
LEVELING BLOCKS: FOR YOUR TIRES AND FLOORS!
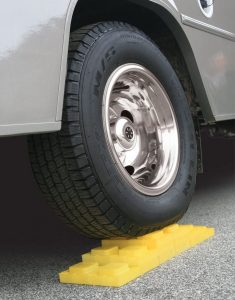
Added bonus: stack them to your desired height in your van cabin floor for a comfortable seated driving/passenger position.
Best Swivel Seat Options
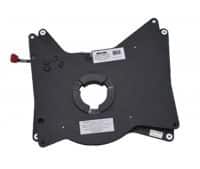
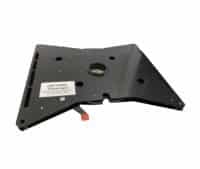
DiscountVanTruck.com Swivel Base product #116020
The most secure (ie no wobbling) of all the options discussed here
Expect resistance in turning, including squeaking sounds!
1-5/8″ added height
The most added weight (Roughly 40 lbs)
Requires additional steps during install of disconnecting wiring that other swivels do not require
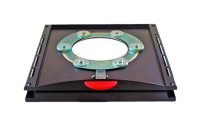
Scopema Seat Swivel: Pricey and Golden Standard
Rotates smoothly, with minimal friction and no squeaking.
The most expensive option
Regularly unavailable due to stock issues
Swisstech OKB
1-1/8″ added height
Some accounts of squeaking while on bumpy roads
SwivelsRUs.com Seat Adaptor
Rotates with little effort
2-1/8″ added height (Woah!)
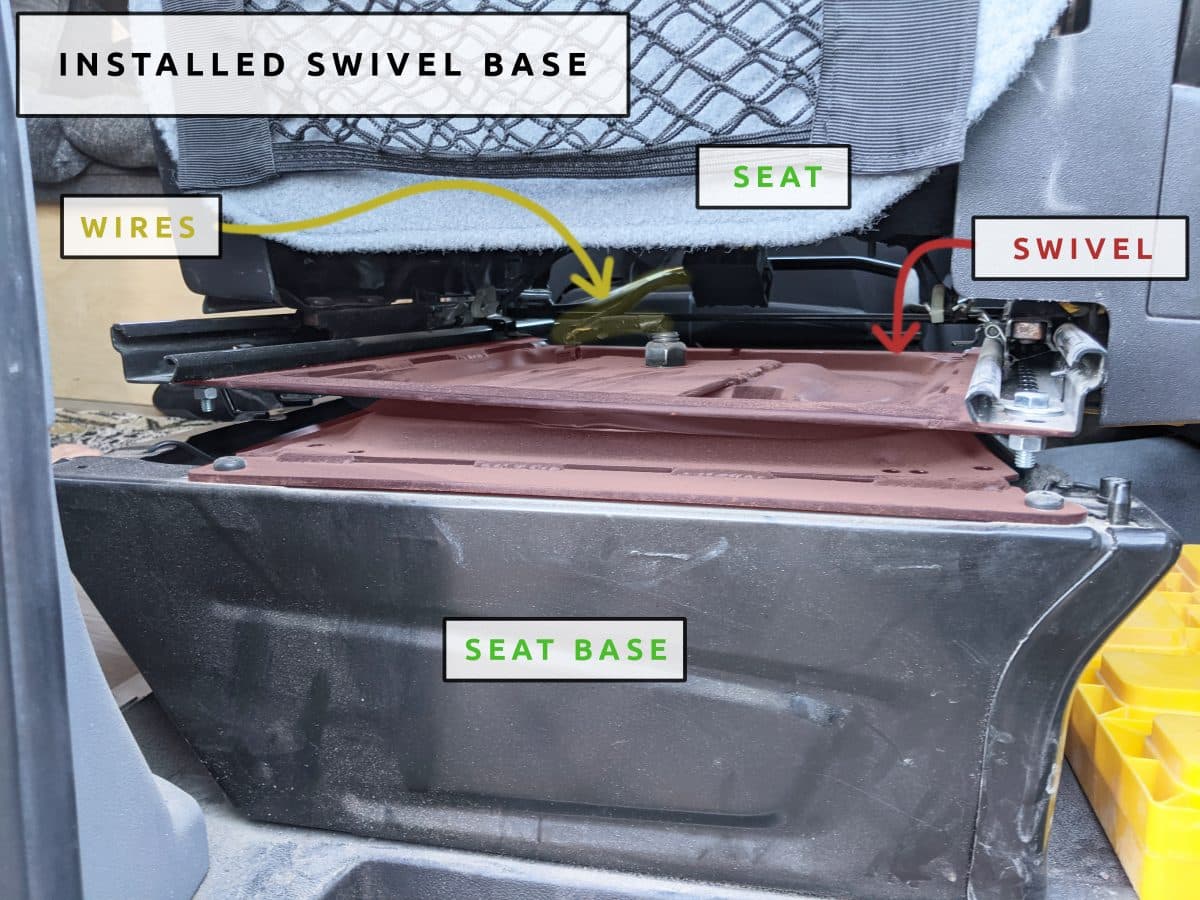
Installation of the Discount Van Truck Passenger Seat Swivel
This is an account of how we installed the Discount Van Truck “Transit Stock Seat” Adapter Swivel for the Passenger’s Seat, Item #116020. This swivel works if using the existing stock Passenger seat.
- Approved for seats without airbags.
- Seat bases tested to meet FMVSS #207 safety standards per sections S4.2 and S4.3
- Bolt in installation
Tools for this installation:
- Ratchet
- T30 Torx bit – Ford Transit bolts are not a standard Phillips head
- Soldering Iron
Step 1
Disconnect the van battery to prevent a short circuit! This project requires some rewiring of the airbag harness wiring under the passenger seat, so this is an essential first step. To do this, disconnect the negative pole.
Step 2
Remove bolts (requires a T30 Torx bit) that connect the seat to the base. To do this, we pushed the seat all the way back to access the 2 bolts in the front of the rail. Then, we pushed the seat all the way forward to do the same for the 2 bolts in the back.
*Be aware of the wiring that exists underneath the seat, which is for the airbag. This will need to be disconnected before you can fully remove the seat.*
Step 3
The small center hole of the DiscountVanTruck swivel is not large enough for the routing of the airbag wiring harness. Therefore, the harness has to be disassembled and reassembled as part of this installation. (Another reminder to disconnect the van battery to prevent short circuit)
The Recommended Way To Do This: Look for the red plastic tabs within the wire carriage and take those out using tweezers. Then press the plastic tab within the carriage to disconnect the wires. This is the recommended and safest way to proceed. However, the wire carriage is really small, thin plastic and we did not feel confident that we could remove them and re-insert.
What We Did: We had trouble accessing the plastic tabs to disconnect the wires from the carriage. We disconnected the airbag harness wires that run from the van floor to the van seat. There are a total of (7) wires. We opted to cut and reconnect each of the individual wires. The easiest way to reconnect the wires was to solder them back together. Please only do this if you are very comfortable with electrical work or have an electrician helping you out.
Step 4
Run the wire through the drilled out bolt hole on the center of the swivel base, and reattach (in our case, solder) the disconnected wires.
Step 5
Bolt the swivel onto the seat base. This is pretty easy because the bolt holes in the swivel line up with the holes in the seat base.
Step 6
Bolt the seat onto the swivel. Prepare, the seat is heavy!
Ready for more info?
Visit the Van Conversion Build GuideWe sincerely hope this information is helpful on your build journey!
This post contains affiliate links that may earn us a commission if a product is purchased. But, we always strive for the reuse and repurpose of materials – so we encourage searching for a local used option before buying from our links.


Hope you dont mind me asking but does it have to be a transit you installon the transit swivel pad or can you use any seat providing the base if the correct one? Many thanks
The swivel bases are made for the specific vehicles (Transit, Promaster, etc) because the seat bases are different. I don’t believe using a Transit swivel on a Promaster seat, for example, would work
So does that mean the first step is to find out what swivels seats are made for your vehicle make and model?
Do you have a swivel base for a Renault Master Van
2021